What defines a human being? Where does the machine end and the human begin?
Viktor is the name of a character design which I developed over the span of two semesters as part of my studies. Character design has interested me before I started this project, but this is the first time that I worked on a project of this scale with professional feedback. In the first semester I was focused on the development of a base concept of the character, first models and shapes, as well as writing a little backstory and worldbuilding. During the summer break between semesters I spent a lot of time on the modelling process of the entire body. With the begin of the new semester I started working on the complex rig, refining some parts of the mesh, texture work on the organic side, as well as some basic animations to test the rig.
I want to give some insight on the substantial process that has occupied my mind on a nearly daily basis for the past ten months. This project has grown very dear to me in that time and I'm very proud of what I was able to make so far.
I will likely continue work on this project outside of the university context, as there are many aspects I would have loved to make, but had to cut because of time and shifting priorities. An important part of the design process, but that still nonetheless often hurts.
Want to scroll chronologically? Click here and scroll from the bottom up!
Time frame
2025 – today
Chapters
Software
Blender
Substance 3D Painter
Krita
Affinity
October 2025 – January 2026
Bringing a statue to life
I have some rigging experience from previous projects, but nothing came close to the scale and complexity of this project. The base of this rig is the Rigify framework, which allowed me to do quick iterations and partial automation in the building process. Along with the standard rigify structures I built multiple new mechanics that for example keep the tendons around the ankle taut or control the curvature of the artifical muscle fibres. These mechanisms are fully automated, bu can be overridden by the animator if necessary.
In the face I make use of a FaceIt-Rig, which saved me a lot of time and allows me to use motion capture as input for animation.
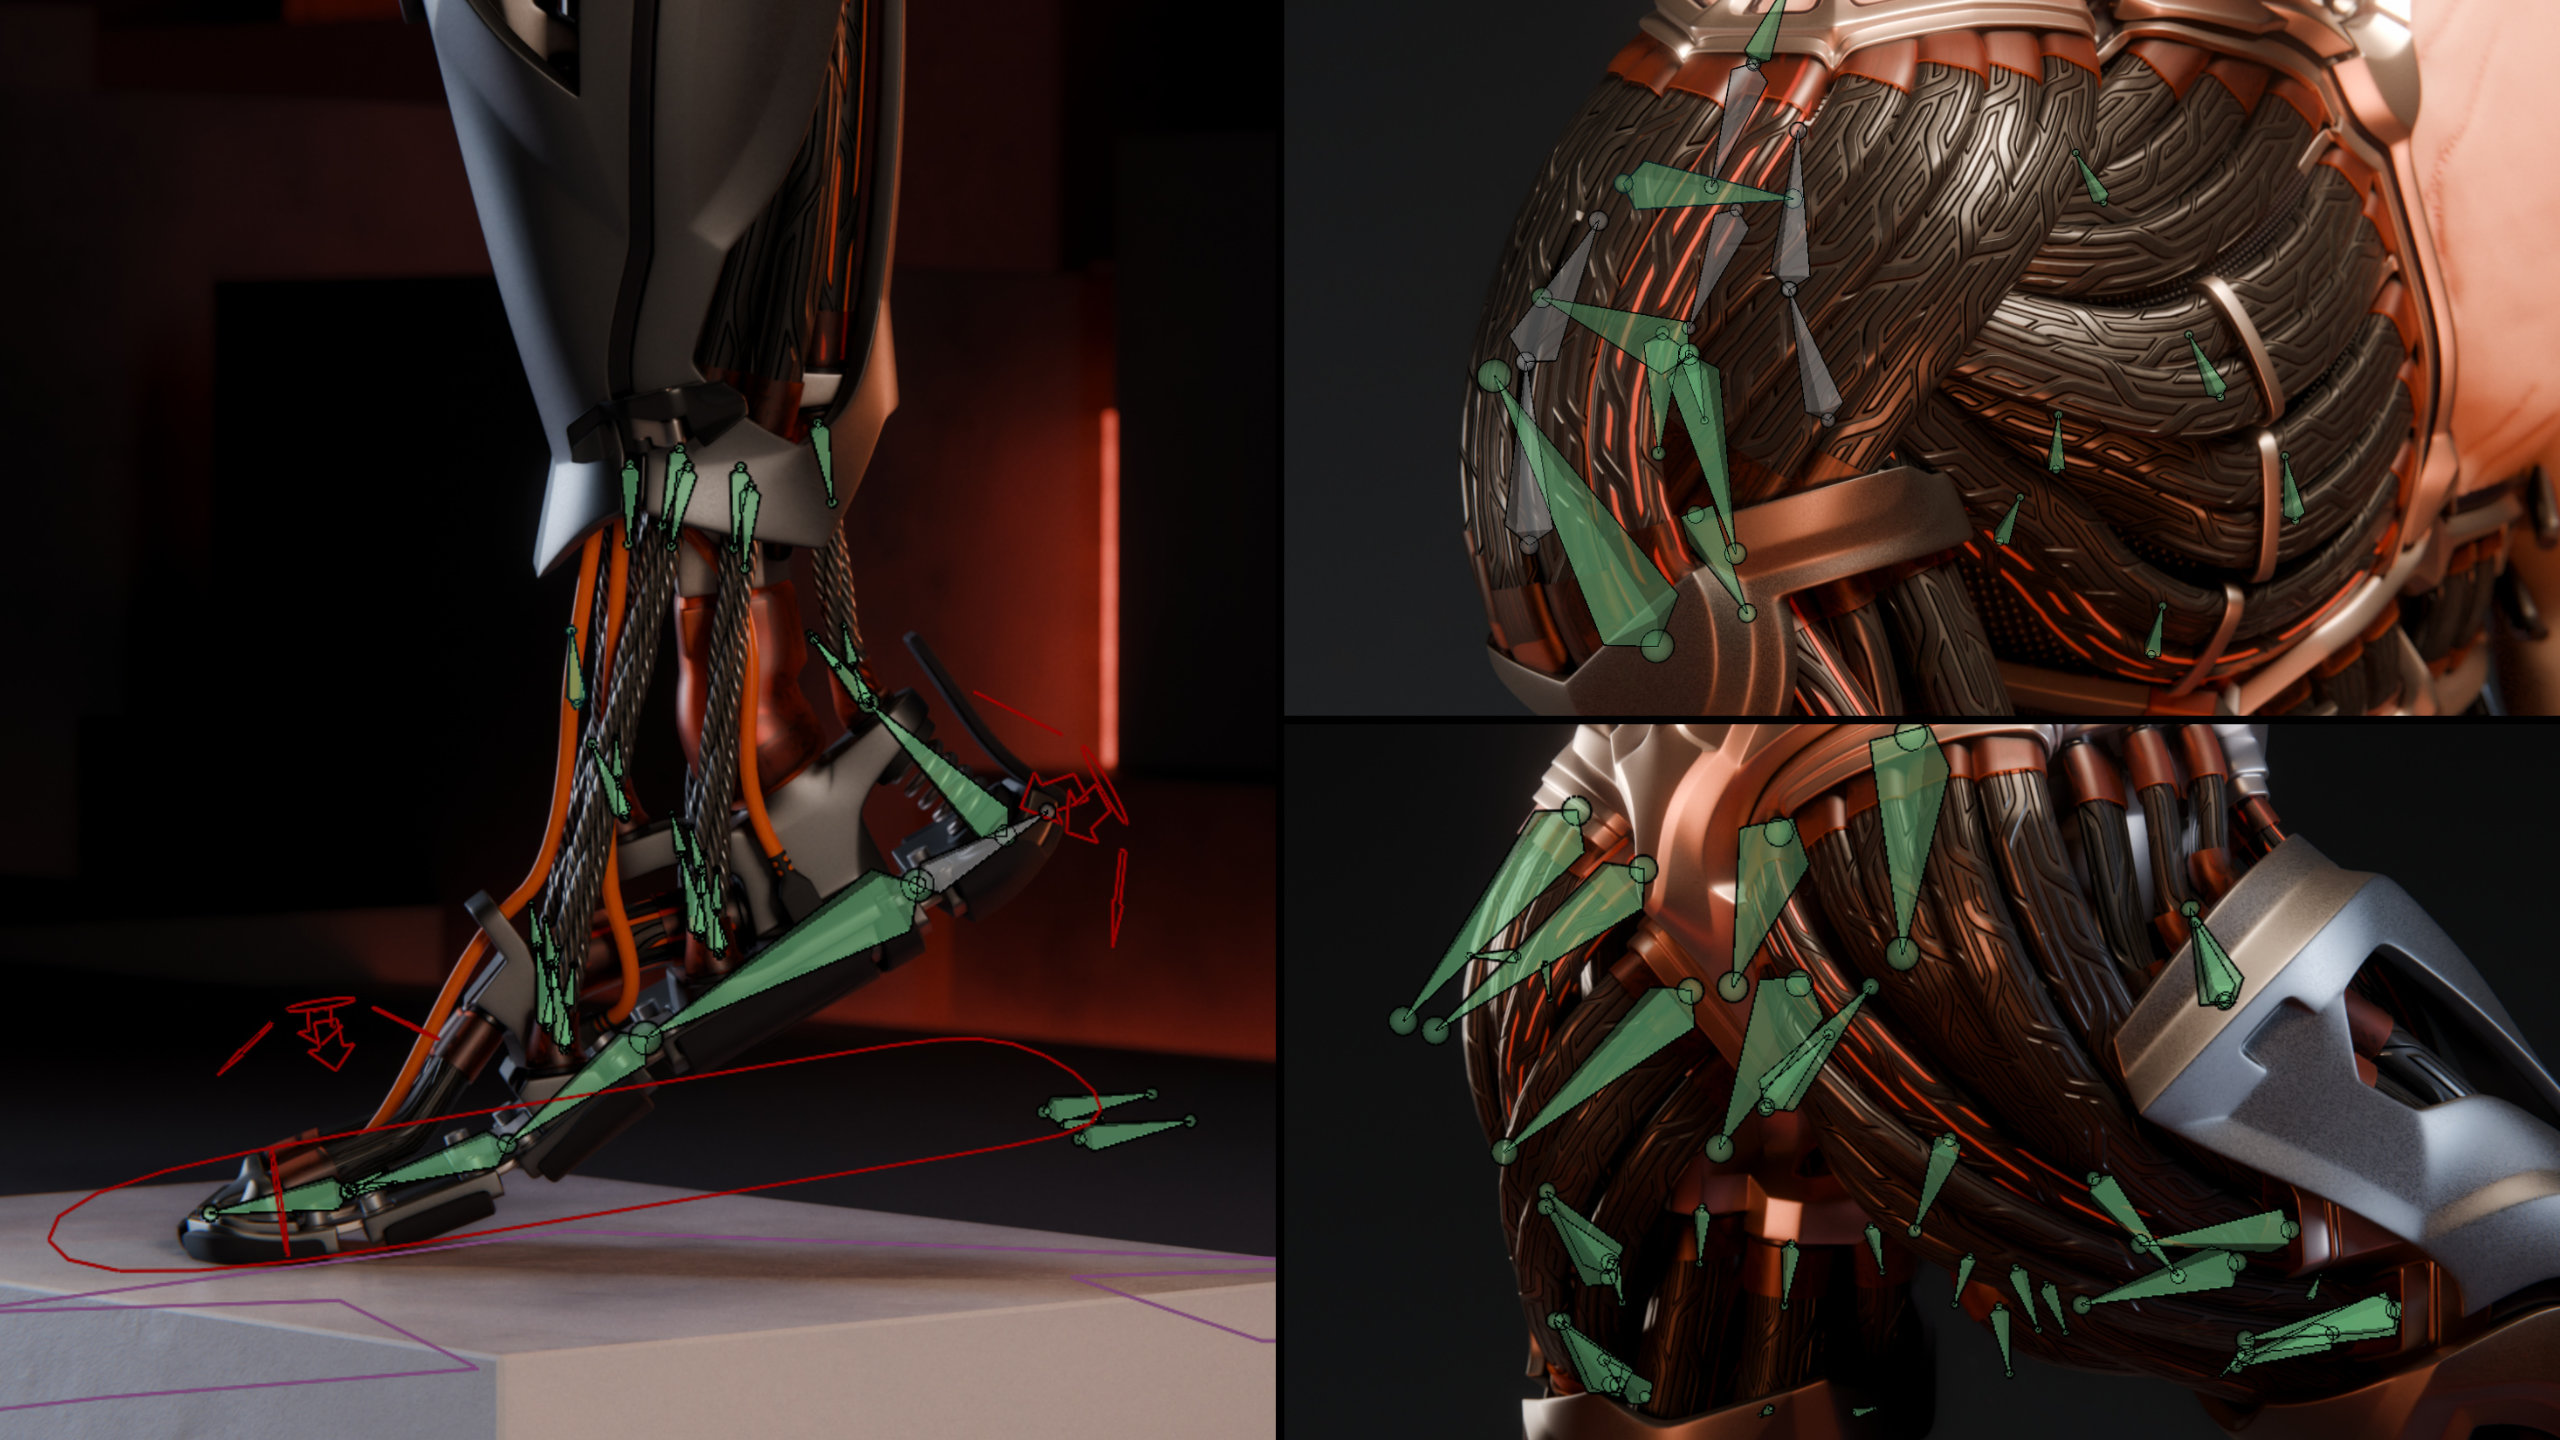
The feet are connected to the shins through multiple tendons. I developed a rig system that deforms a bezier curve and always keeps it taut between the muscle and the anchor on the feet. The mechanism is fully automated, the animator needs to only animate the foot controller.
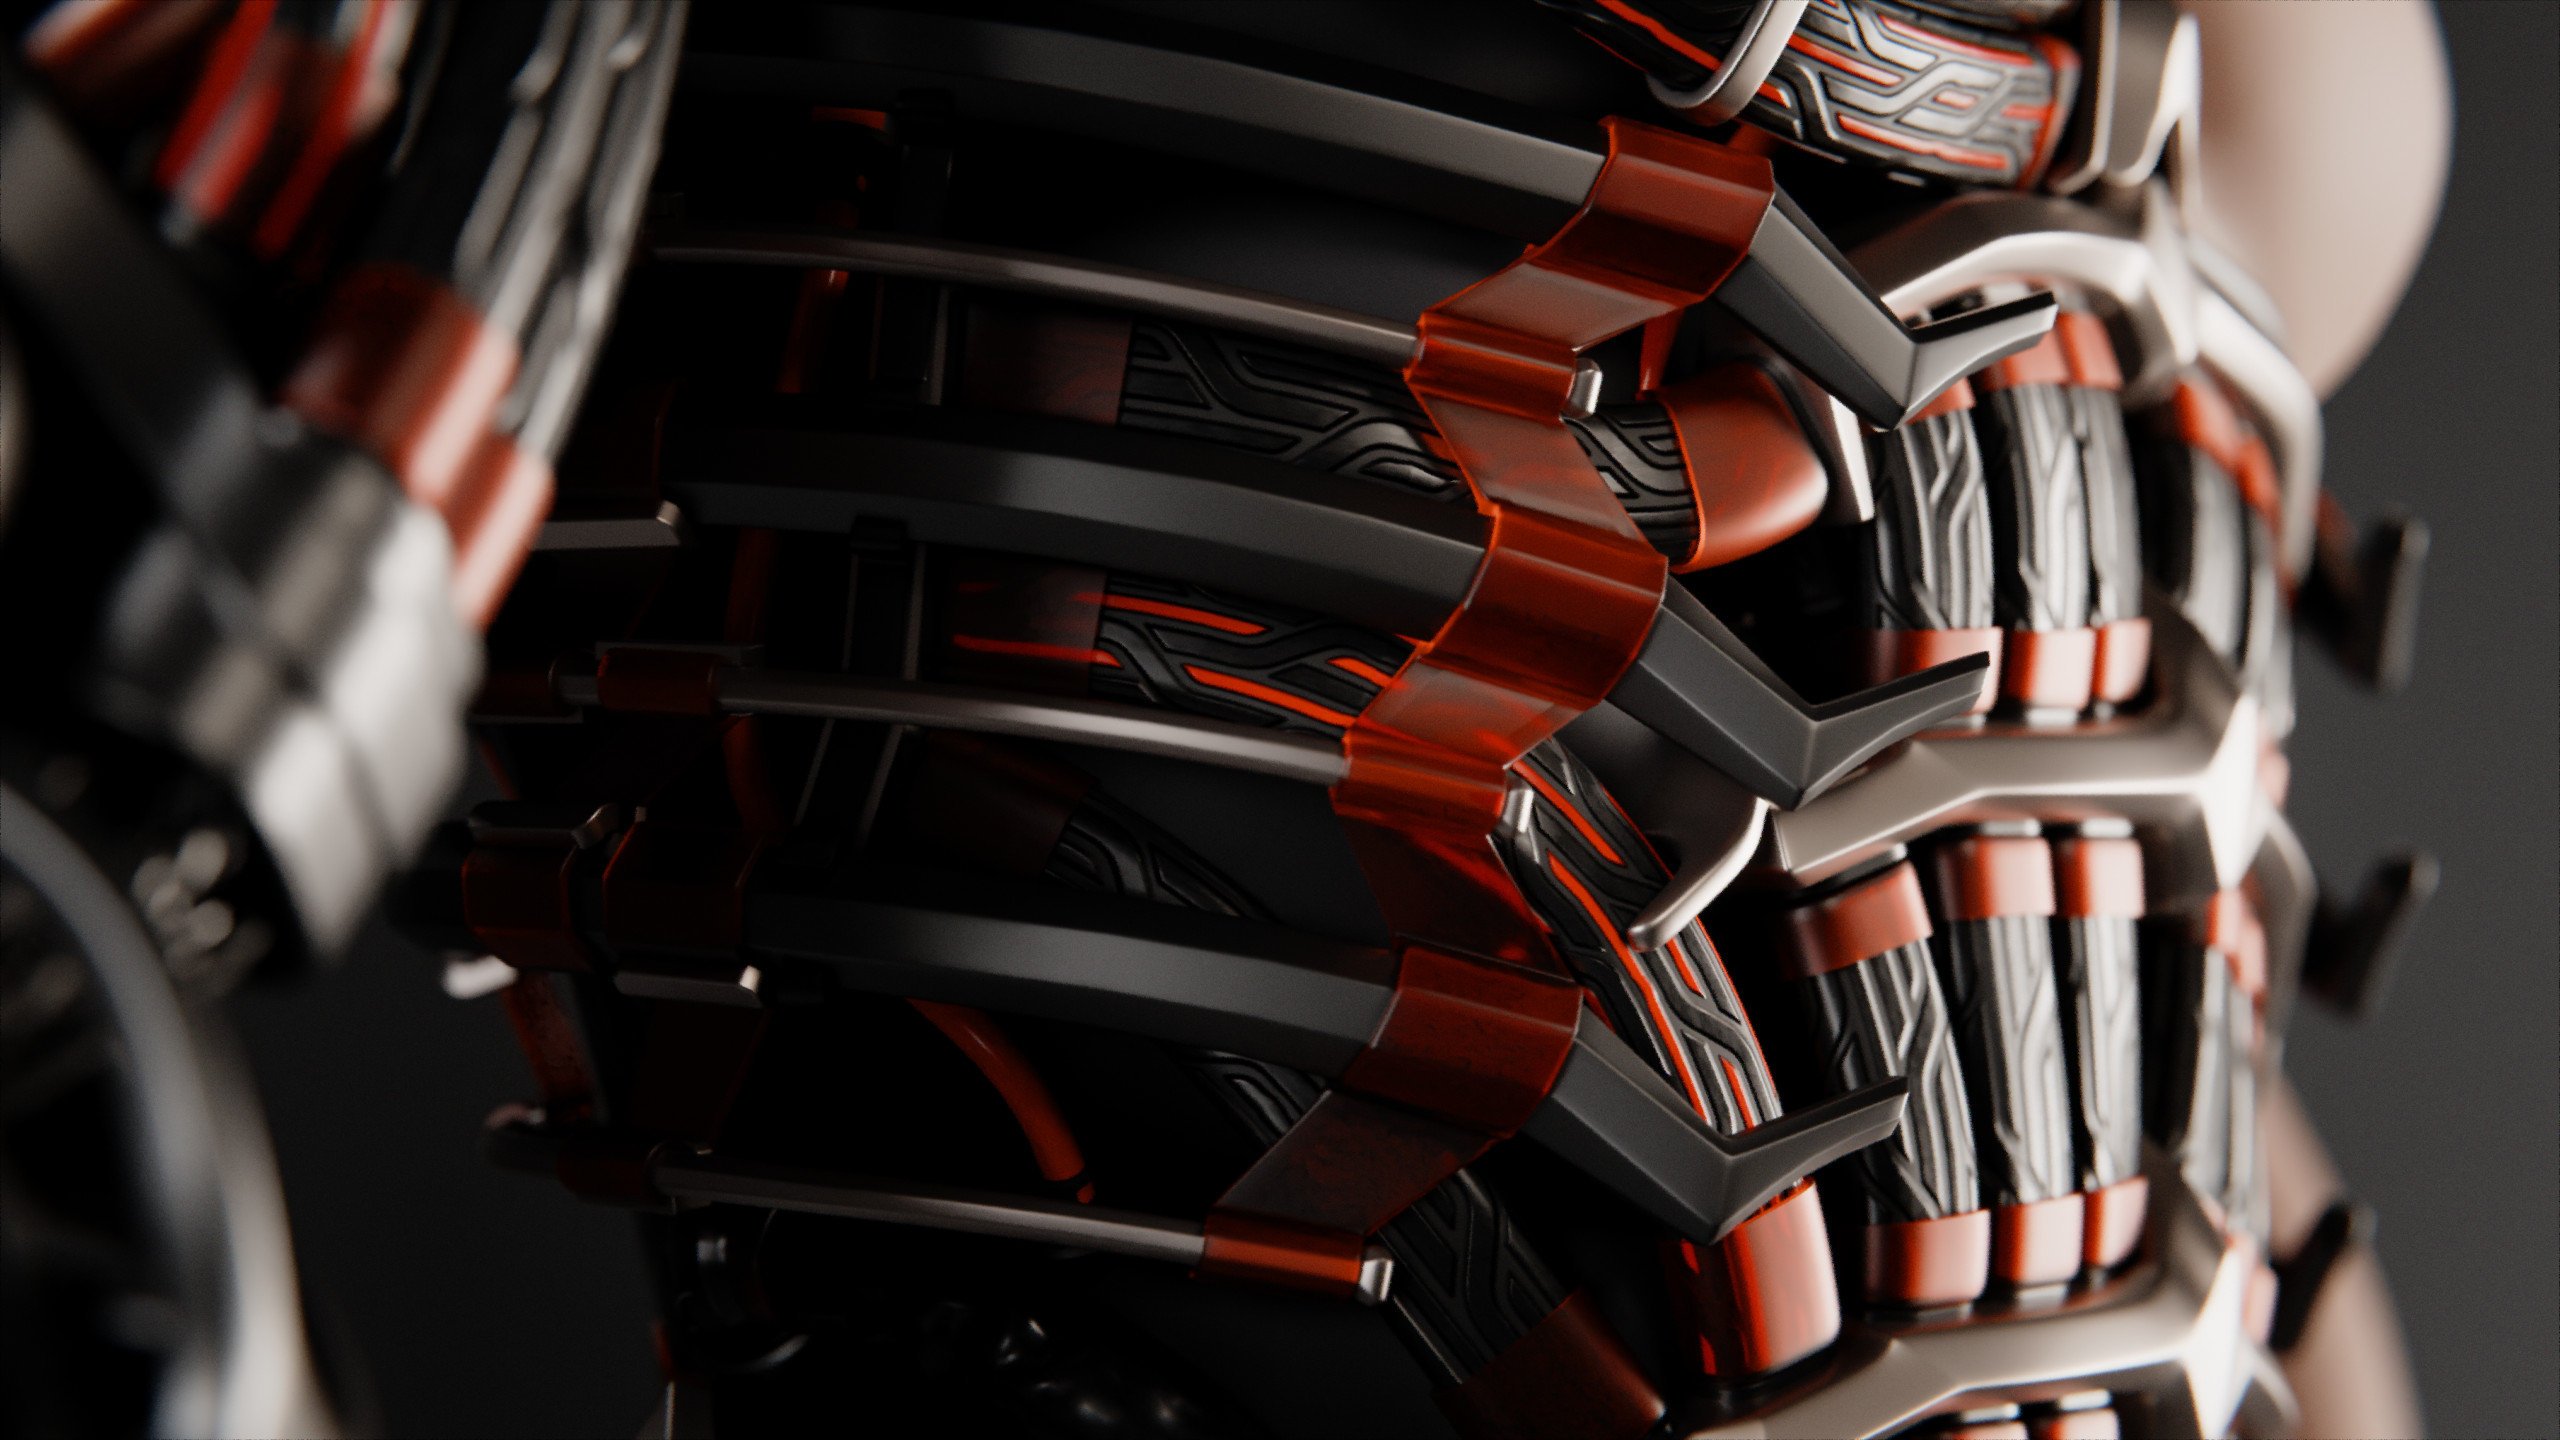
A similar principle is used on all of the artificial muscles around the body. A curve gives the shape to the muscles, and the curve is deformed through its anchor points. This prevents unnatural deformations along the muscle. Ein ähnliches Prinzip wird in allen Bereichen mit den breiten Muskelfasern angewandt. The bones that control these curves are part of constraint structures that move them automatically along with the body.

December 2025
Refining the organic body
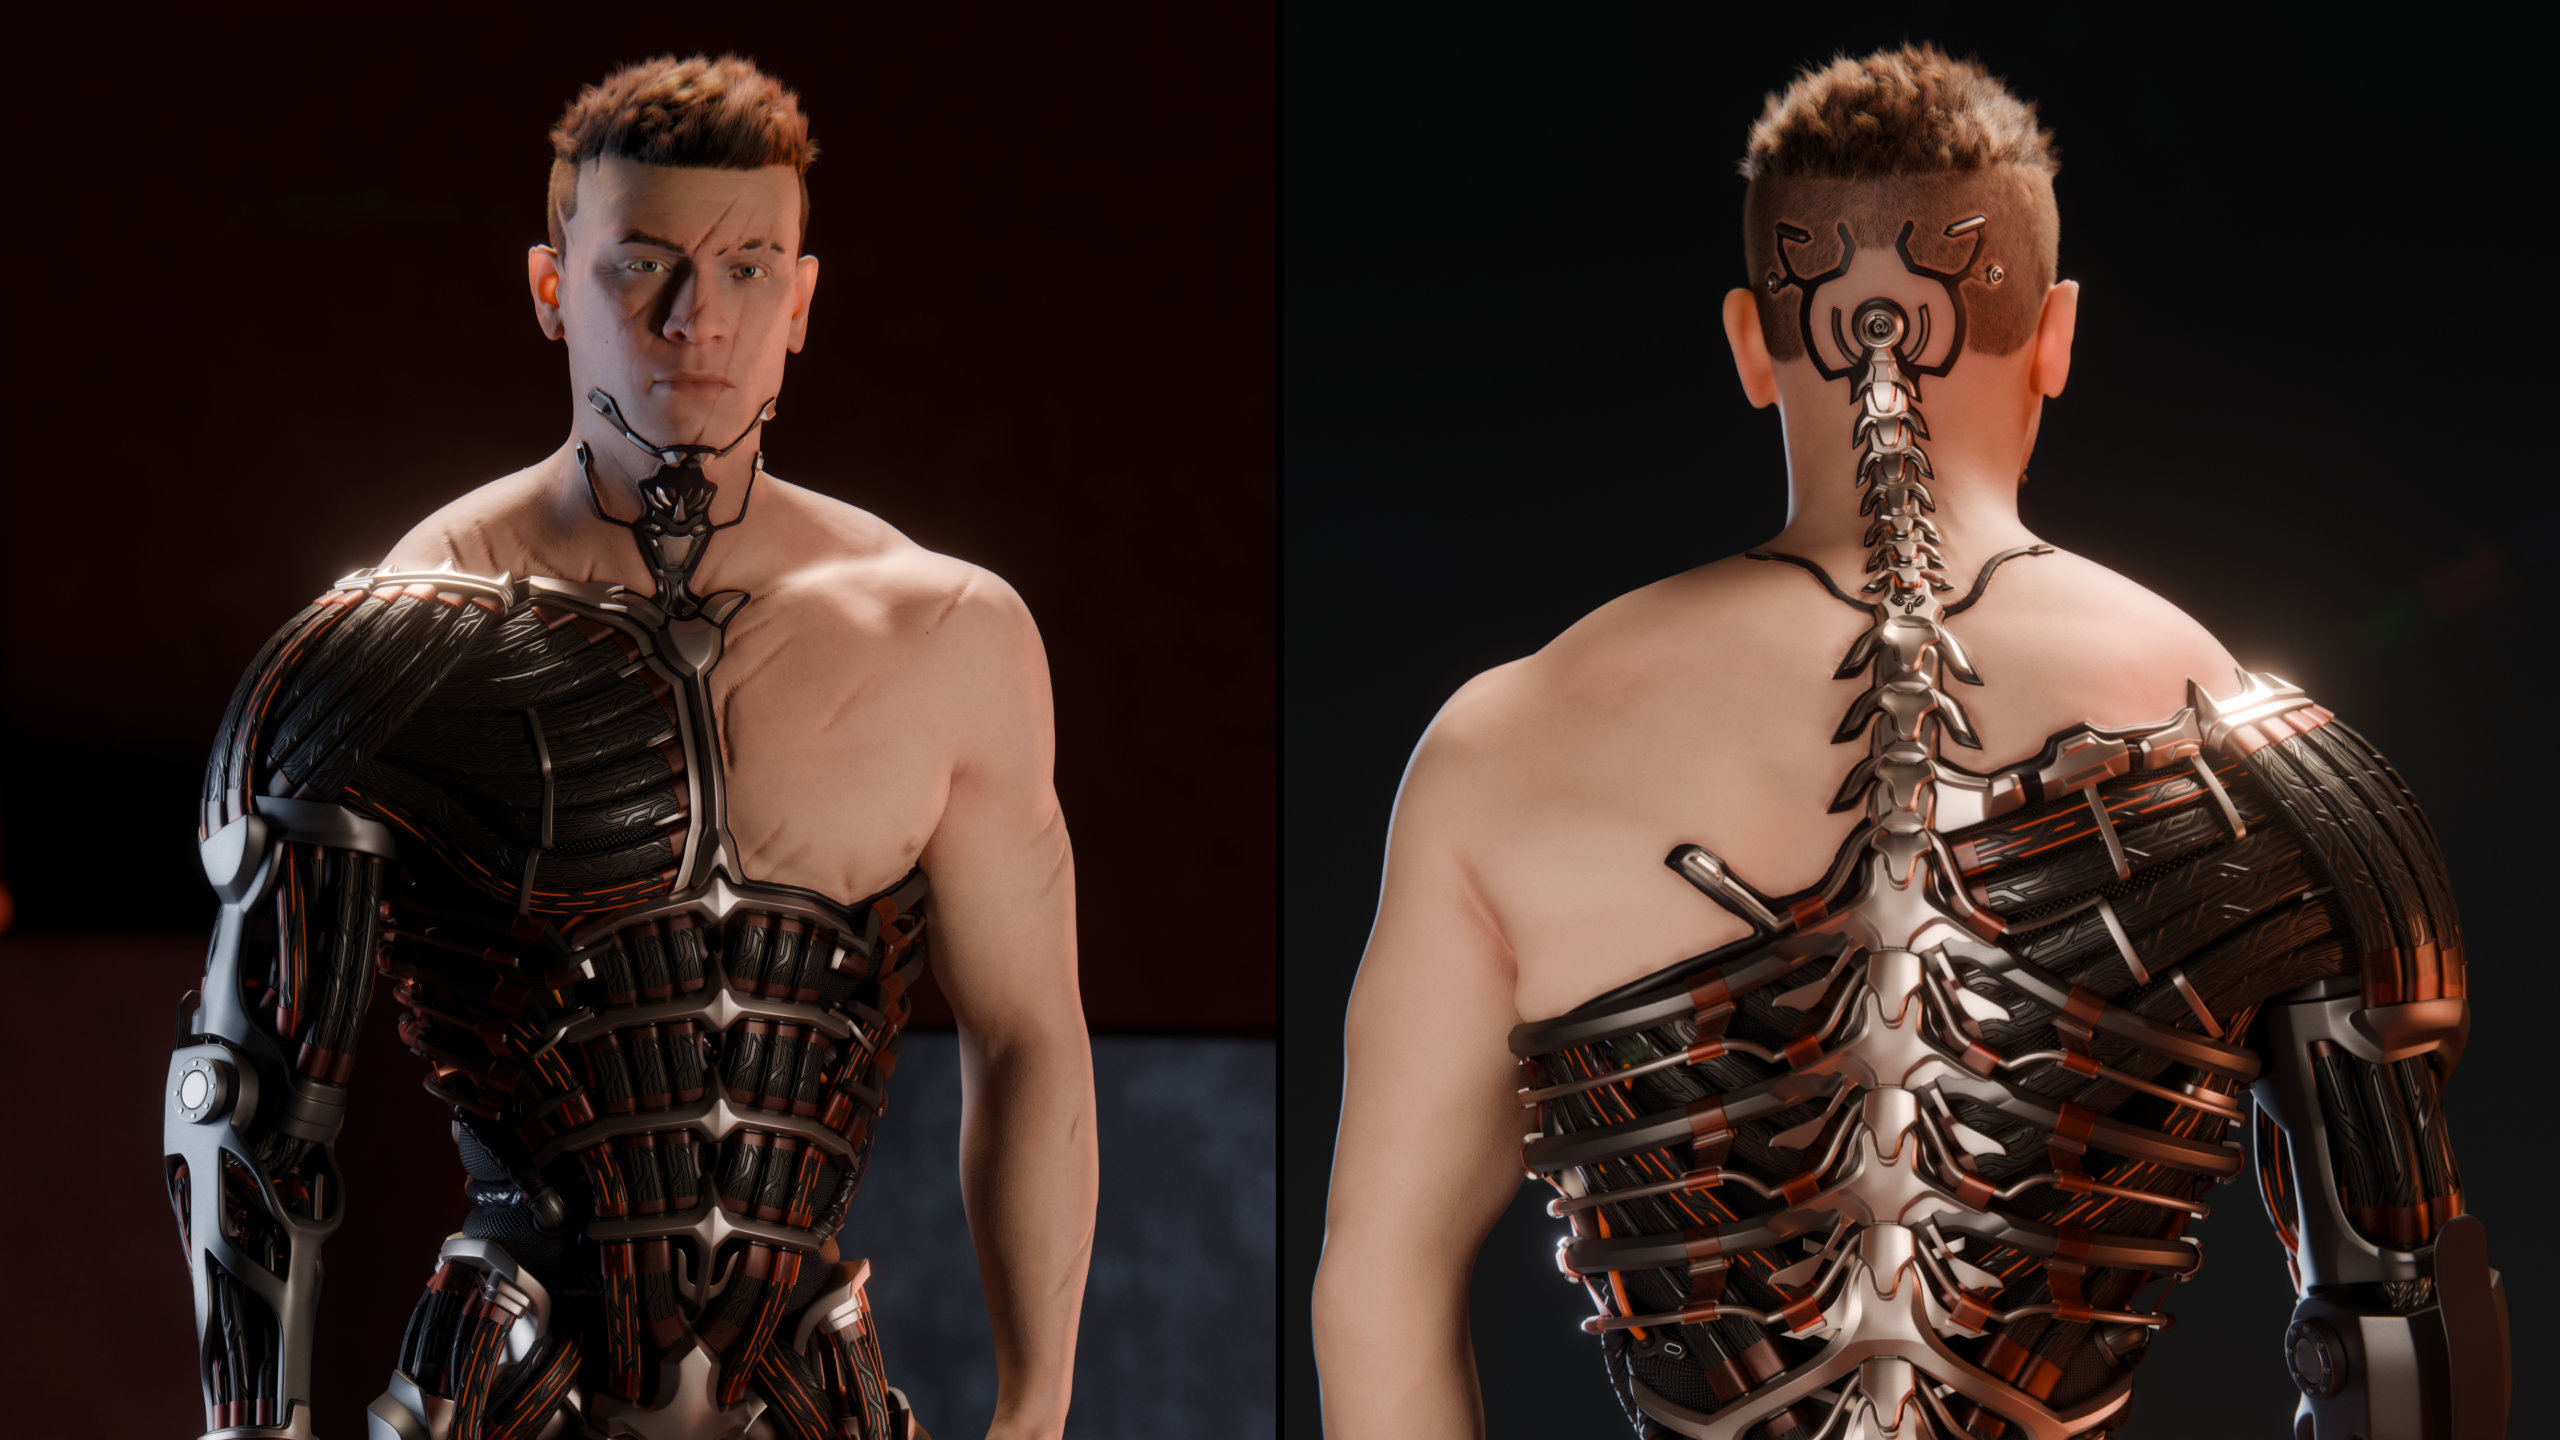
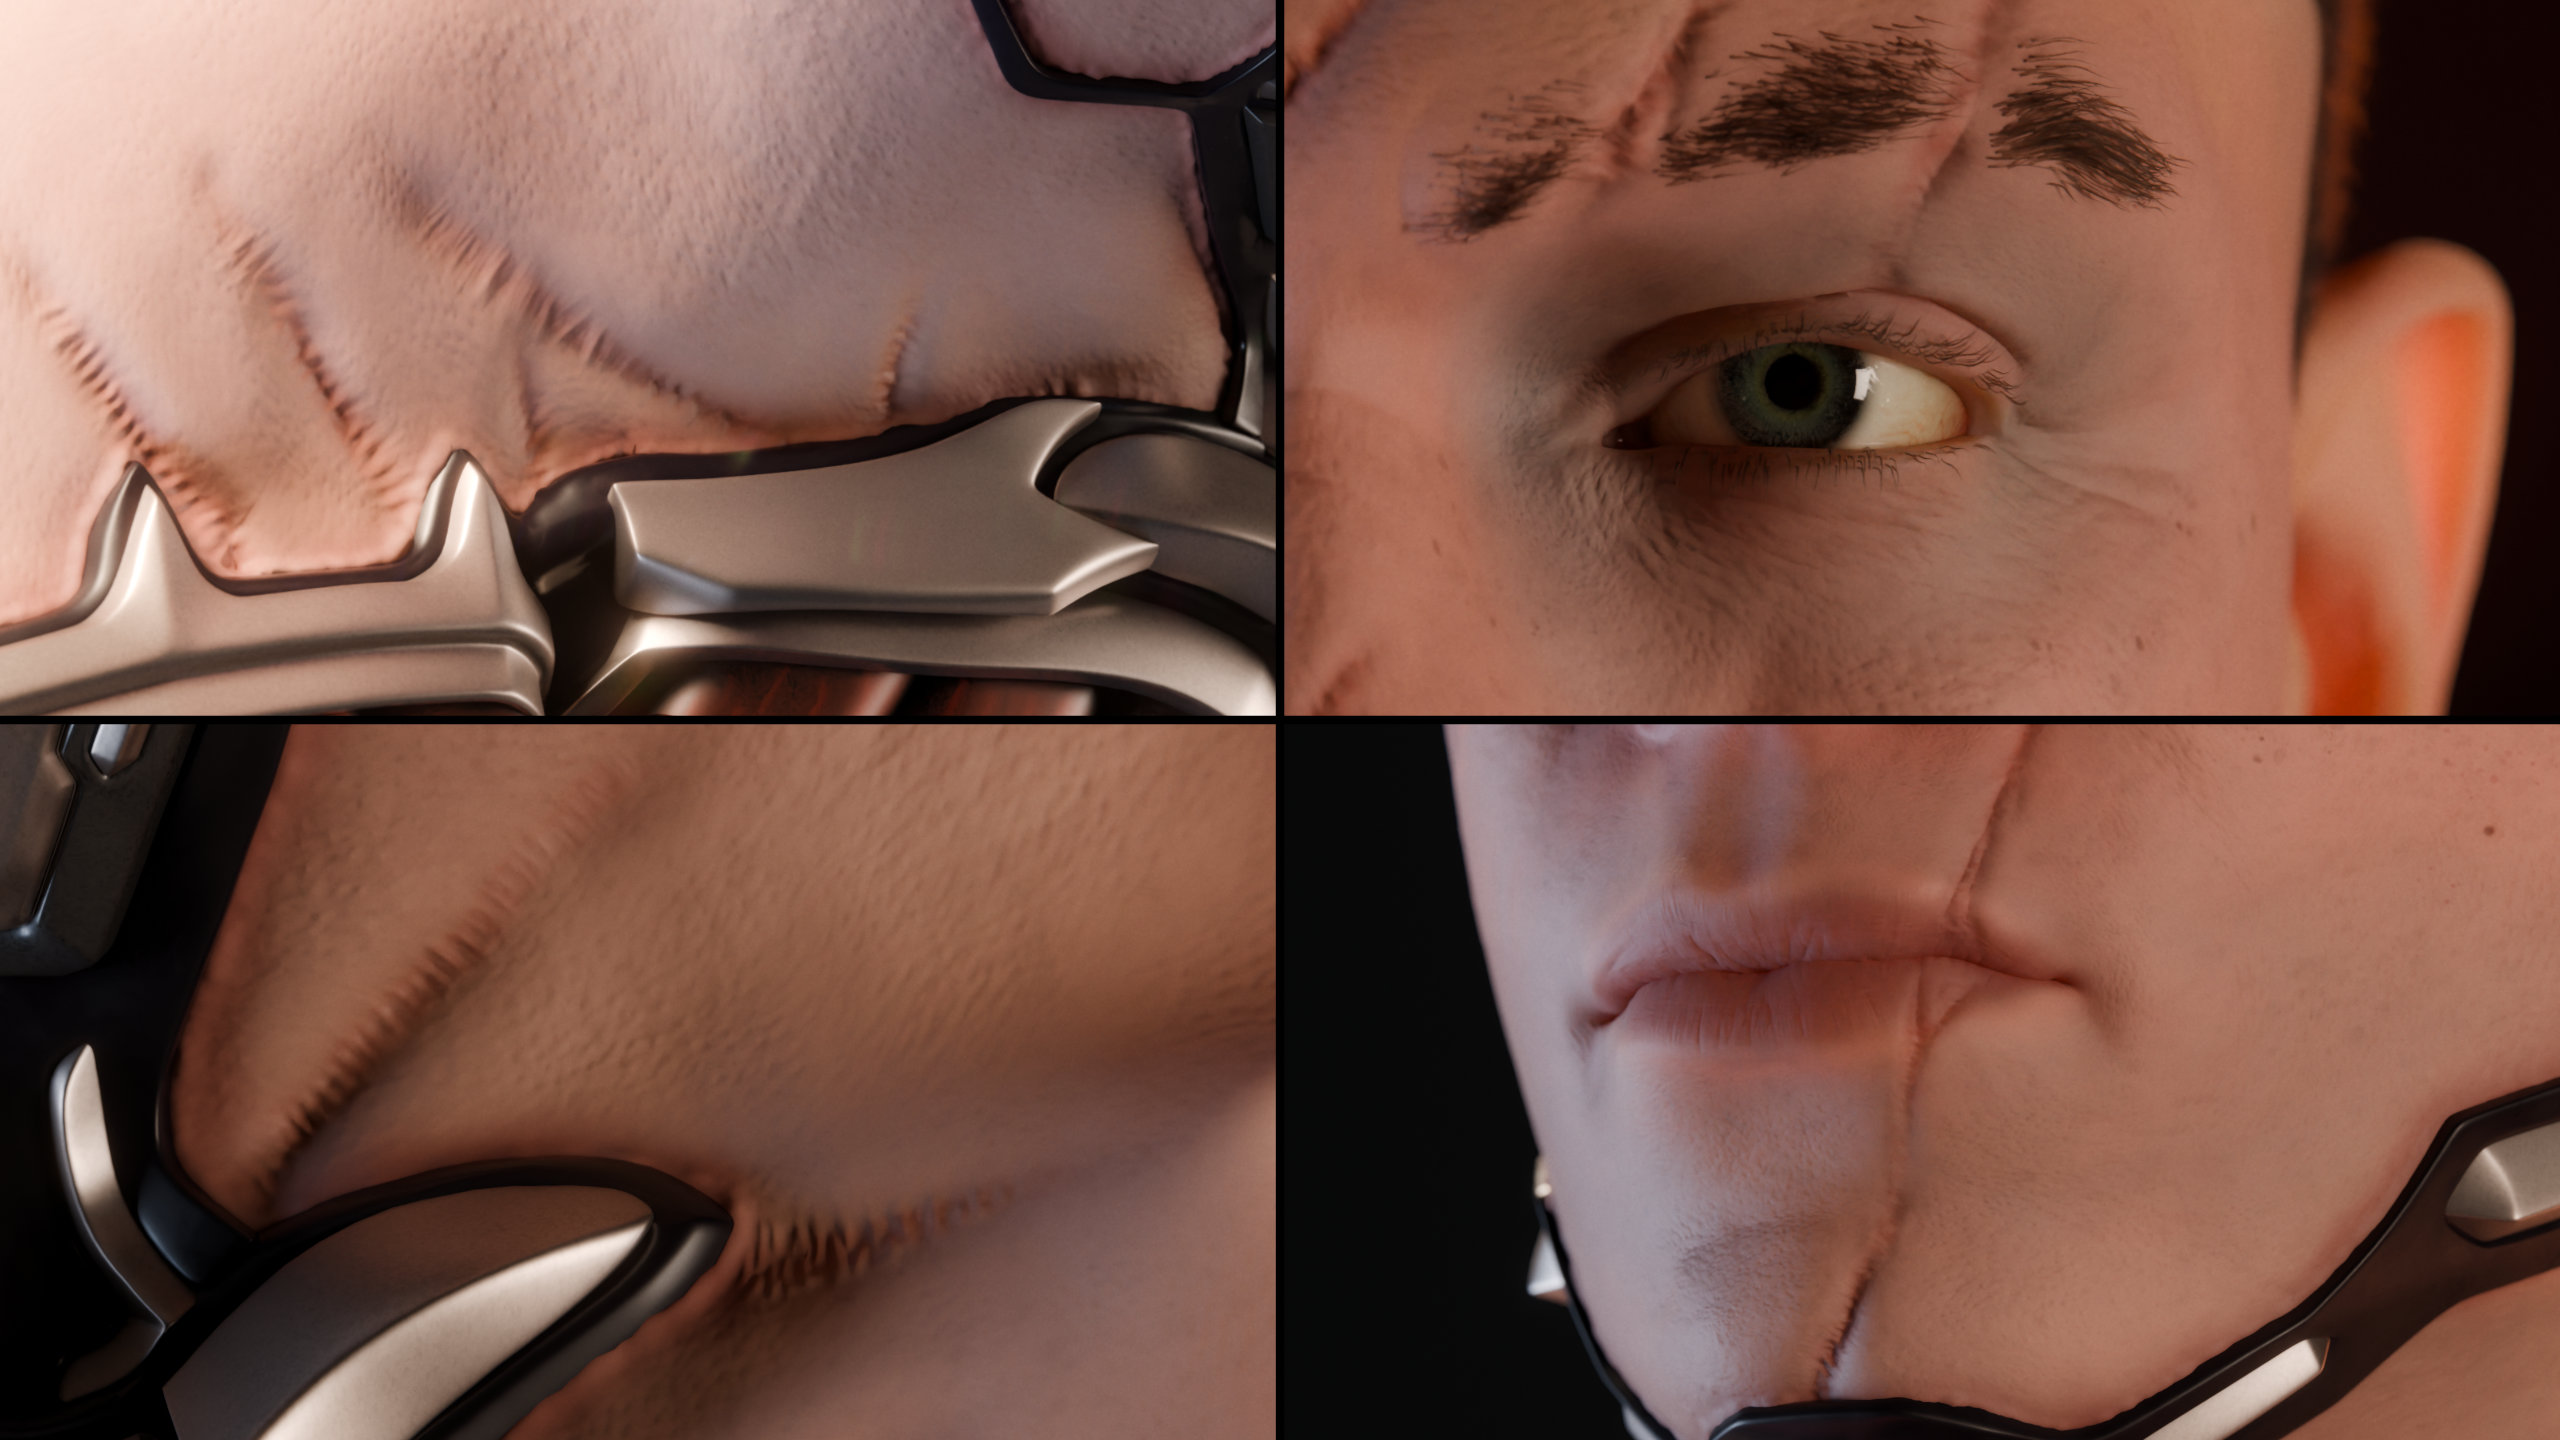
The skin covering the head, shoulder and hand was painstakingly stamped and sculpted with pore detail. I then baked these details down into a texture to transfer all these details onto a mesh with a lower subD level. I also carved the scars by hand and refined them with uneven bumps in the skin.
On the head I use multiple Geo-Node based hair systems, with hair maps controlling interpolation of additional hairs.
September 2025
Mechanical meshes completed
Throughout the summer break between semesters I have spent a lot of time refining the vision of the design, as well as turning that vision into reality.
One of the top considerations I have with this character design is that parts should be built in a way that makes sense from a practical perspective, at least at first glance.
The human body is an incredible construction and I wanted to capture the structure, in particular our bone and muscle structure, in an industrial style.
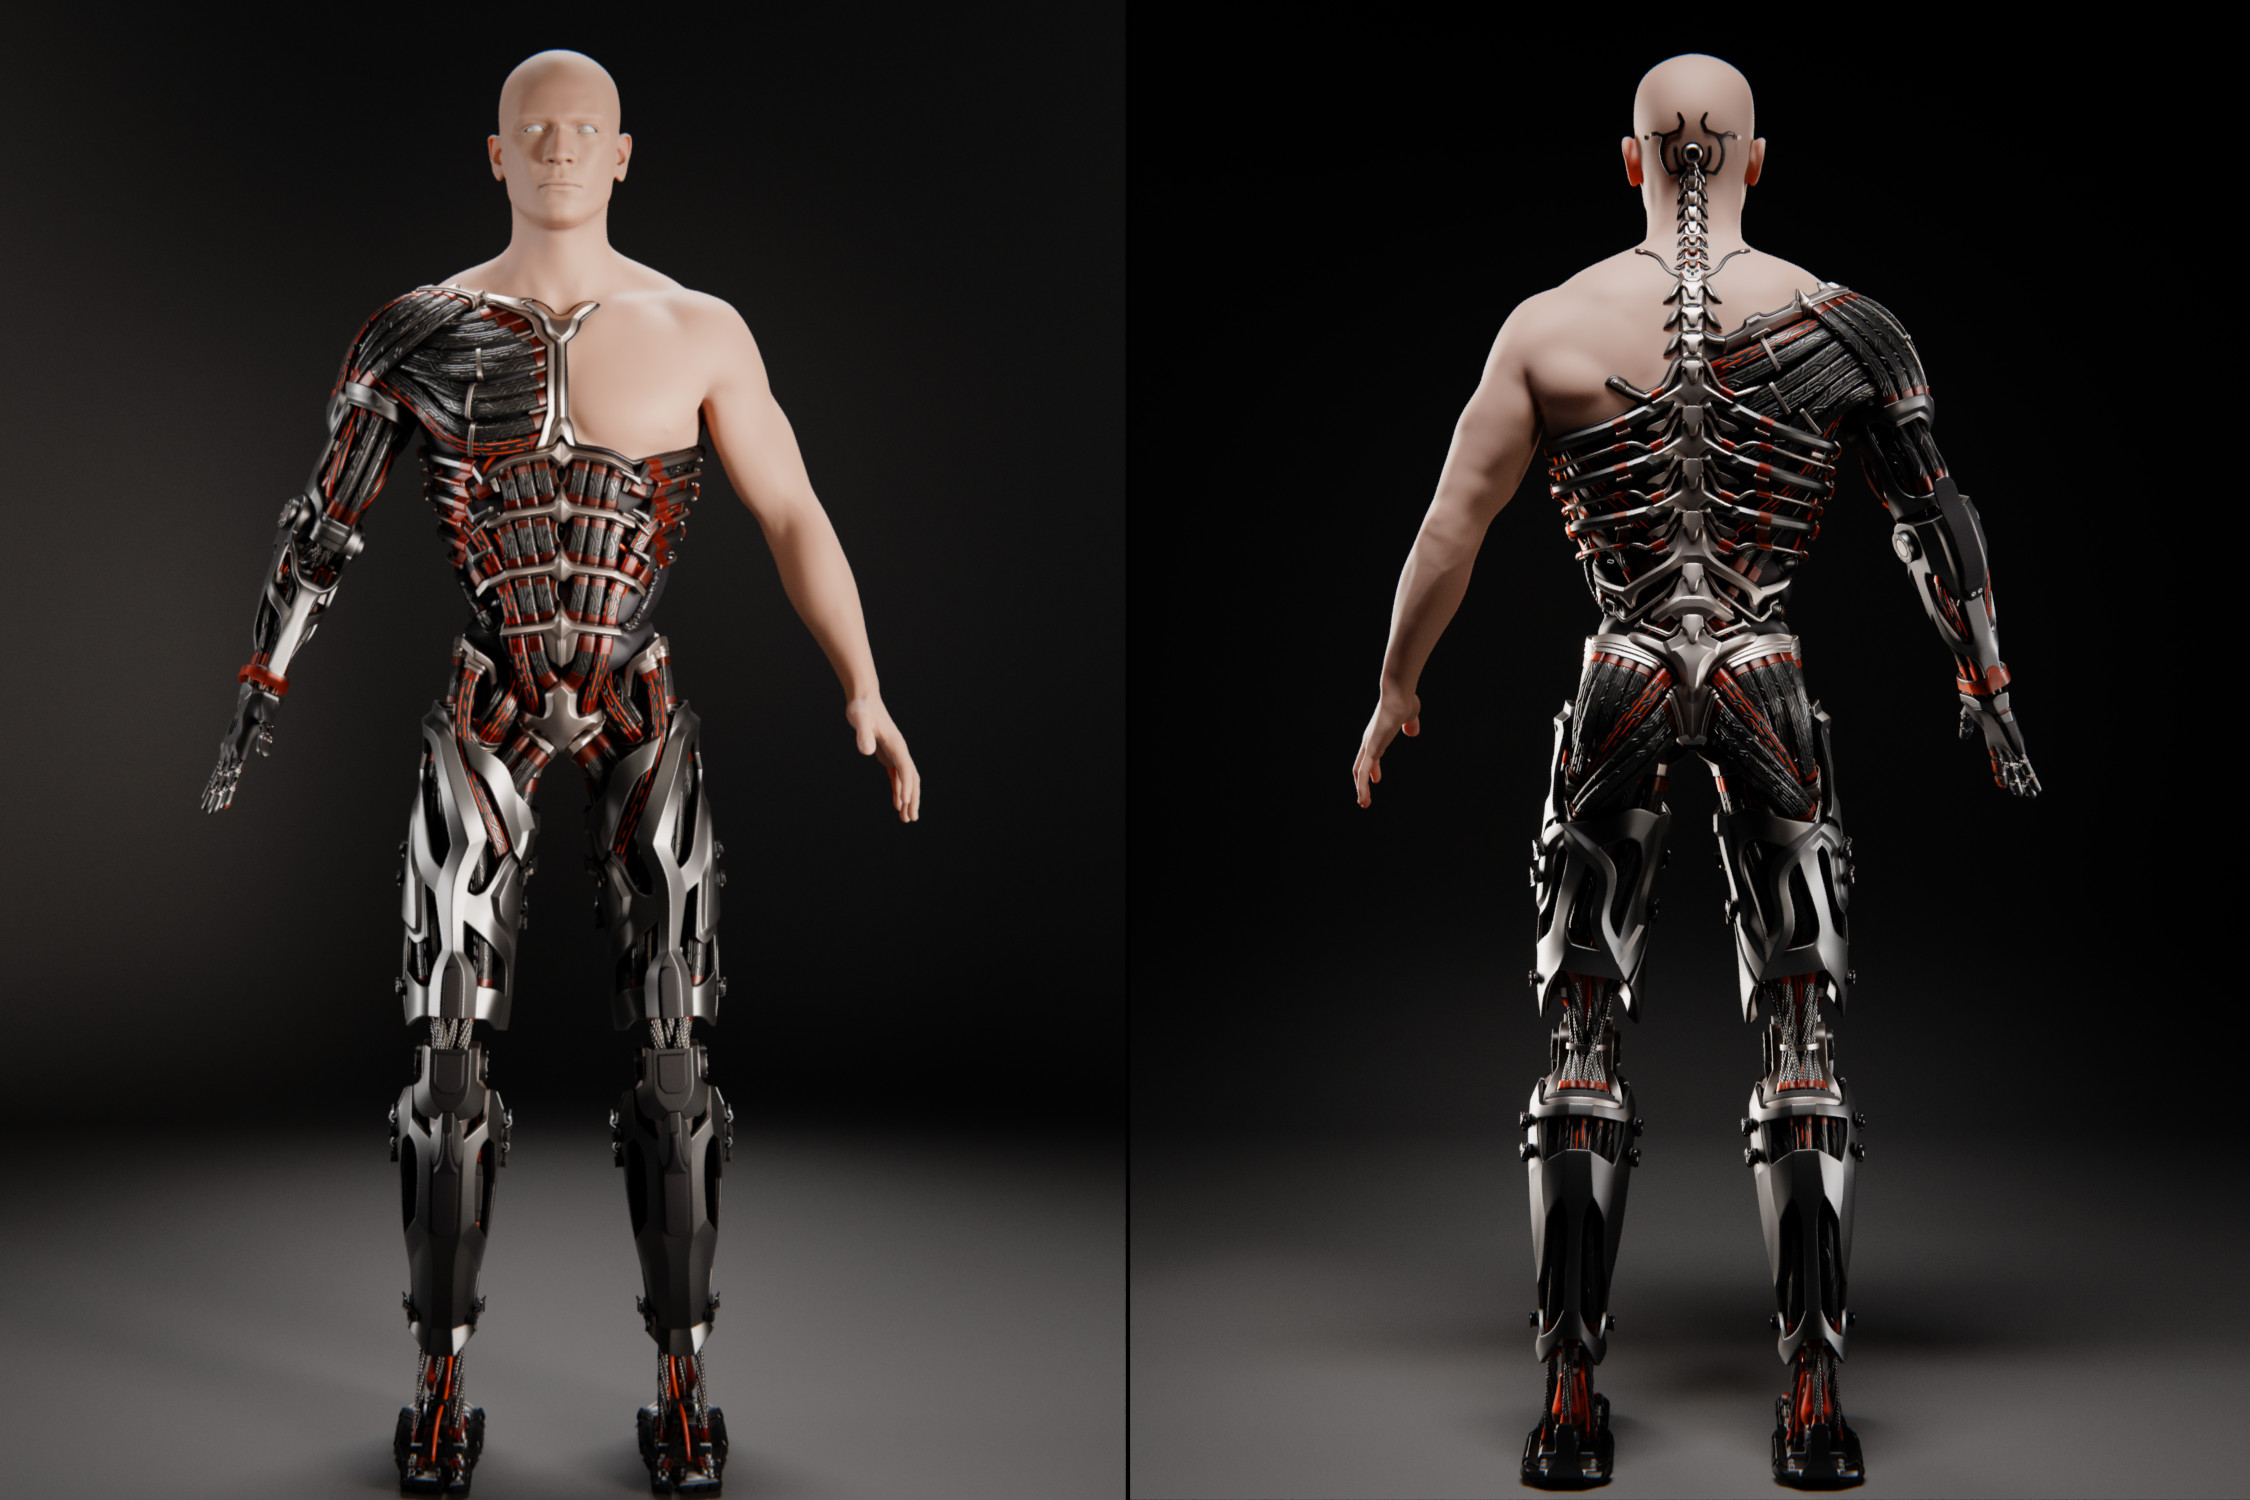
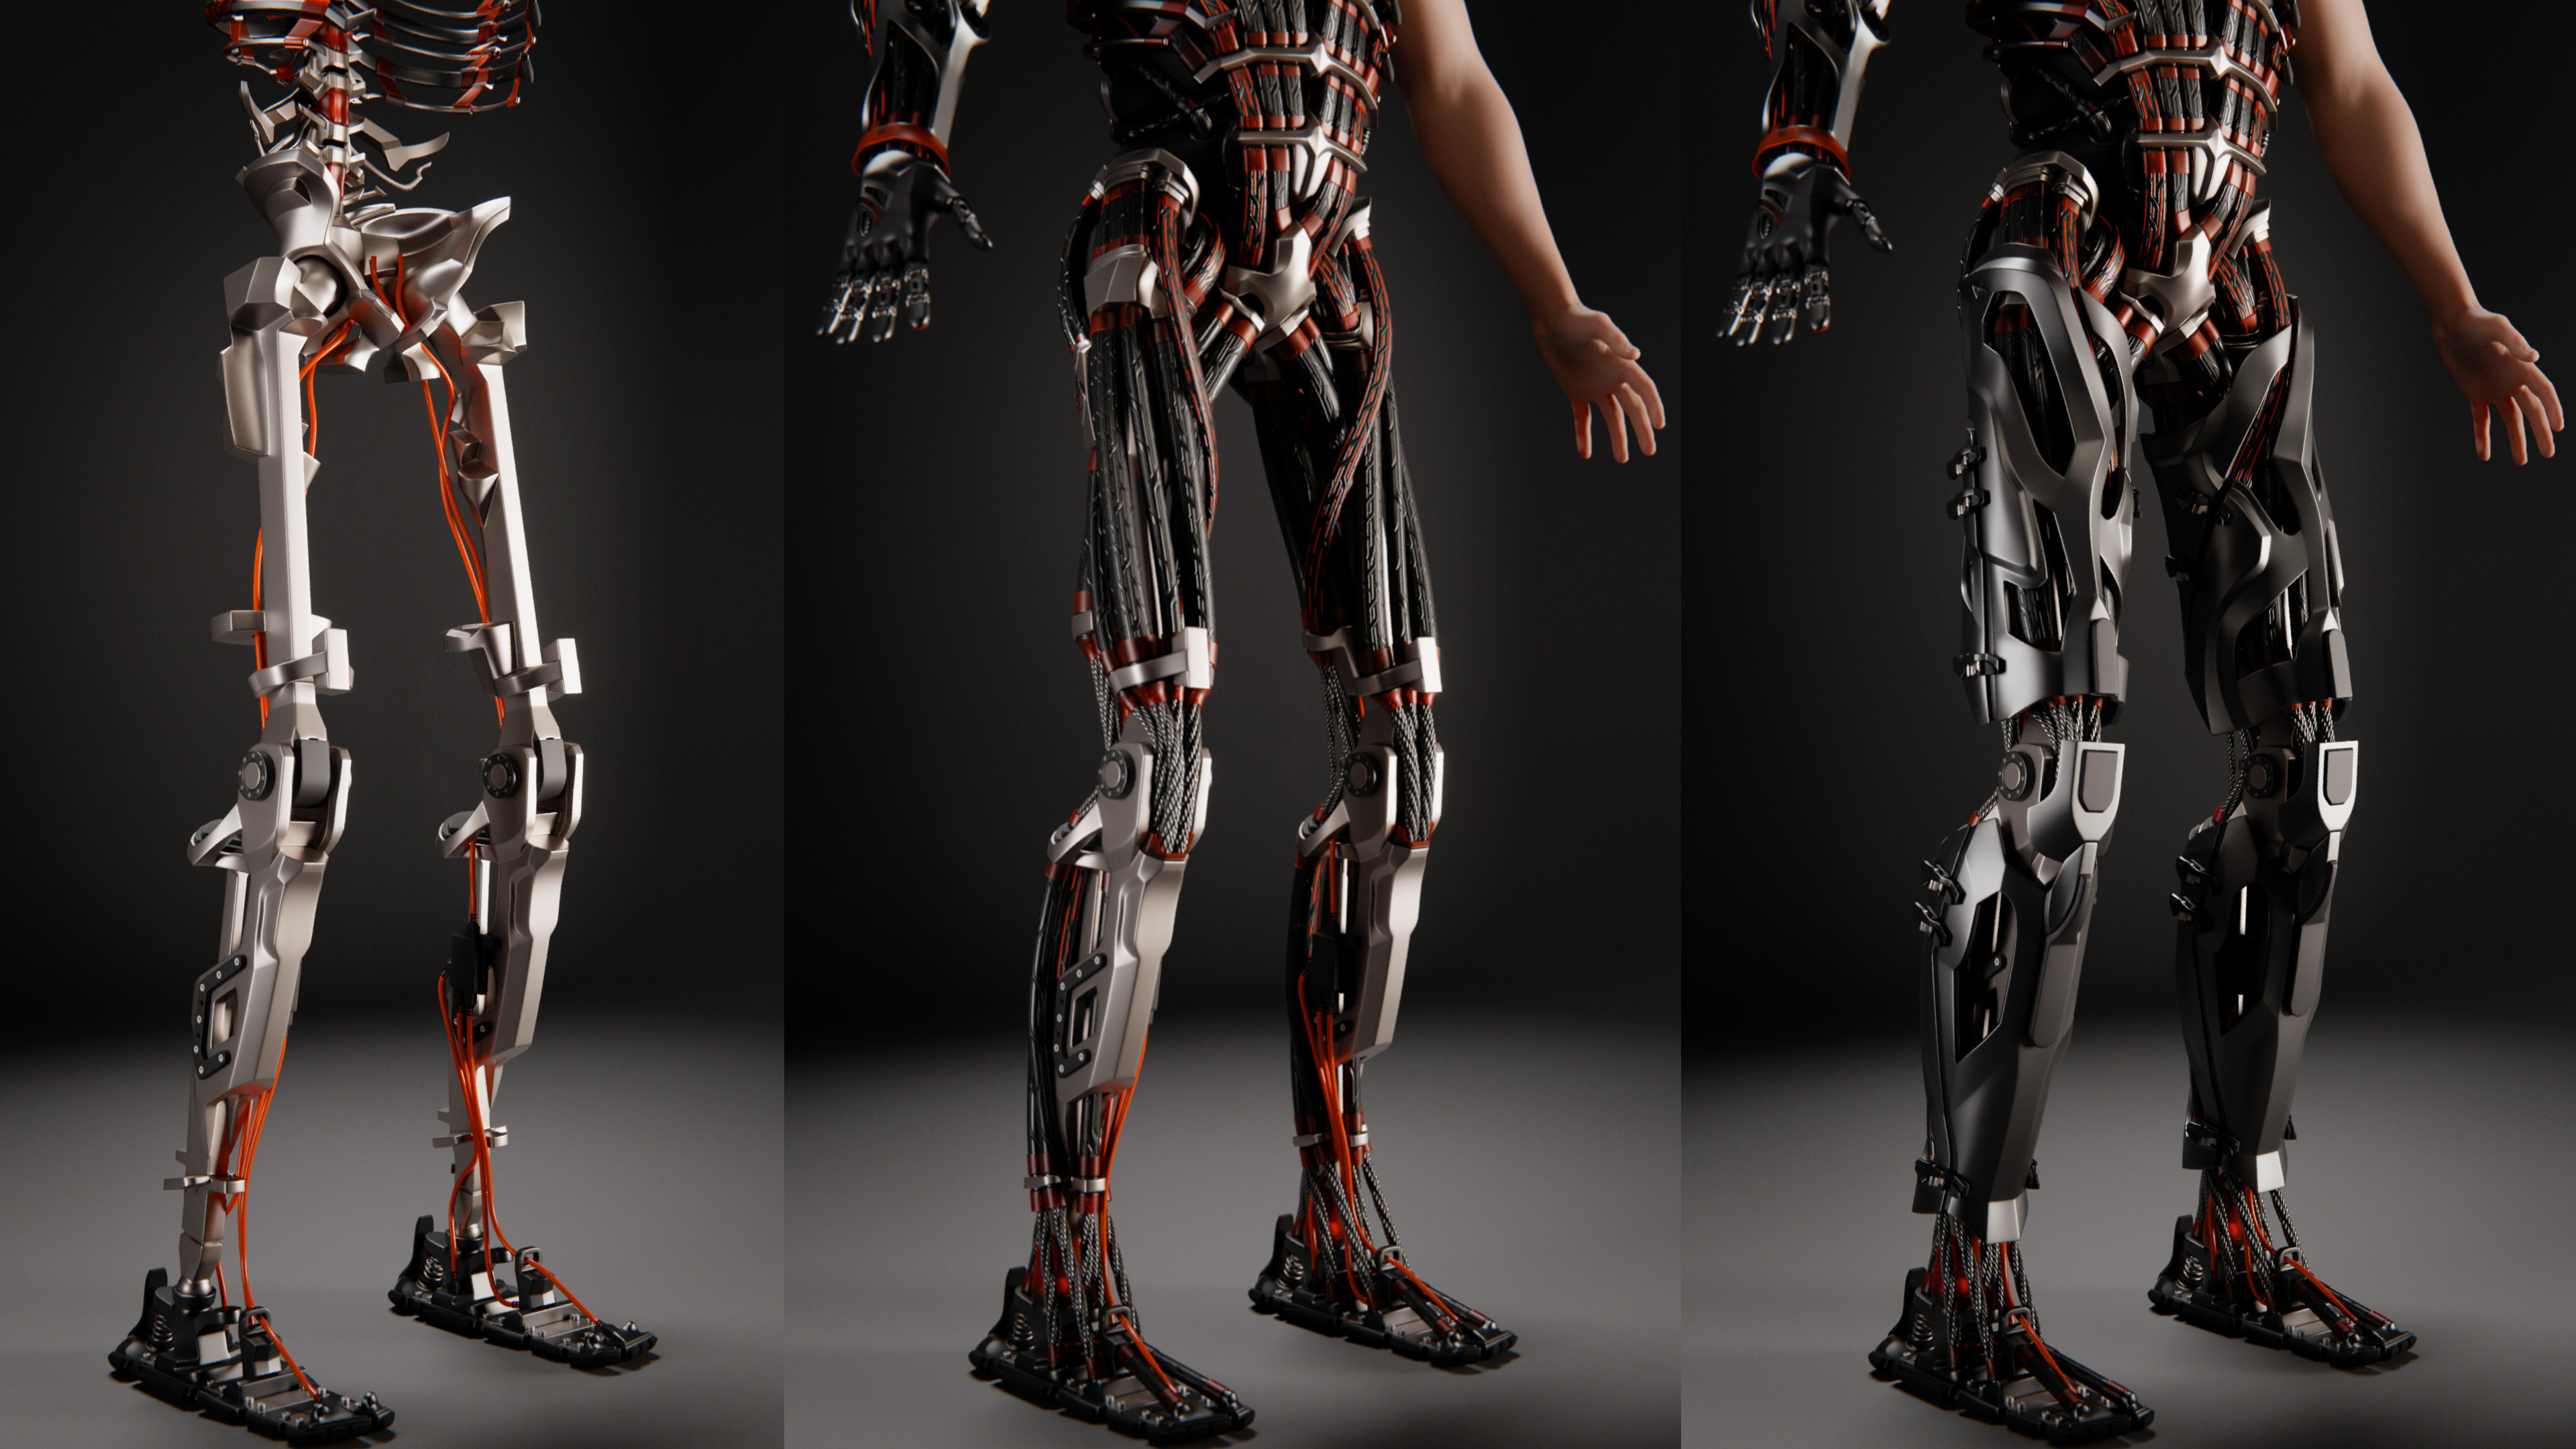
The legs are an intricate construction, with anatomy just like human legs. The bones and many of the muscle groups have been adapted to fit the overall design aesthetic. The front panels are designed in a way that they could be switched out for a different model with only a few screws. The back panels simply clamp onto the front panels.
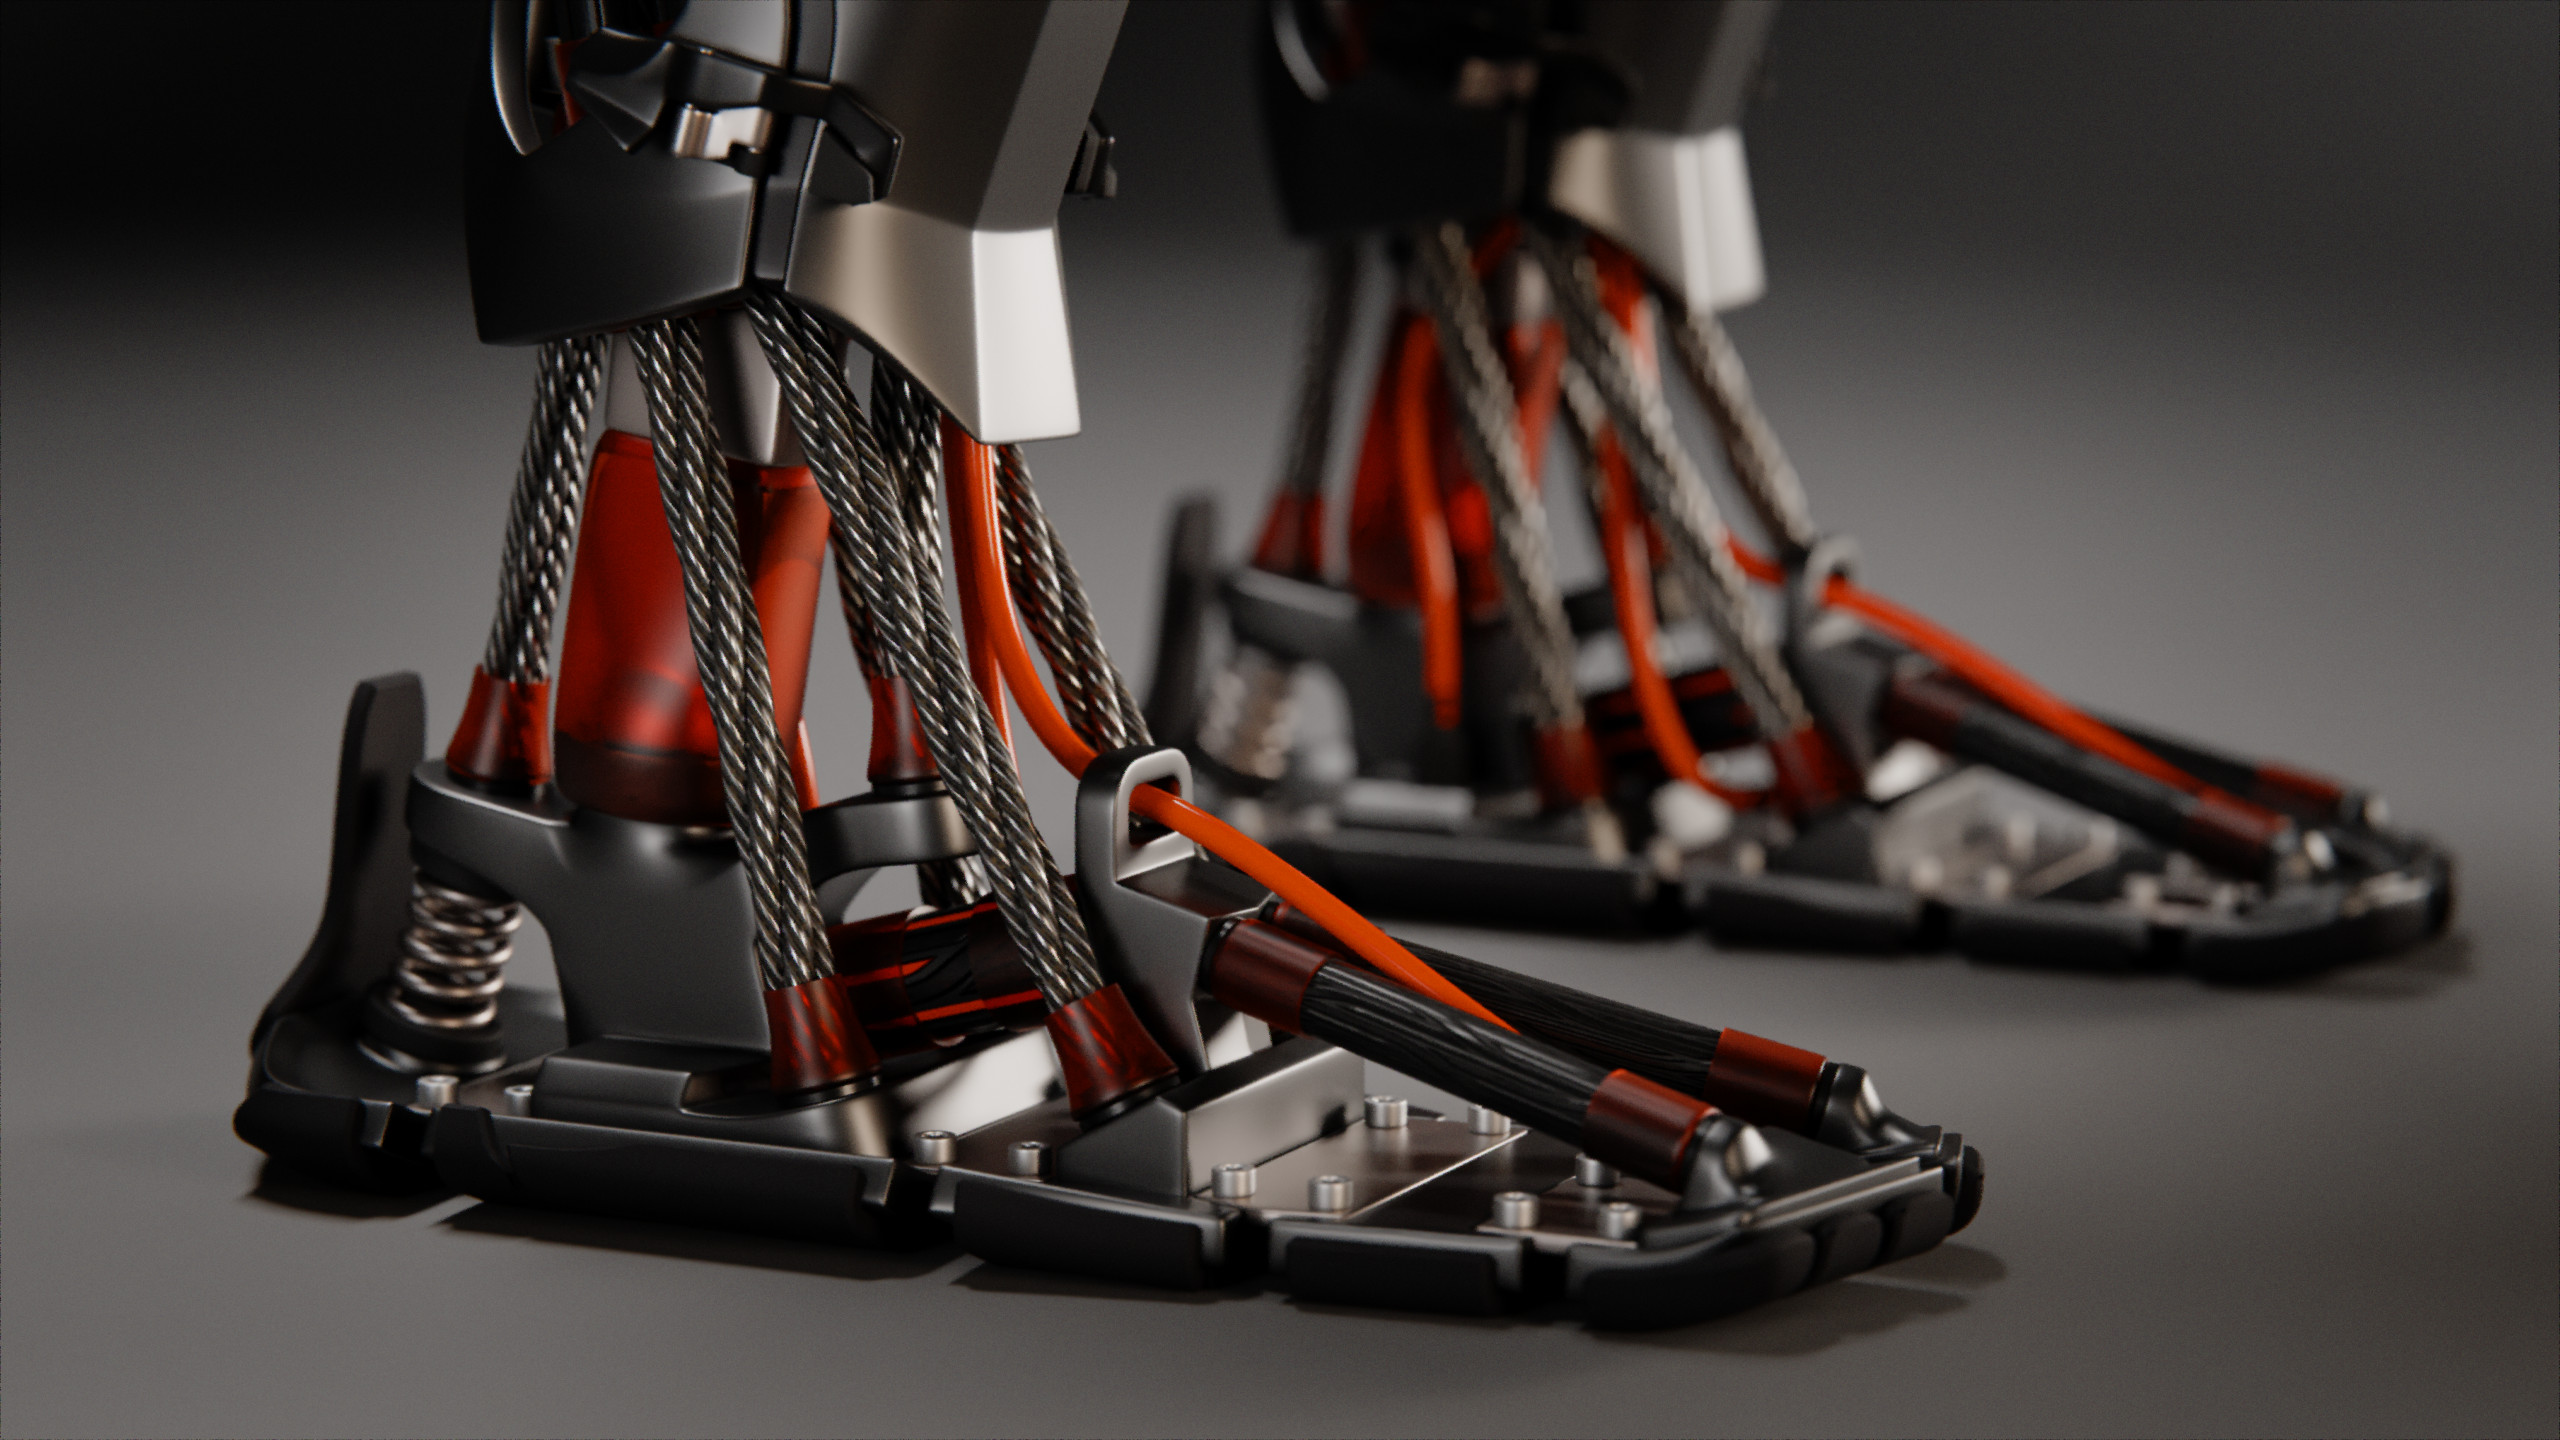
The feet are designed around multiple base plates that are joined together by thin titanium plates. These plates allow for elastic deformation and bring the foot back to its flat shape when not under pressure. The ball joint allows flexibility and is protected by a rubber cover.
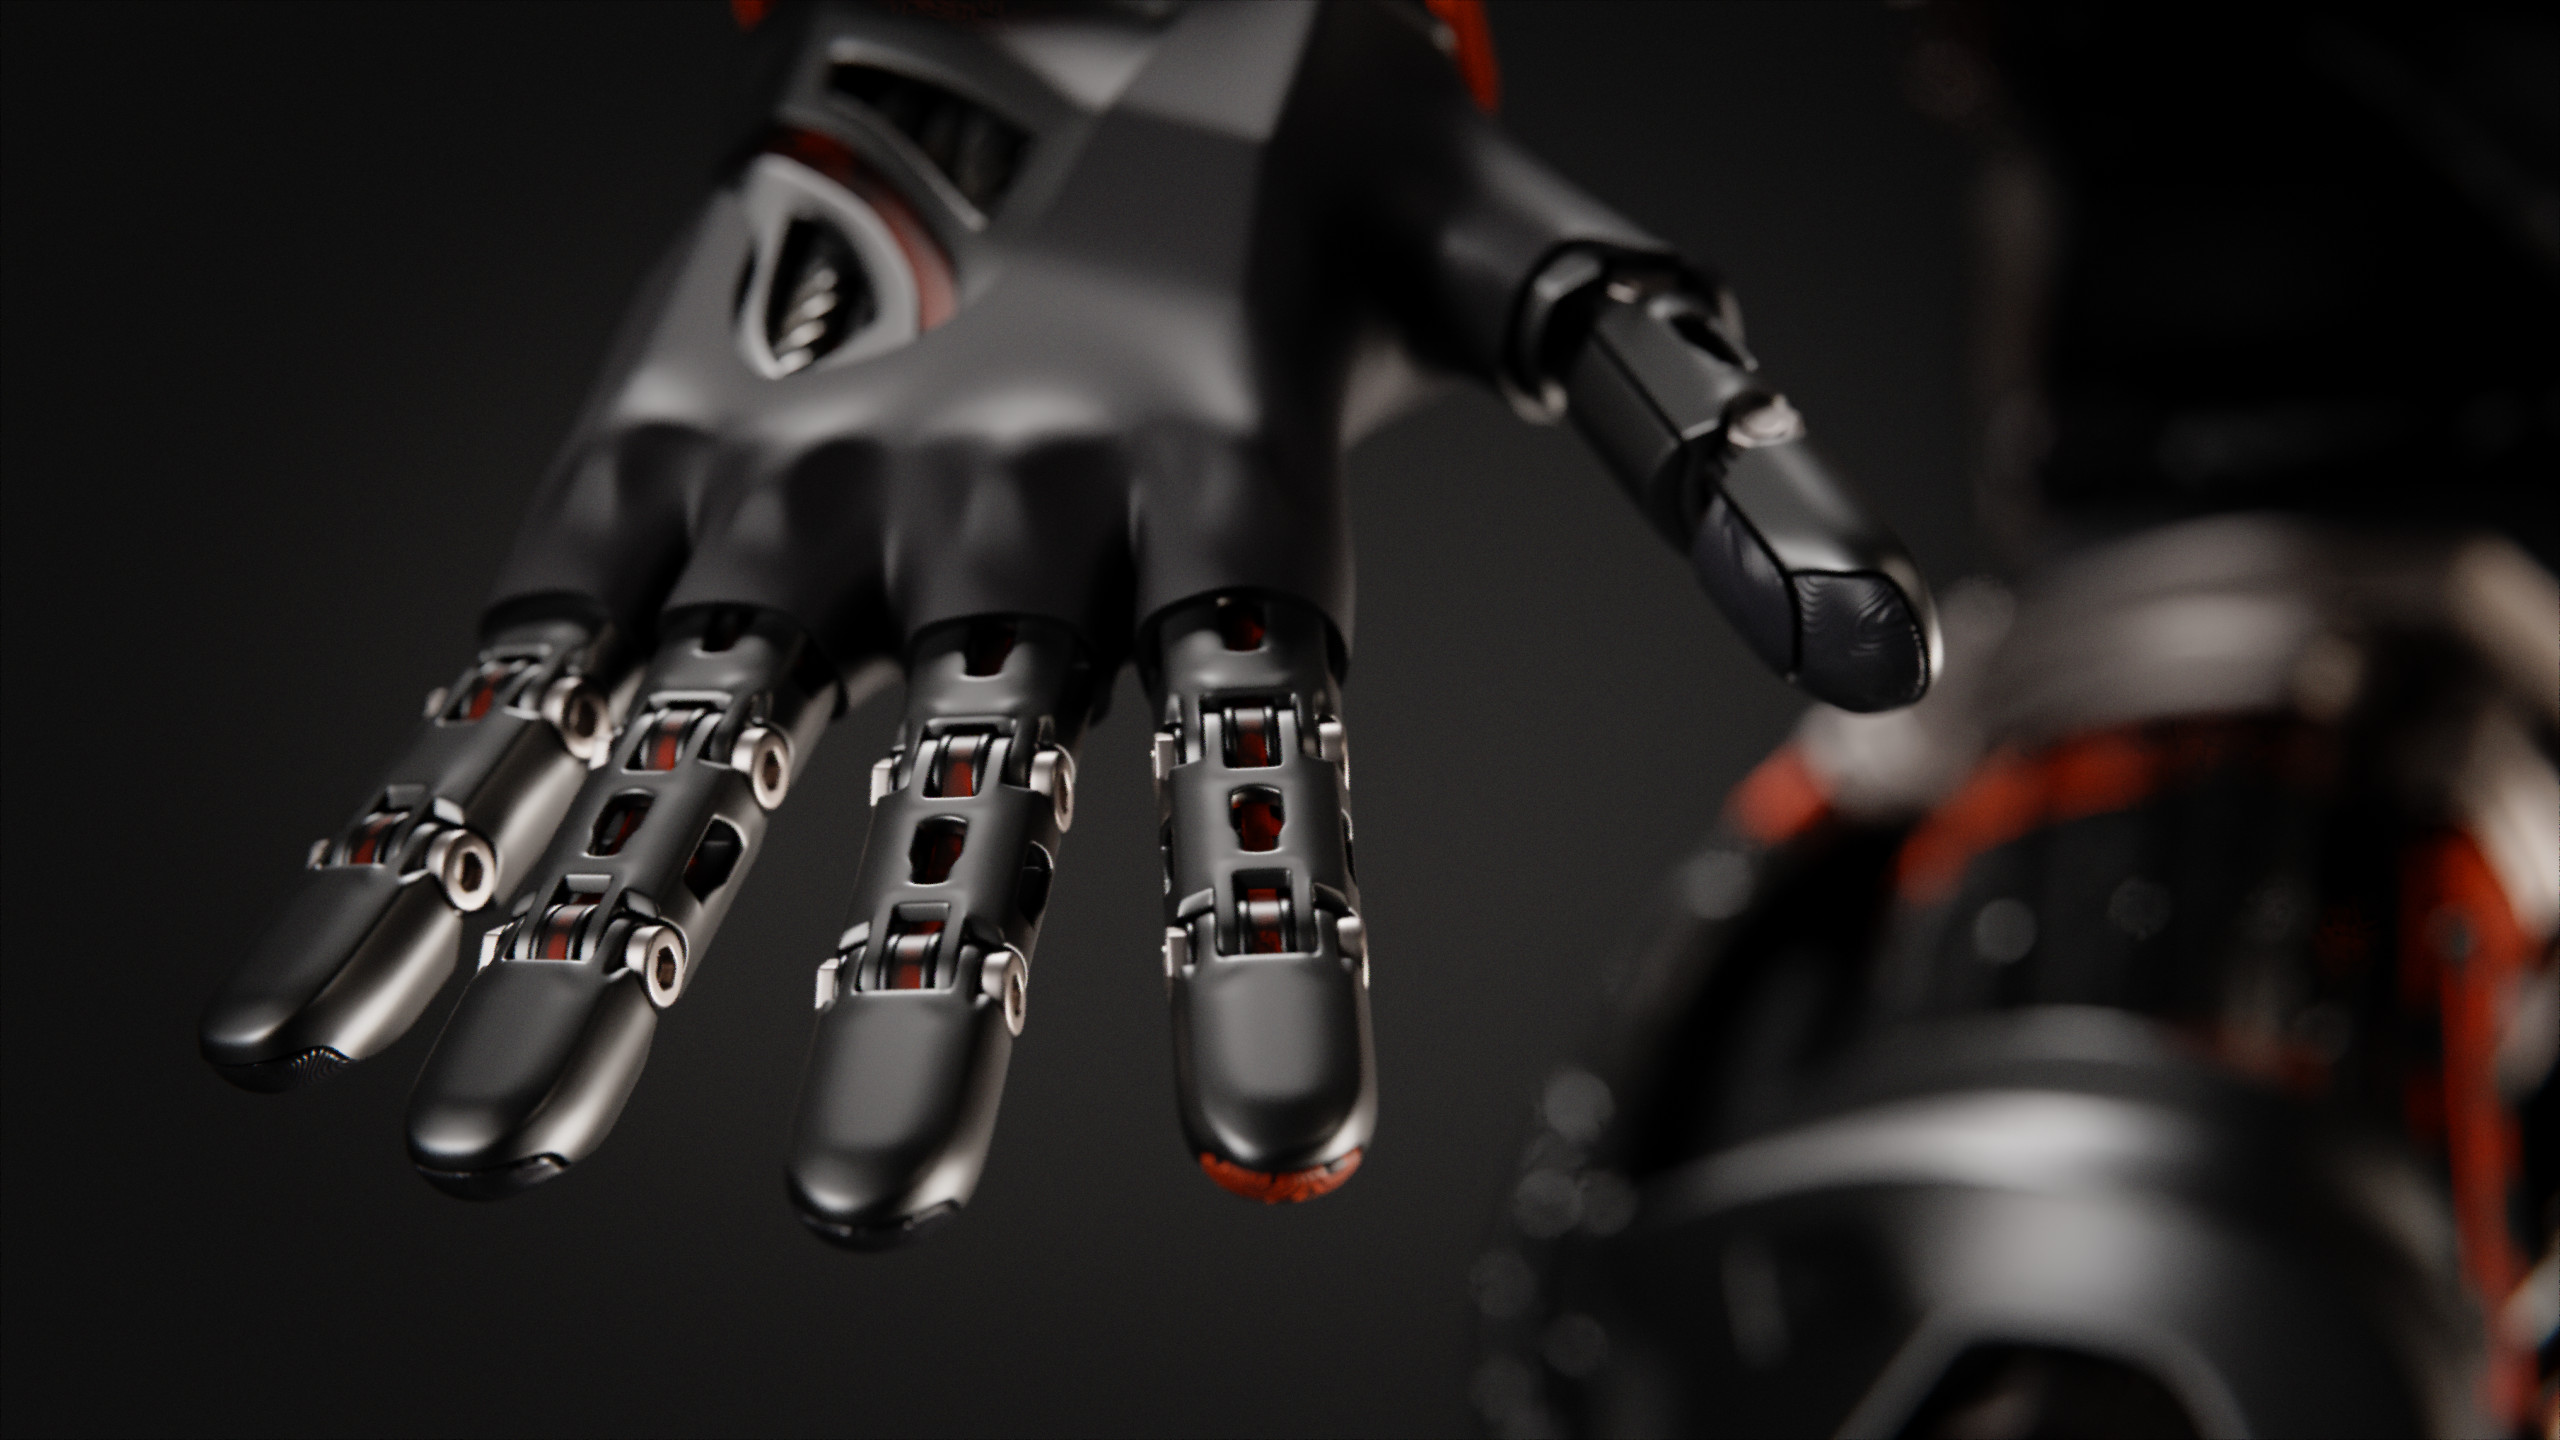
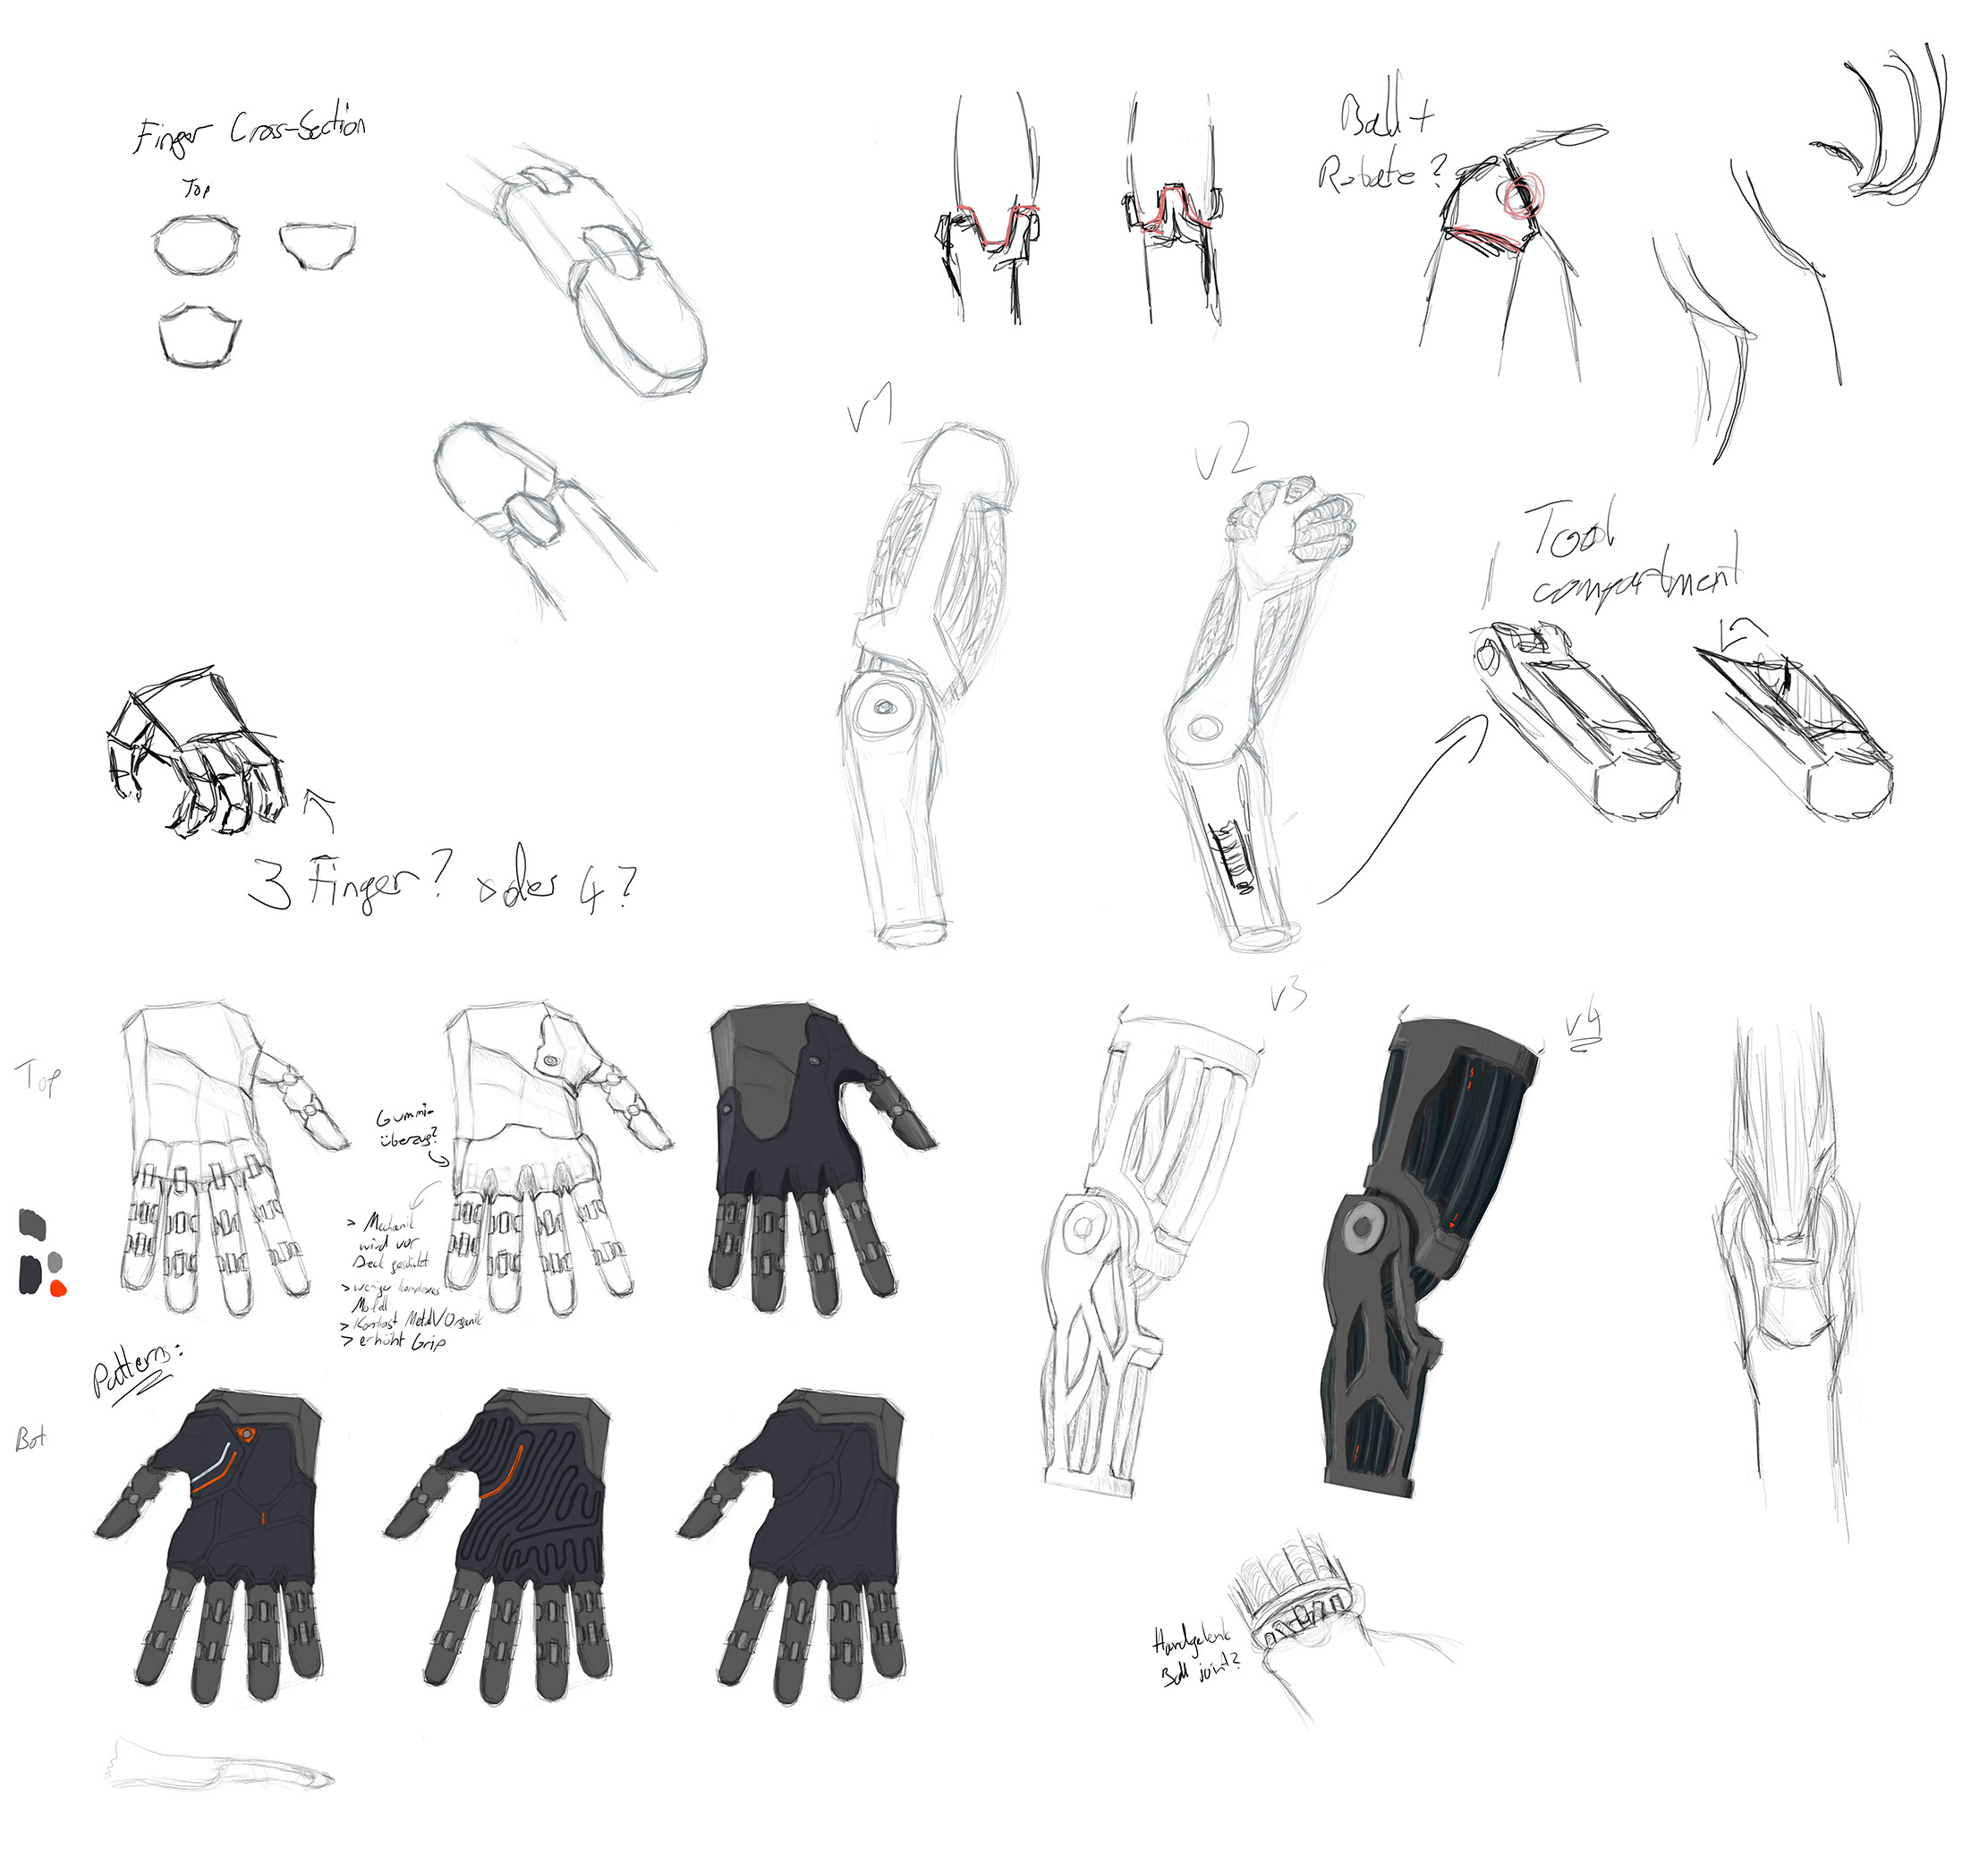
The cybernetic hand features a rubber grip area on the palm and on the palmar side of the fingers. The hand structure itself is also flexible in the palm area, allowing for a better grip.
The ribs are moved onto the outside to serve both as a structural piece, as well as protection for the muslces and organs beneath. To make the long metal pieces less wobbly, they are connected to each other with flexible connections.
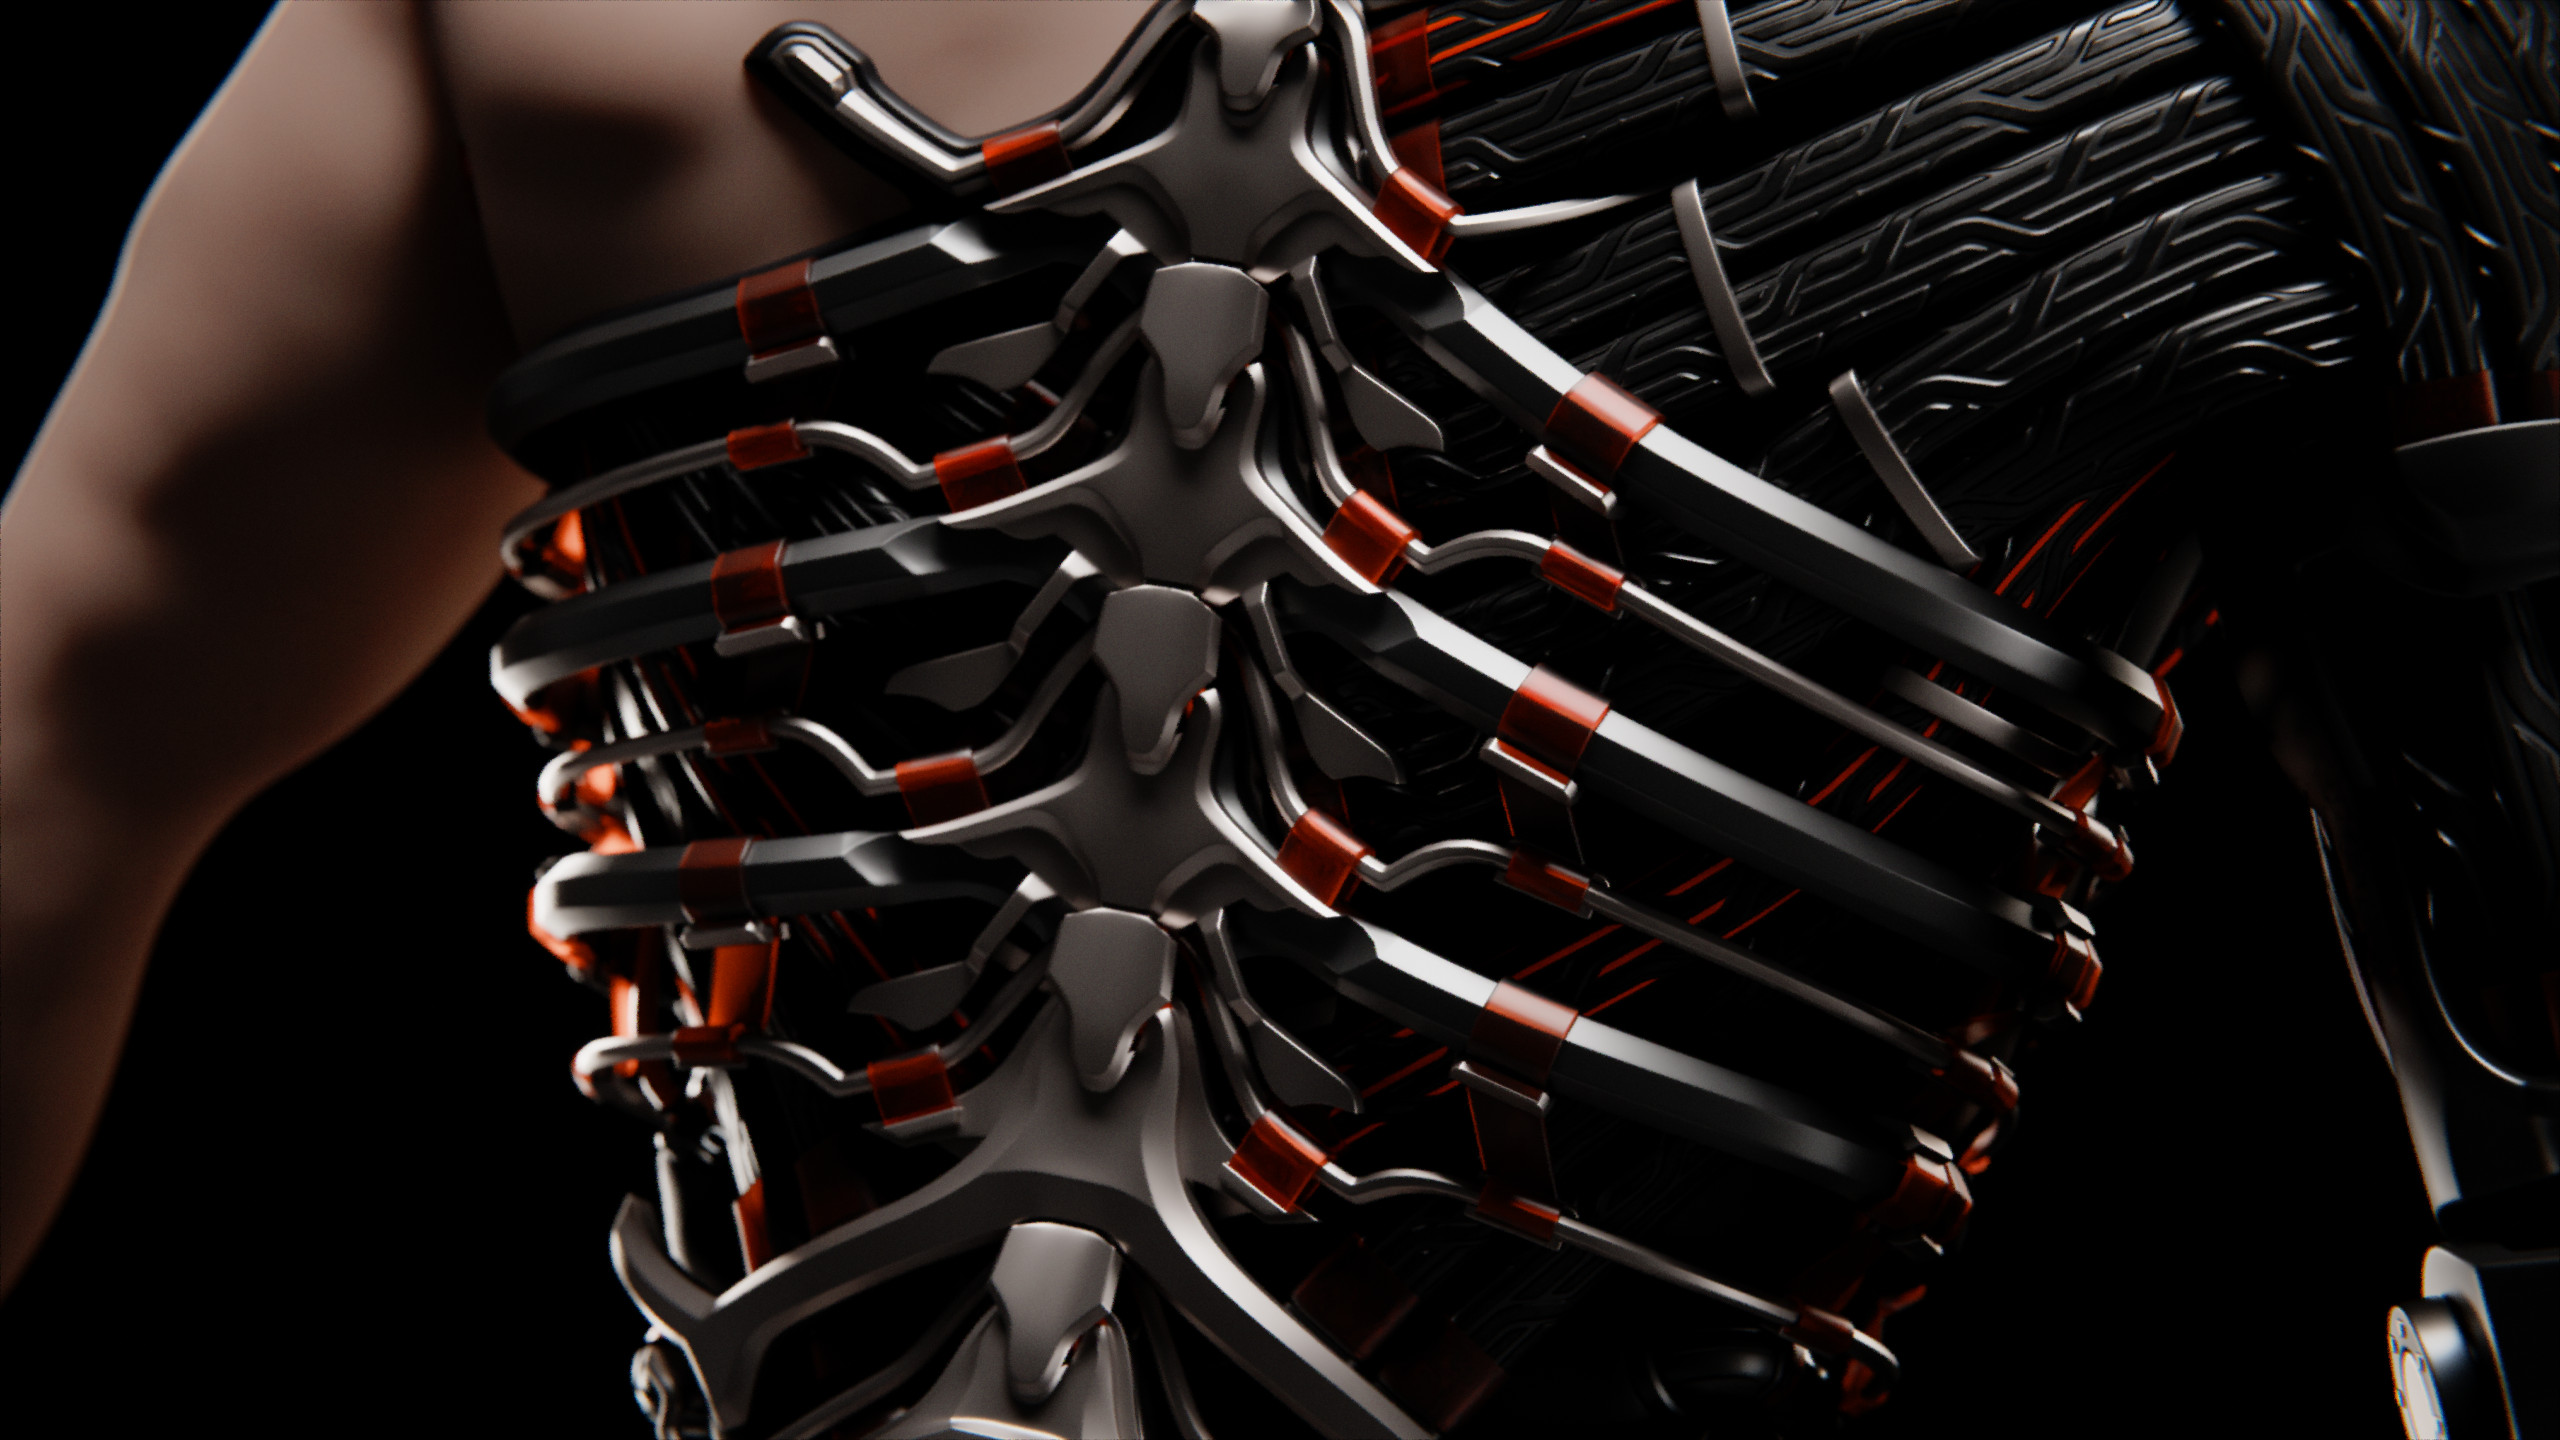
Just like the human spine, this cybernetic equivalent is the structural and neurological backbone of the body. It is segmented, with the segments changing size depending on their position on the spine. Cables connect the entire structure. The connection points are covered by metal flaps that stick to the segment below through magnets.
May 2025
Refined concepts
During the end of the semester I unified all the previous tests and ideas into a new full concept sketch of the body and prensented it to the class. This would serve as my guide for the next couple of months, where I would be modelling the rest of the body.
The first sketch from March 2025
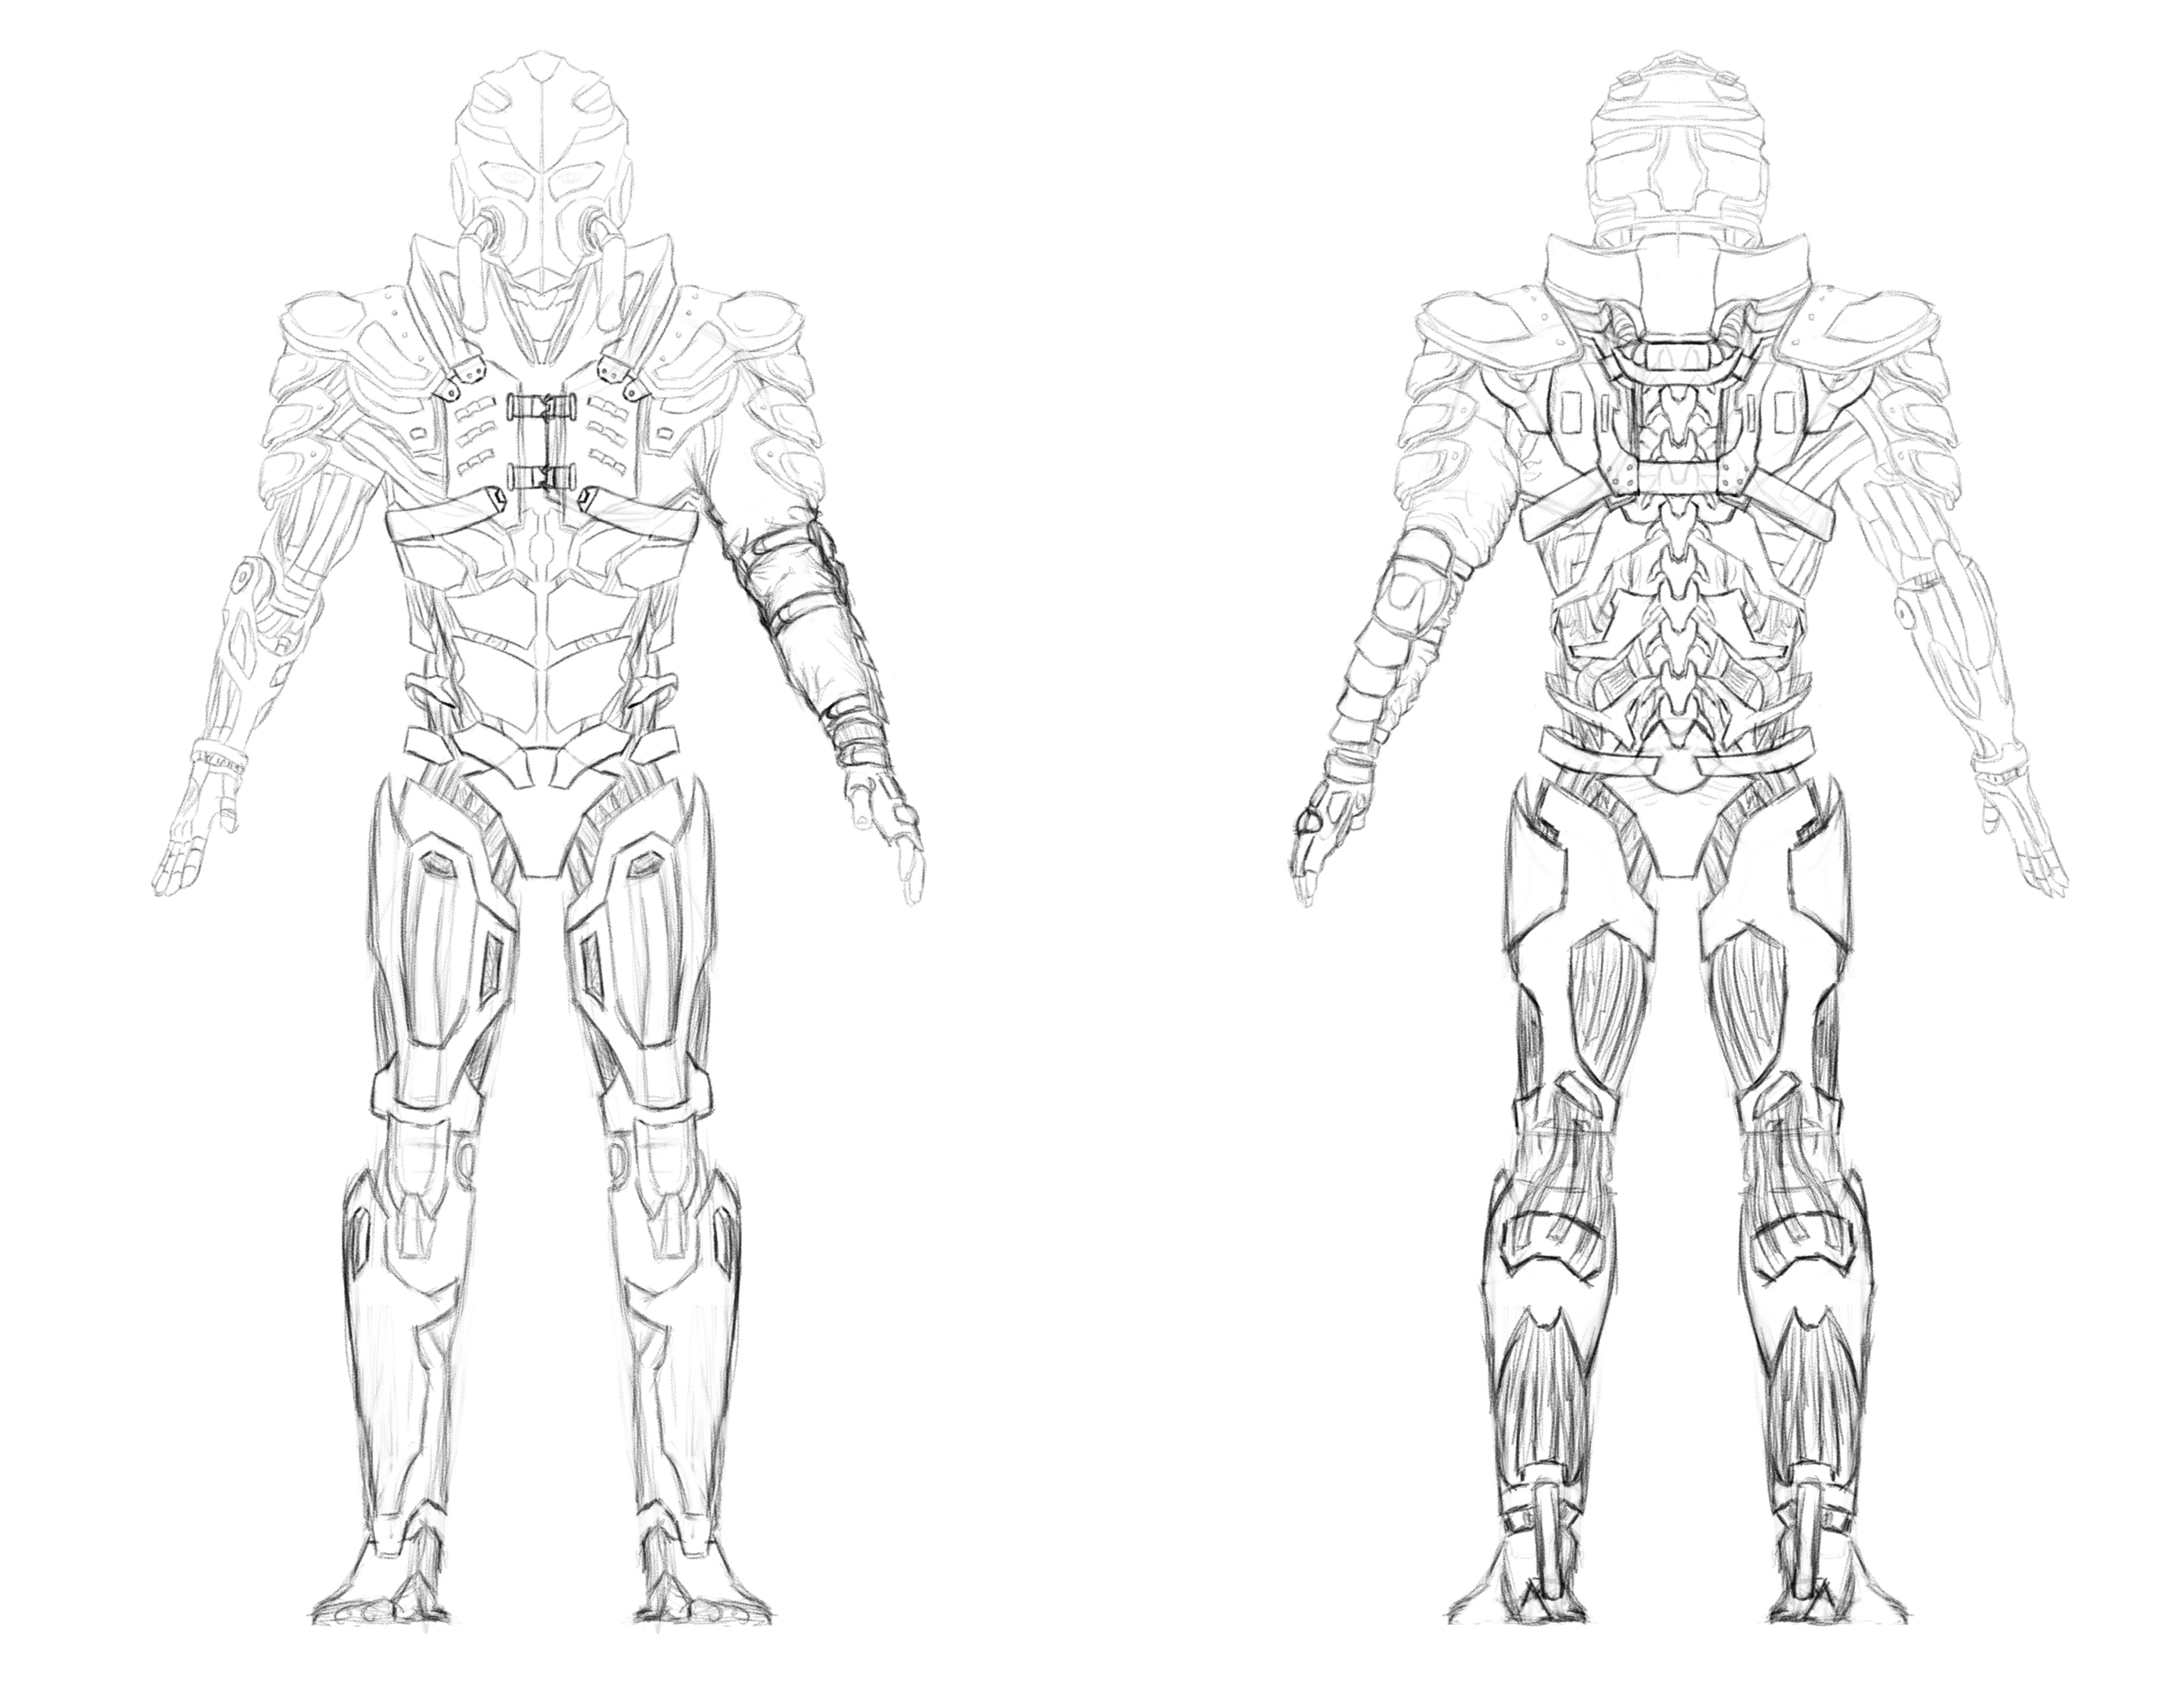
A revised full body sketch mid May 2025
May 2025
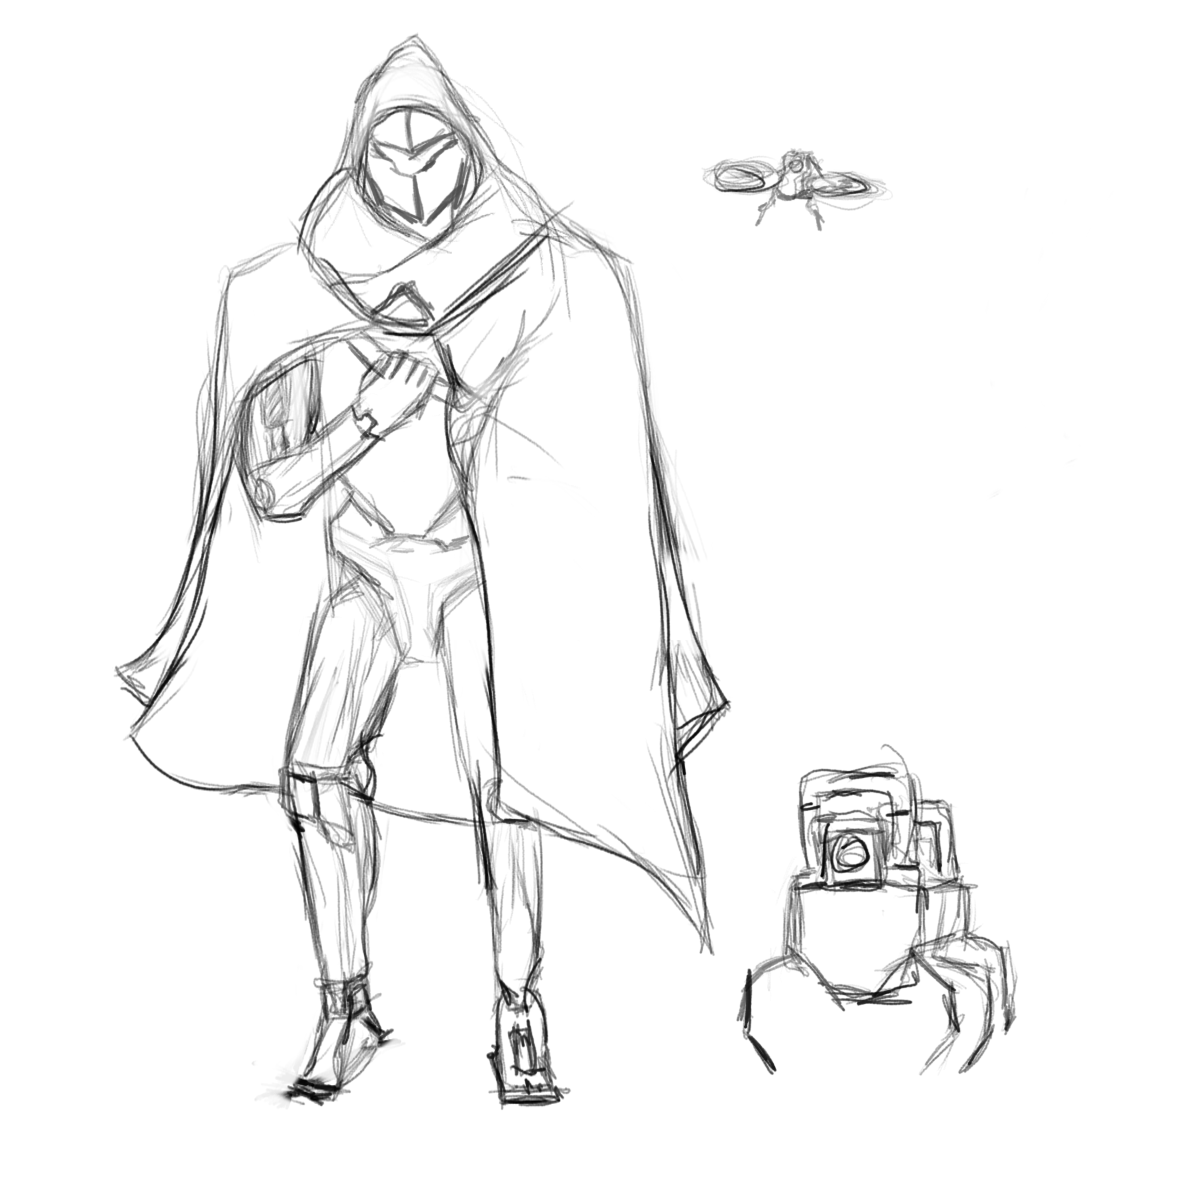
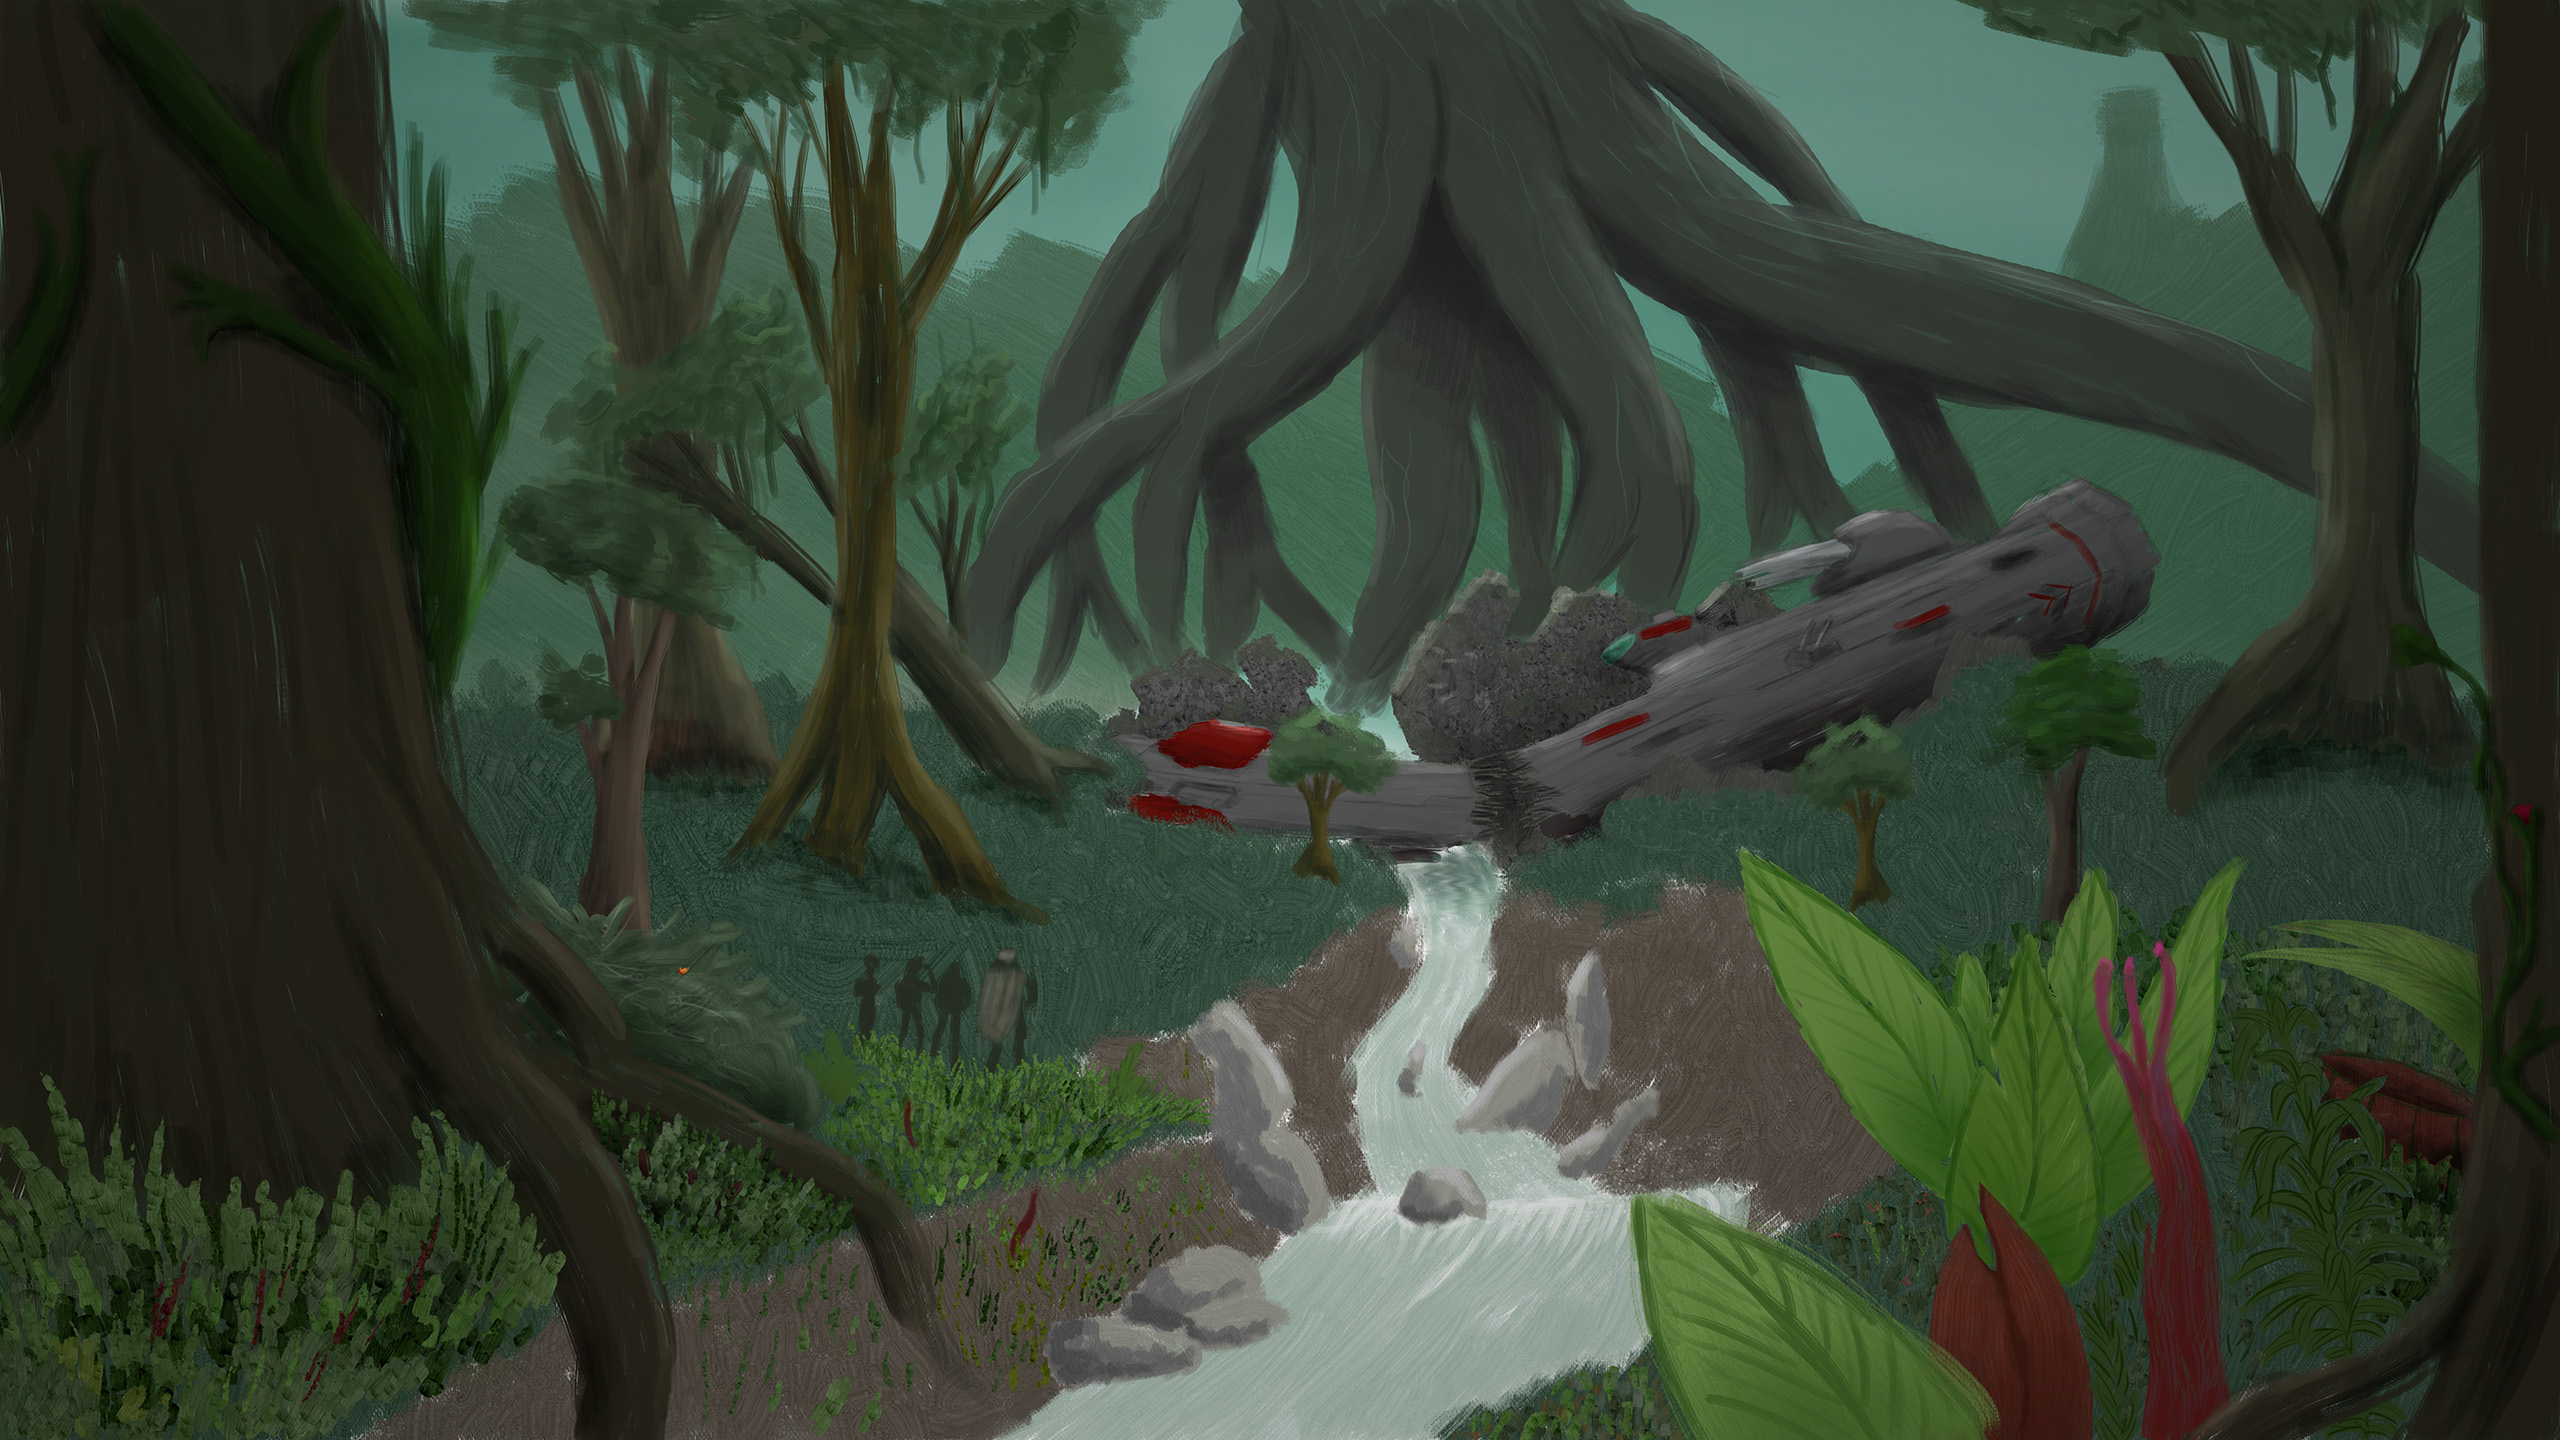
Worldbuilding
Along with the development of the model, the world in which the character slots in plays a big role and flows into its design. To not re-invent the wheel completely and with time constraints in mind for a solo project like this, I have decided to slot this story into the Endless-Universe by Amplitude Studios, specifically inspired by their game "Endless Space 2".
To visualize some of the writing, I have started creating a map of the galaxy and concept art of a crucial story location. Although certainly not my core strength, it is fun trying my hand more in digital painting and illustration.
April 2025
First Modelling steps
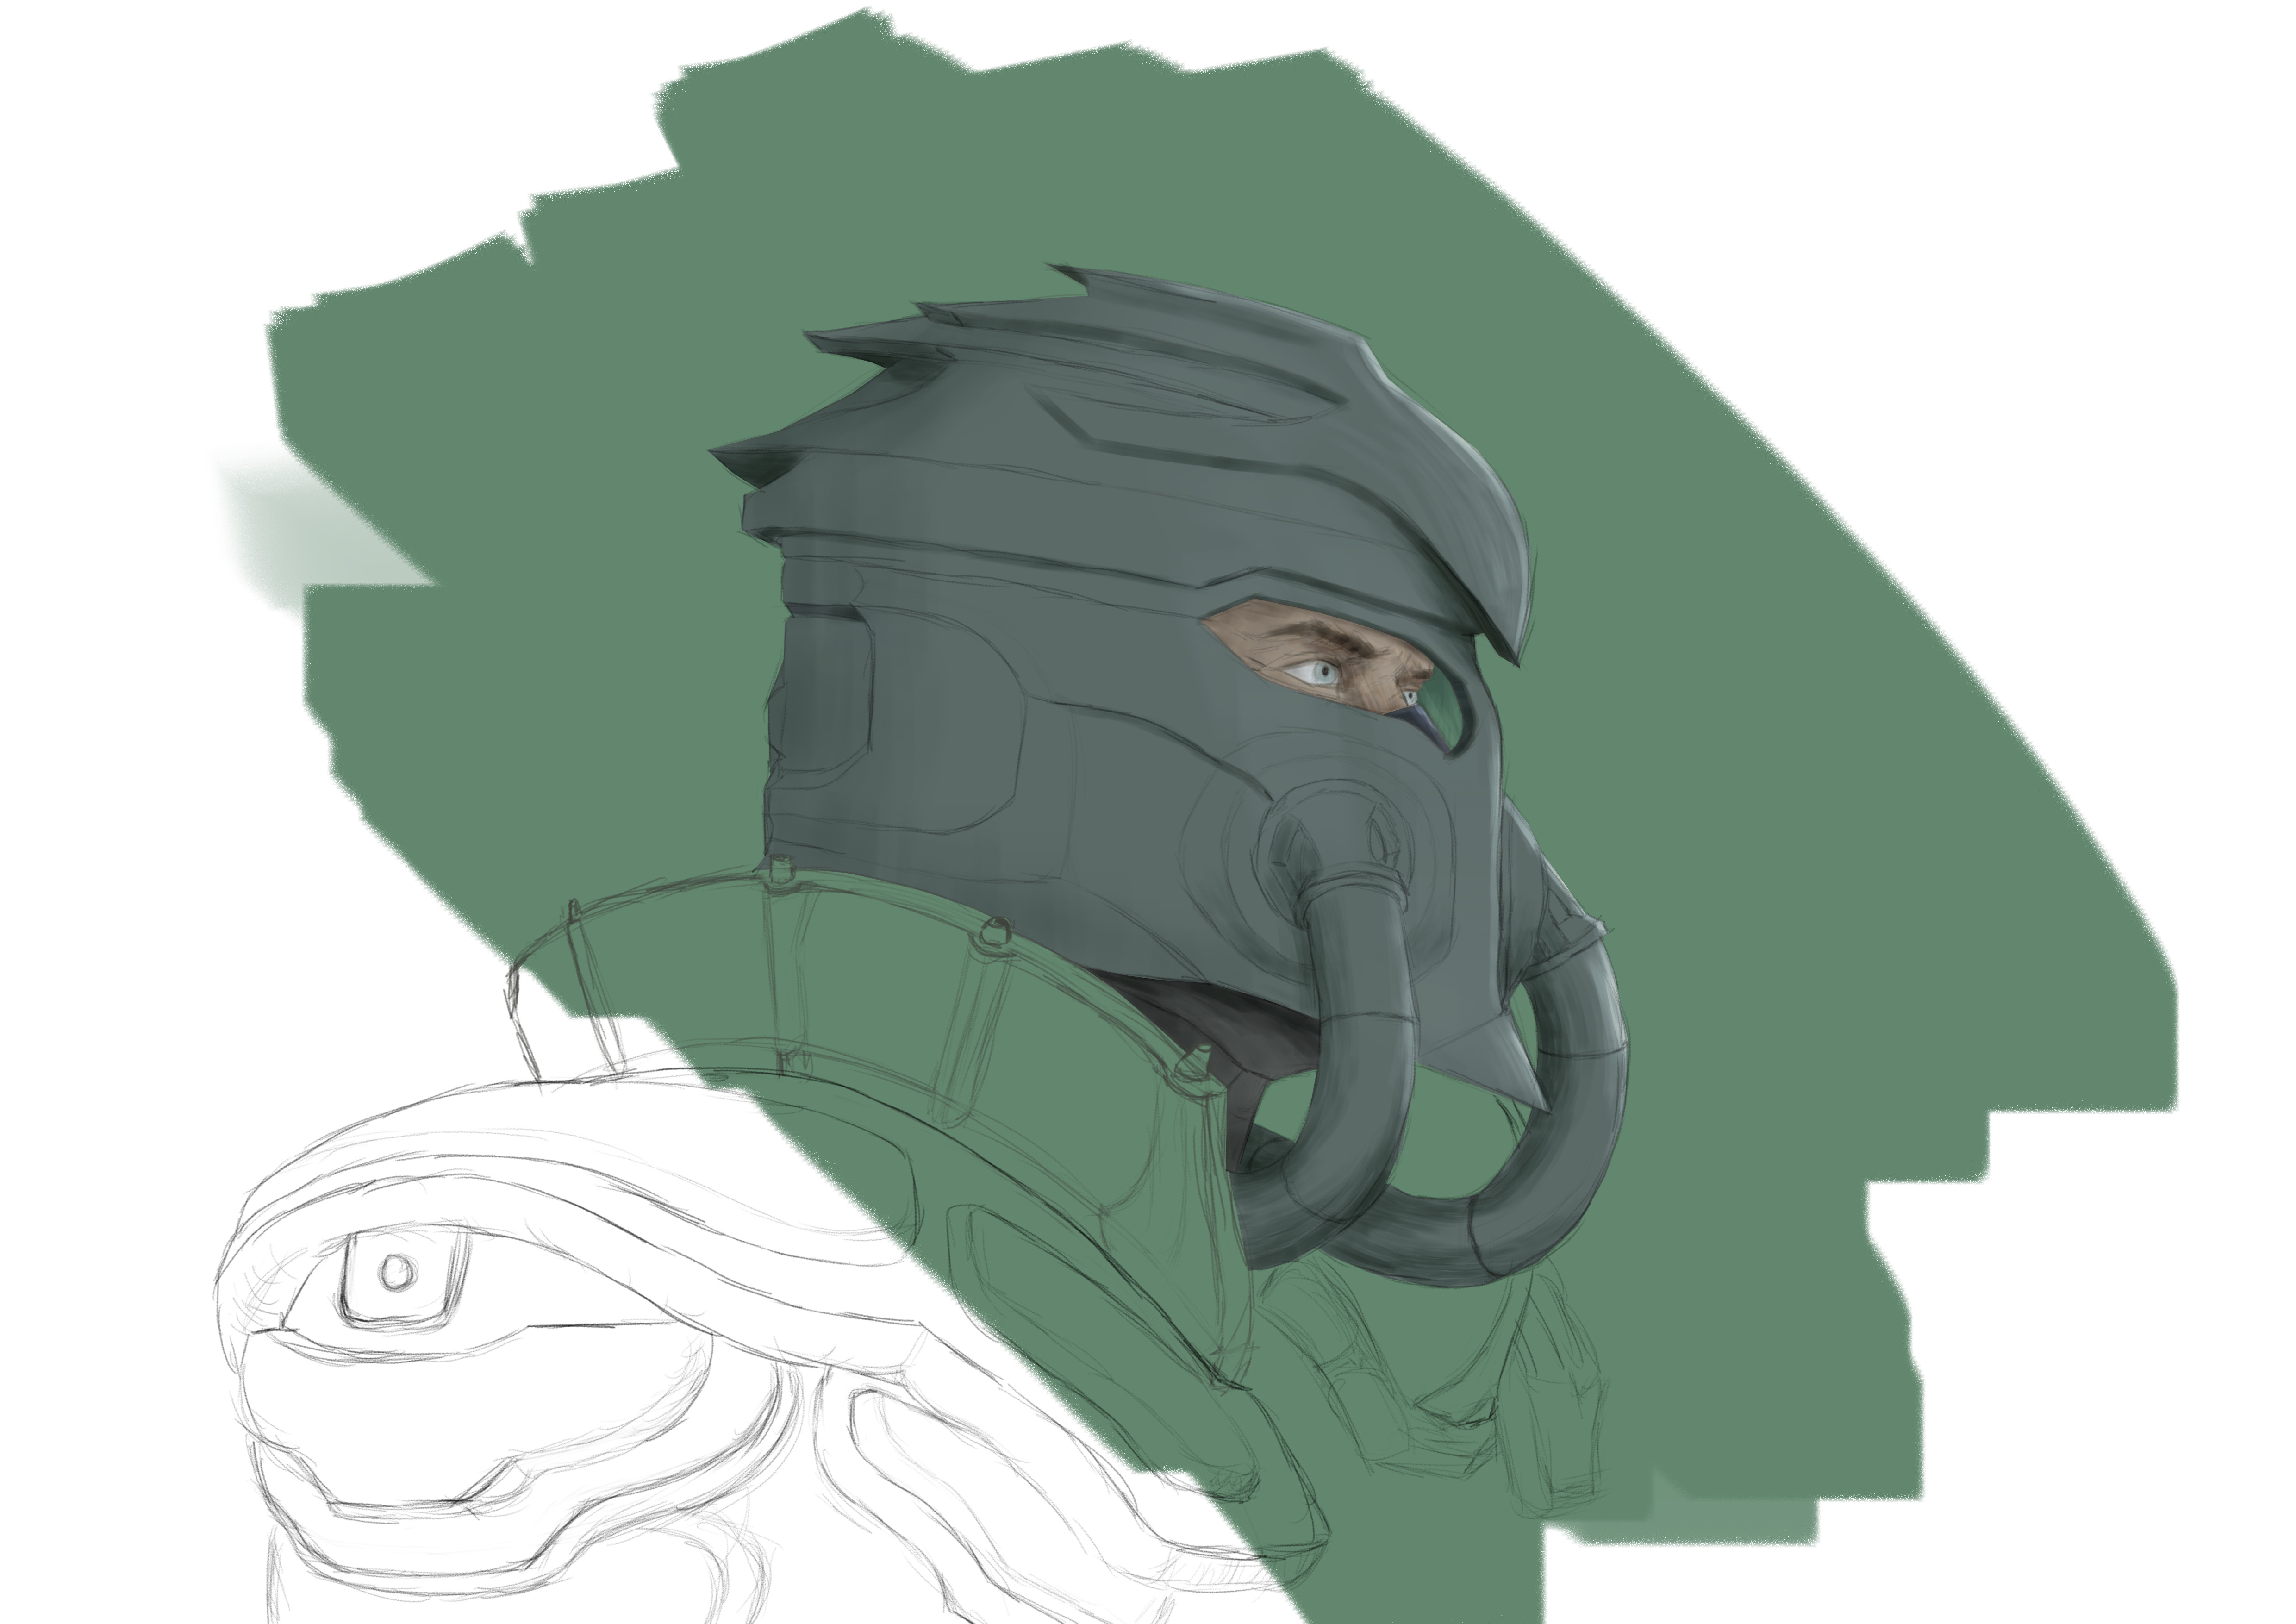
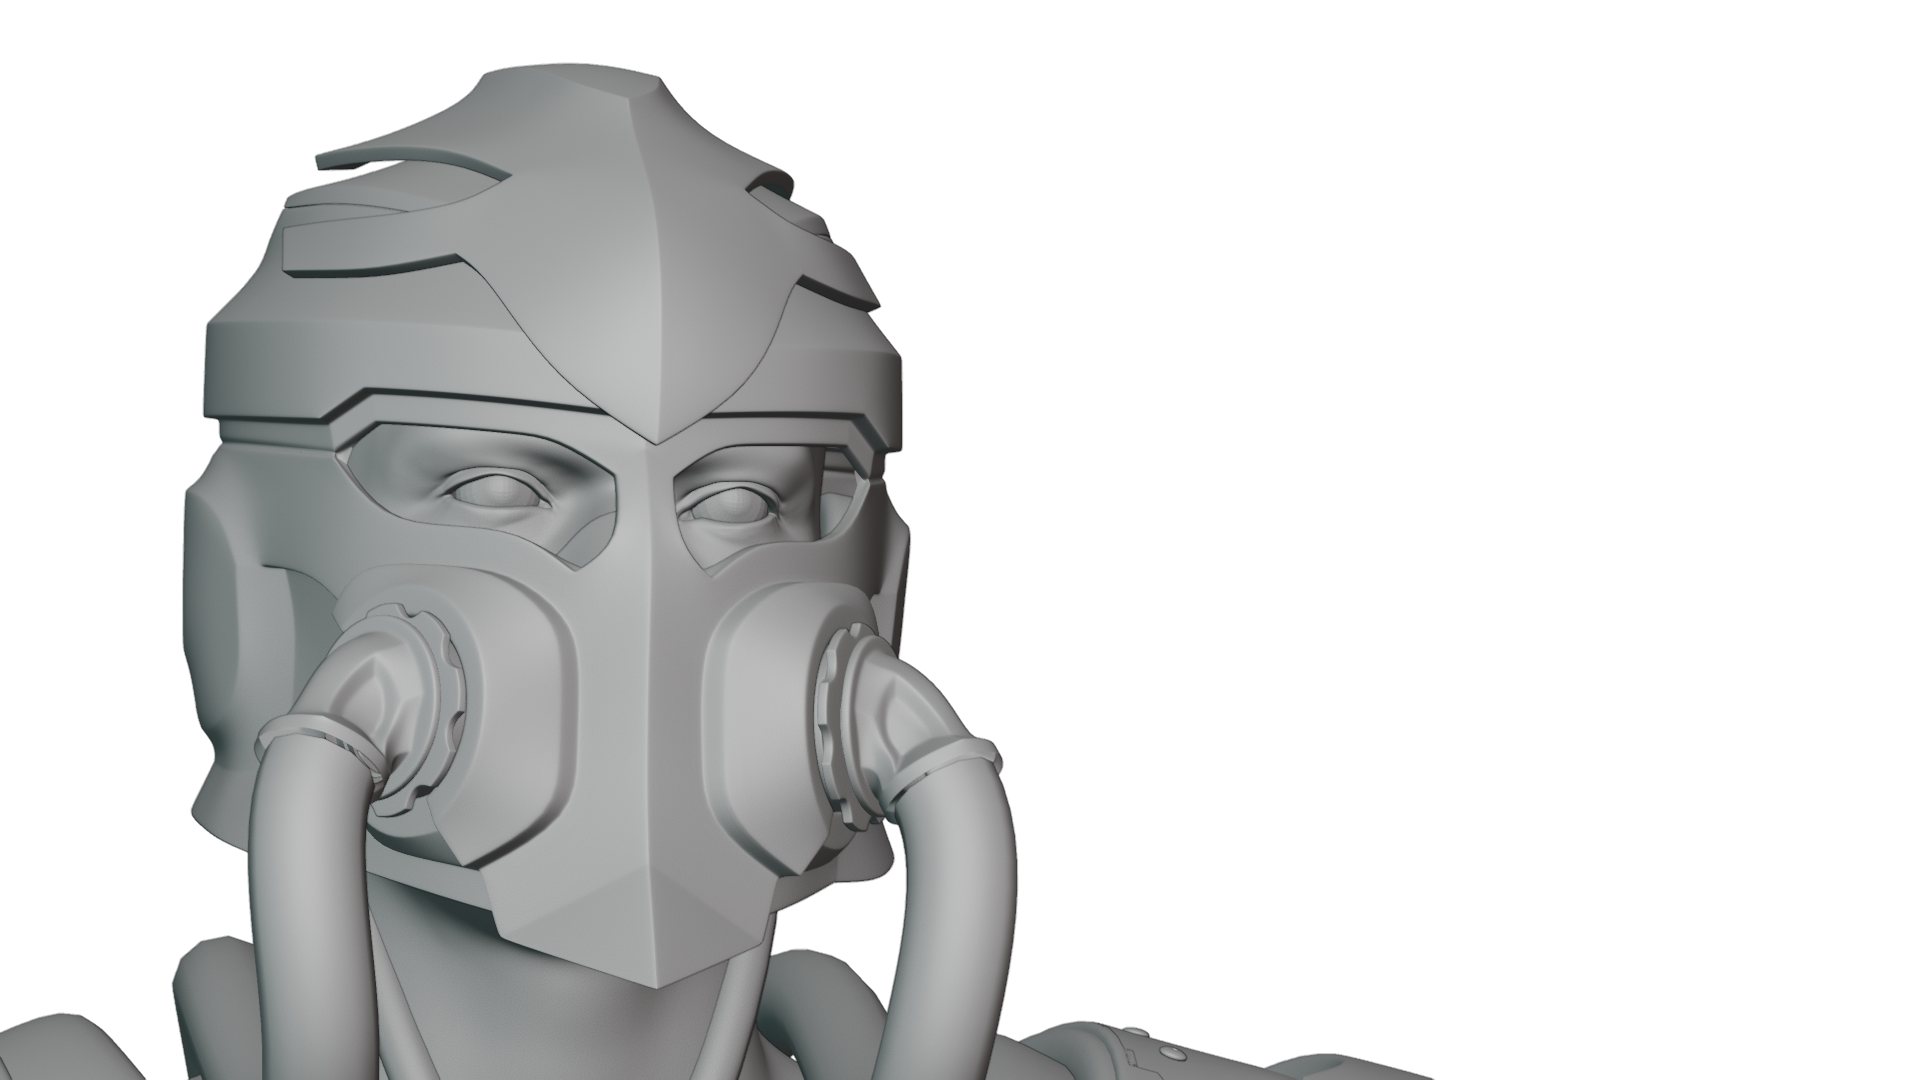
As I had also started with the head (or later helmet) in the concepting phase, I also started modelling here first, establishing the overall design language, defined by swooping lines and accentuated by sharp angles.Although not fully modelled yet, the helmet served as a guide for other elements.
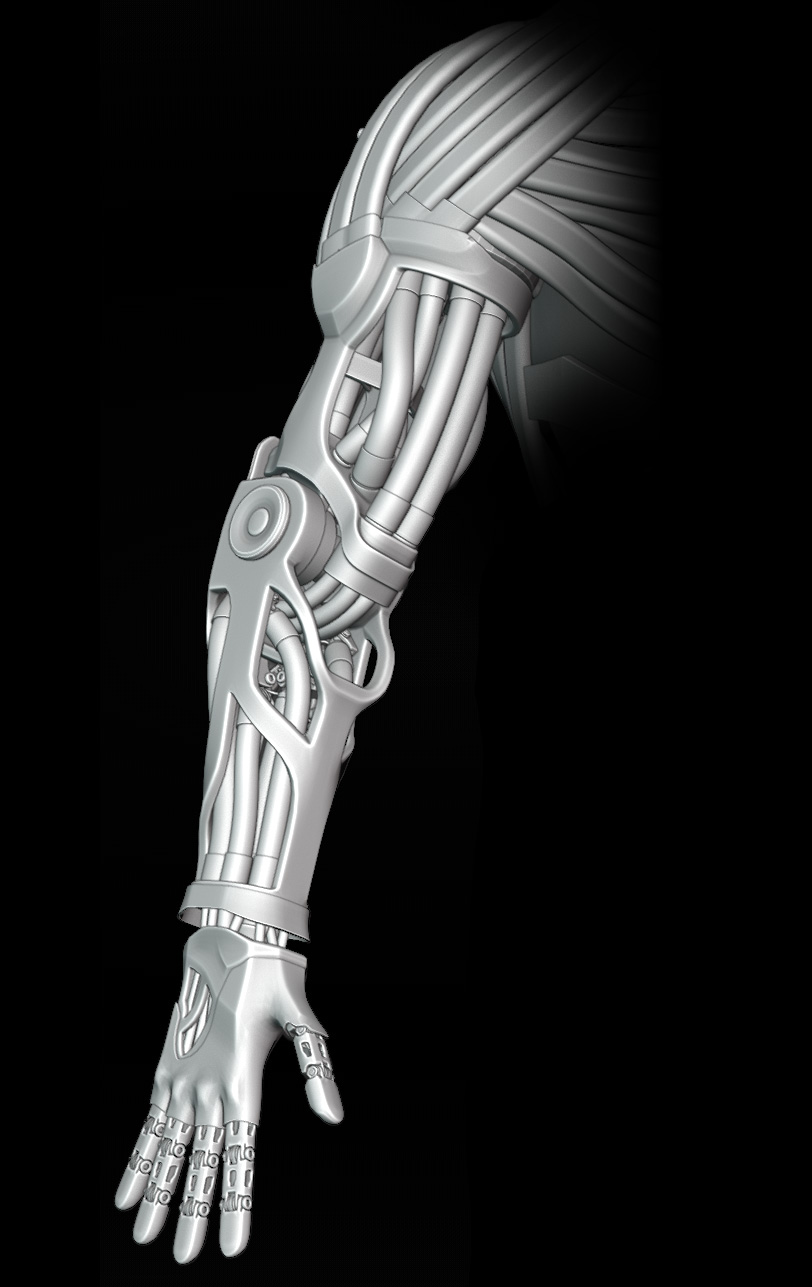
One of these being the robotic arm, along with helmet it would be a visual highlight that the viewer might be drawn to, and so it was important to establish its design. I went through multiple iterations, going back to concepting and taking in feedback. I landed on a bionic approach, where artificial muscles and tendons weave through skeletal metal structures. This design really resonated with me and established the look of the cybernetic parts that were still unmodelled at that point.
April 2025
Cybernetic arm design
With the shift to a more humanoid design came the idea to have the body work similar to human anatomy on more levels than just aesthetics. I started and tested that idea on the arm and hand at first. The concept of artificial muscle structures was developed and finetuned with feedback from students and our professor. I also thought about possible materials and color palettes for the first time.
March 2025
Evolving the idea
After first starts in concepting head shapes for a robot, I switched directions slightly by changing the design to be a heavily augmented human instead. I felt that I was more in touch with that idea and it played better with the mixing in of clothing elements.
March 2025
First Steps
At the start of the year I thought about doing a robot as my design, since I have not built a mechanical character before. I wanted to combine mechanical elements with organic elements like cloth. I was considering a wide range of shapes and ideas, even thinking about not designing a character at all and developing a vehicle design. With feedback from my professor and the class, I followed through with a two-legged robot concept at first.