Thunderbolt and Lightning
"Project Shattered Skies" is my working title for a collection of projects that I have on the afterburner since early on in my 3D path. These projects have long since served as my training grounds, where I constantly try out new techniques and push my skills to the next level. All of the things in this collection are tied together by my love for "Ace Combat" and aviation in general. While life and other projects pop up and take up my most of my time, every now and again I come back to tinker and improve upon what mostly started it all.
Time frame
2019 – today
Software
Blender
Substance Painter
Illustrator
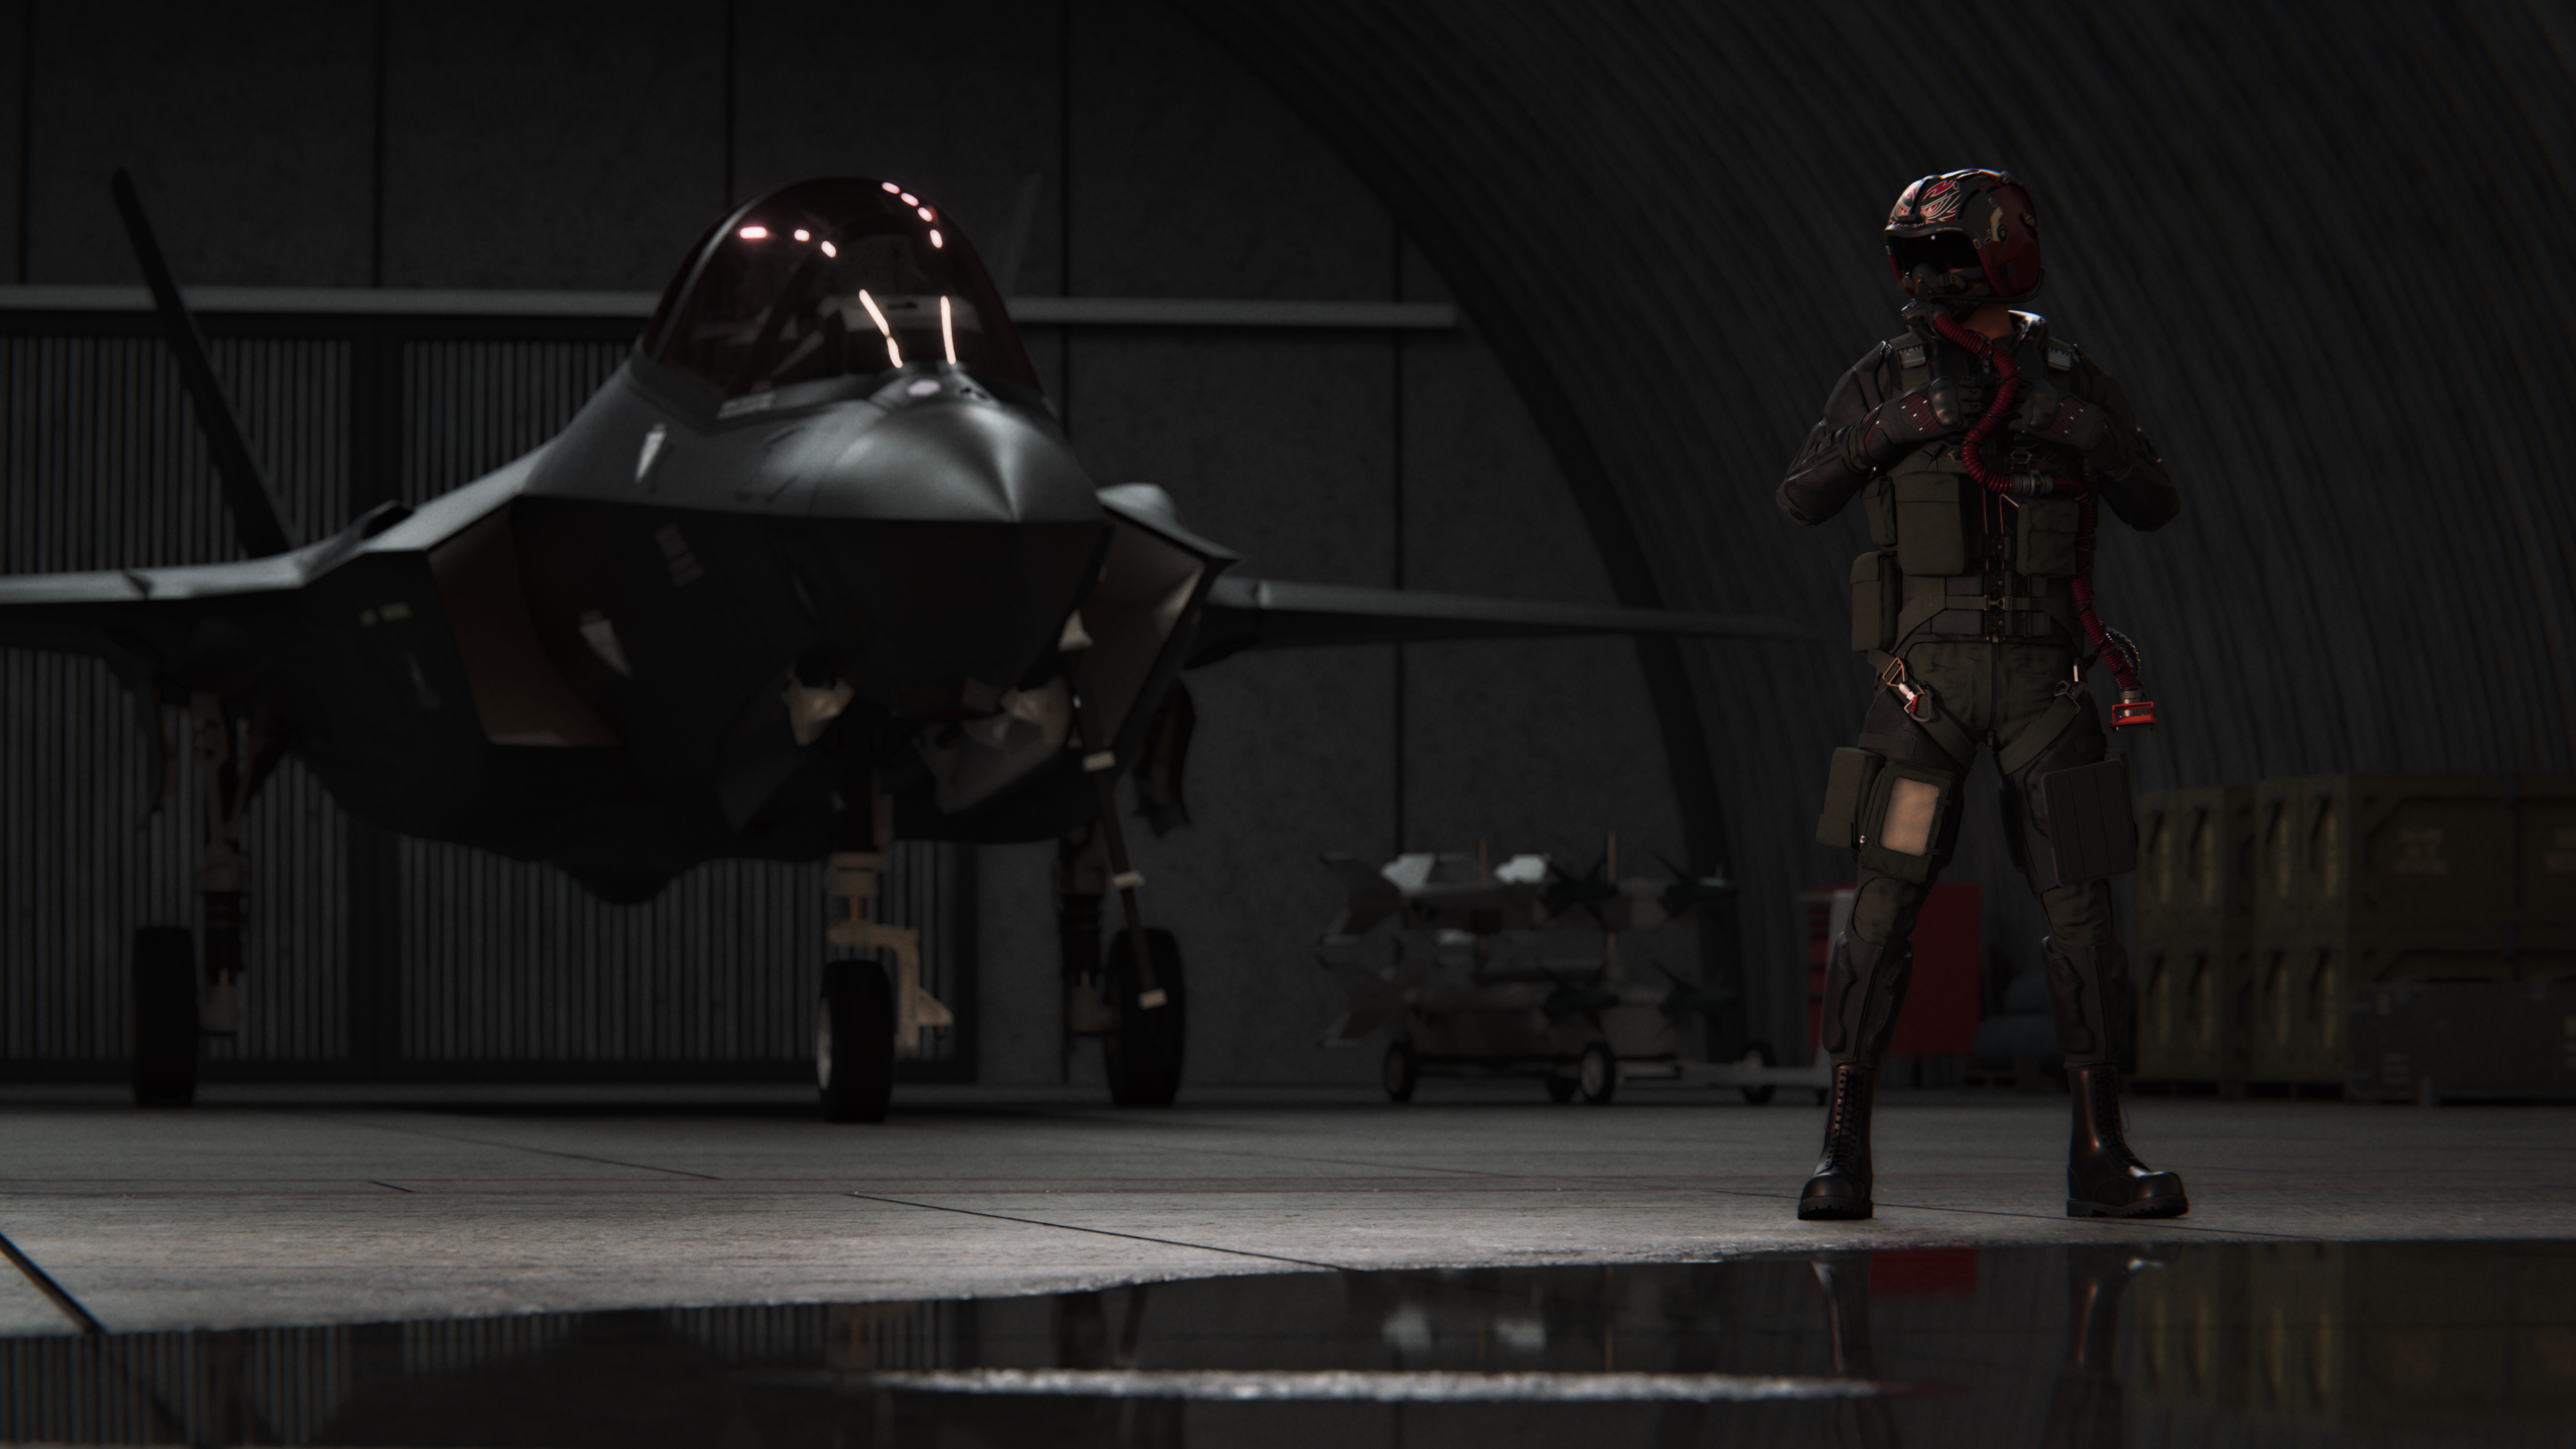
The center piece
The main project around which this all started is this F-35. I wanted to make a fictional 2-seater variant to see what that could look like. A lot of the time spent on this project went into recreating the cockpit to a faithful degree. Finding good references for such a state-of-the-art jet is not easy and since the entire plane was already a fictional variant, I filled in details with my own adaptations when needed.
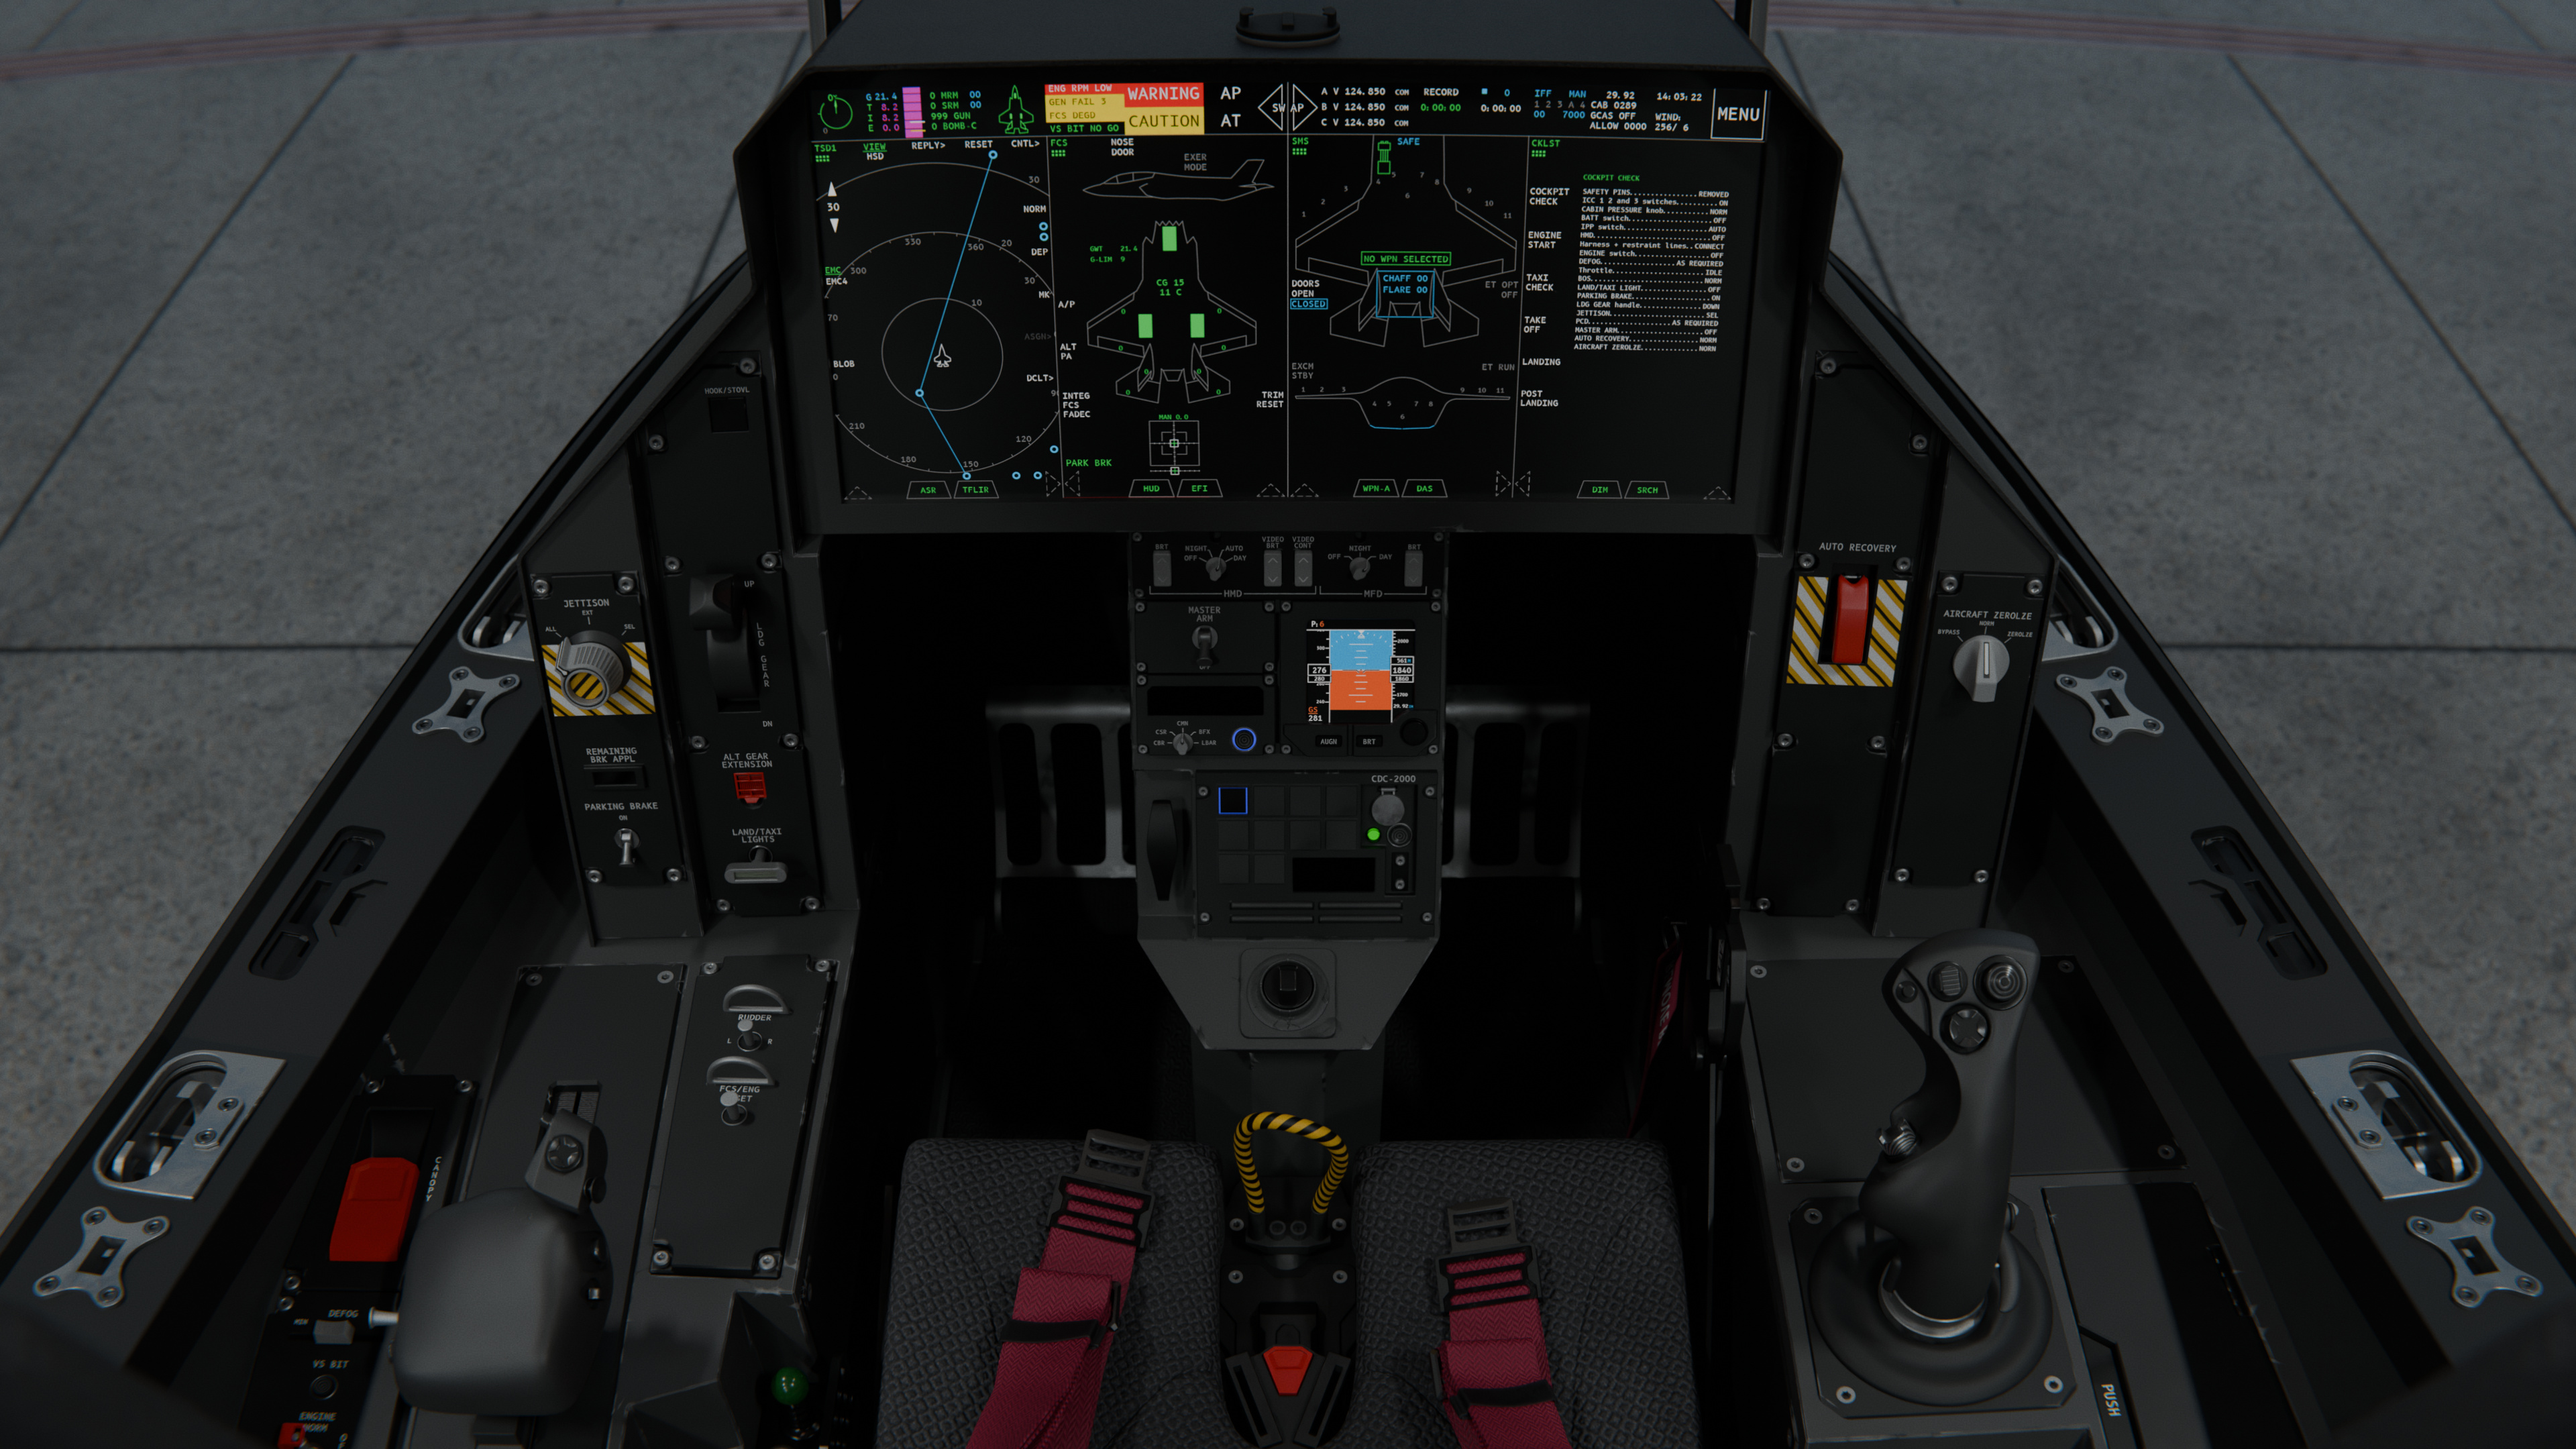
The cockpit of the F-35 is dominated by the touch controlled PCD, or Primary Control Display. It features a highly customizable interface made up of up to 4 columns and a info bar at the top, linking to the most important controls.
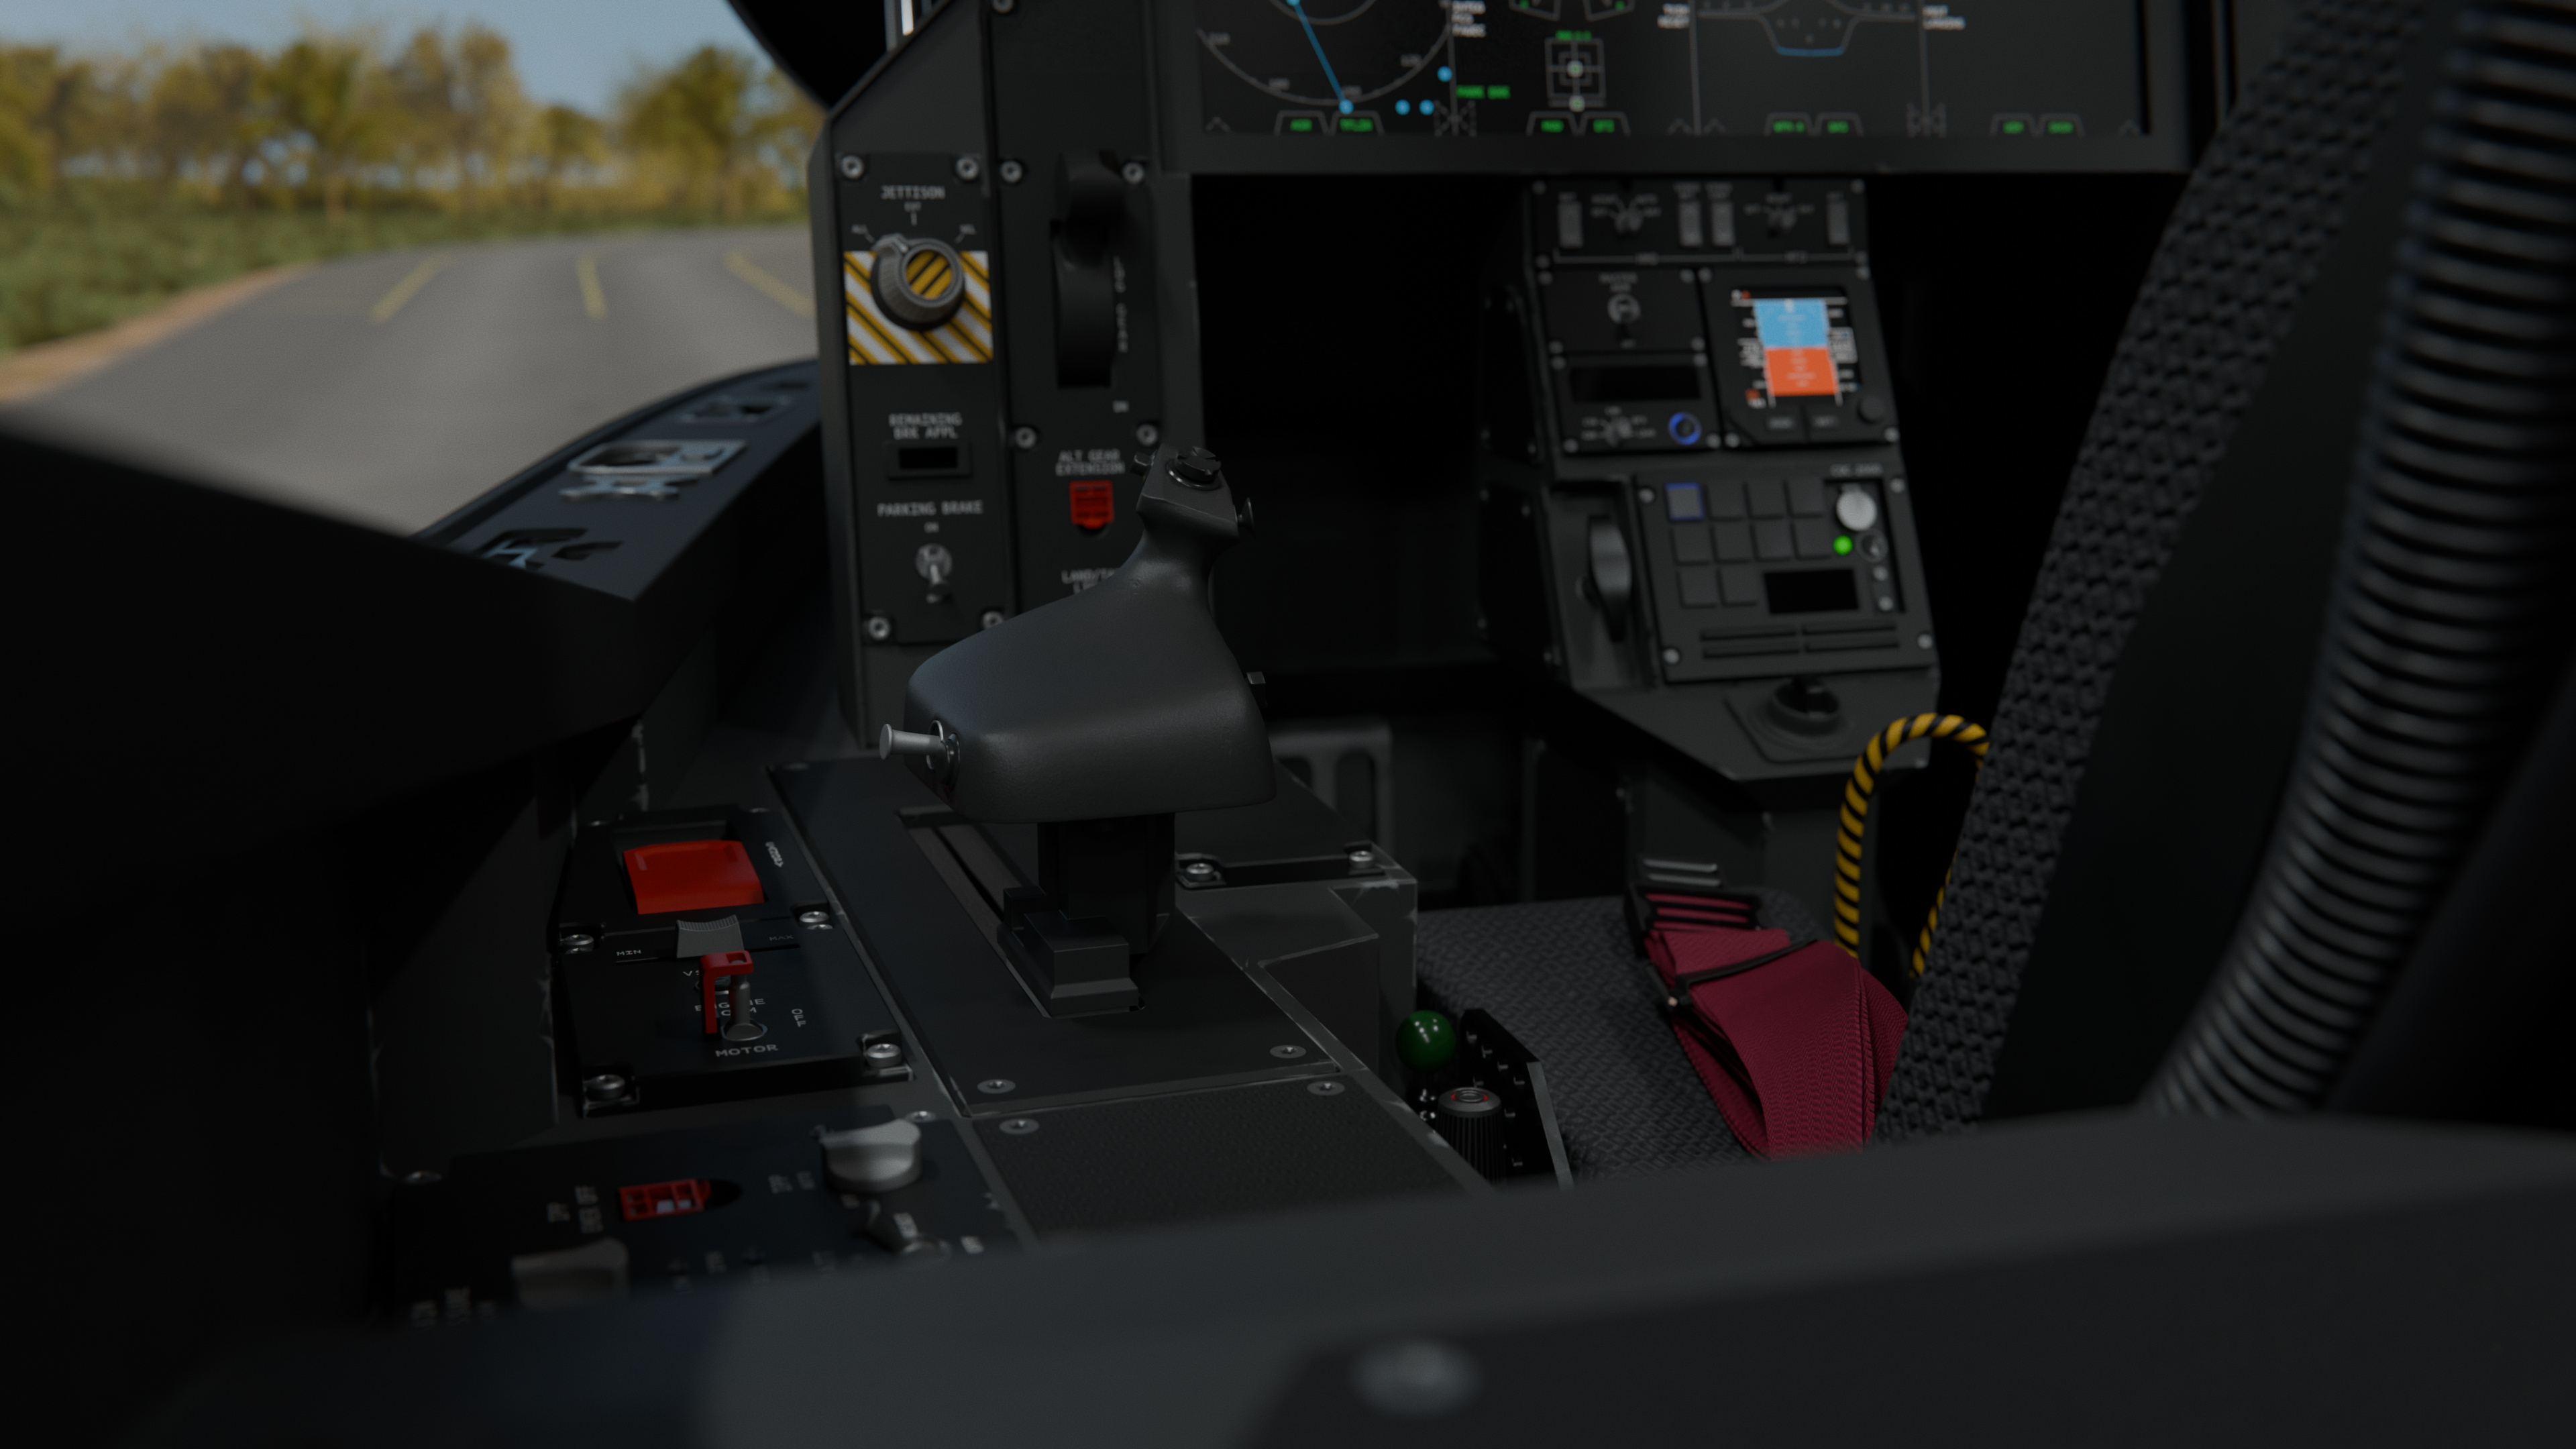
Most essential flight controls like throttle, flight stick and landing gear have their dedicated sections on the dashboard. The altimeter sits centered on the dash, along wtih the master arm switch and controls for the PCD and helmet-mounted HUD.
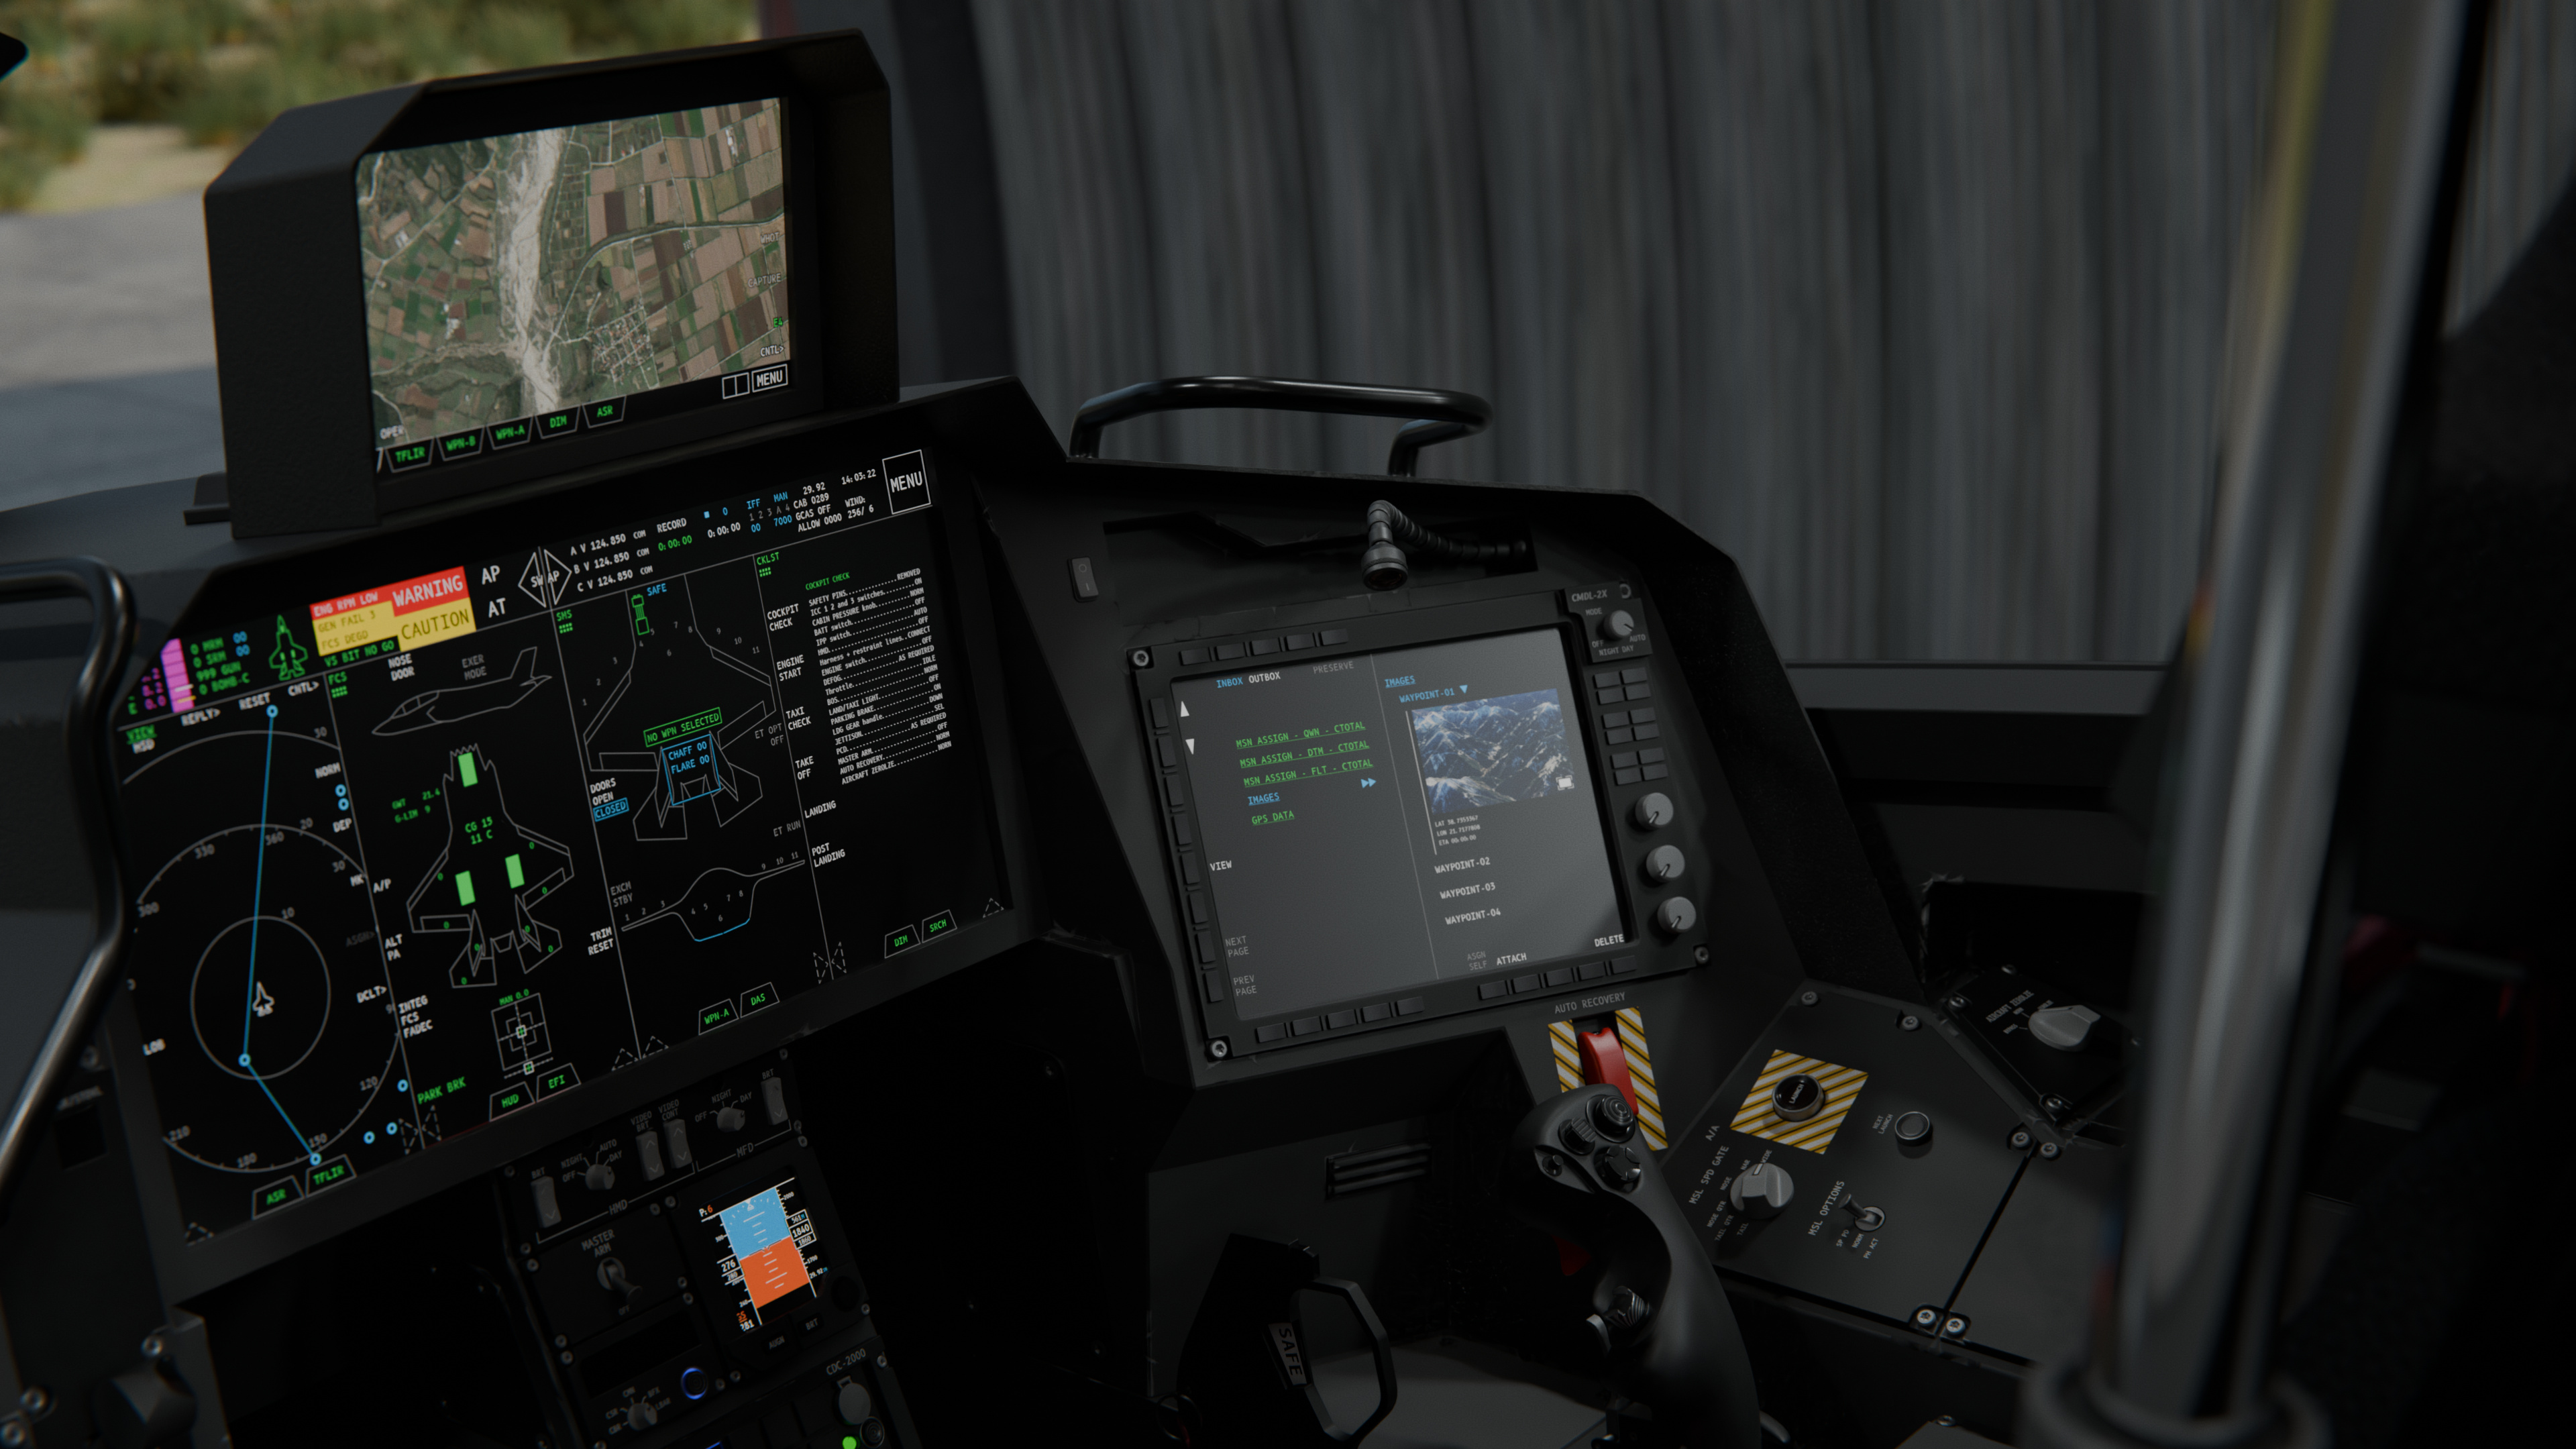
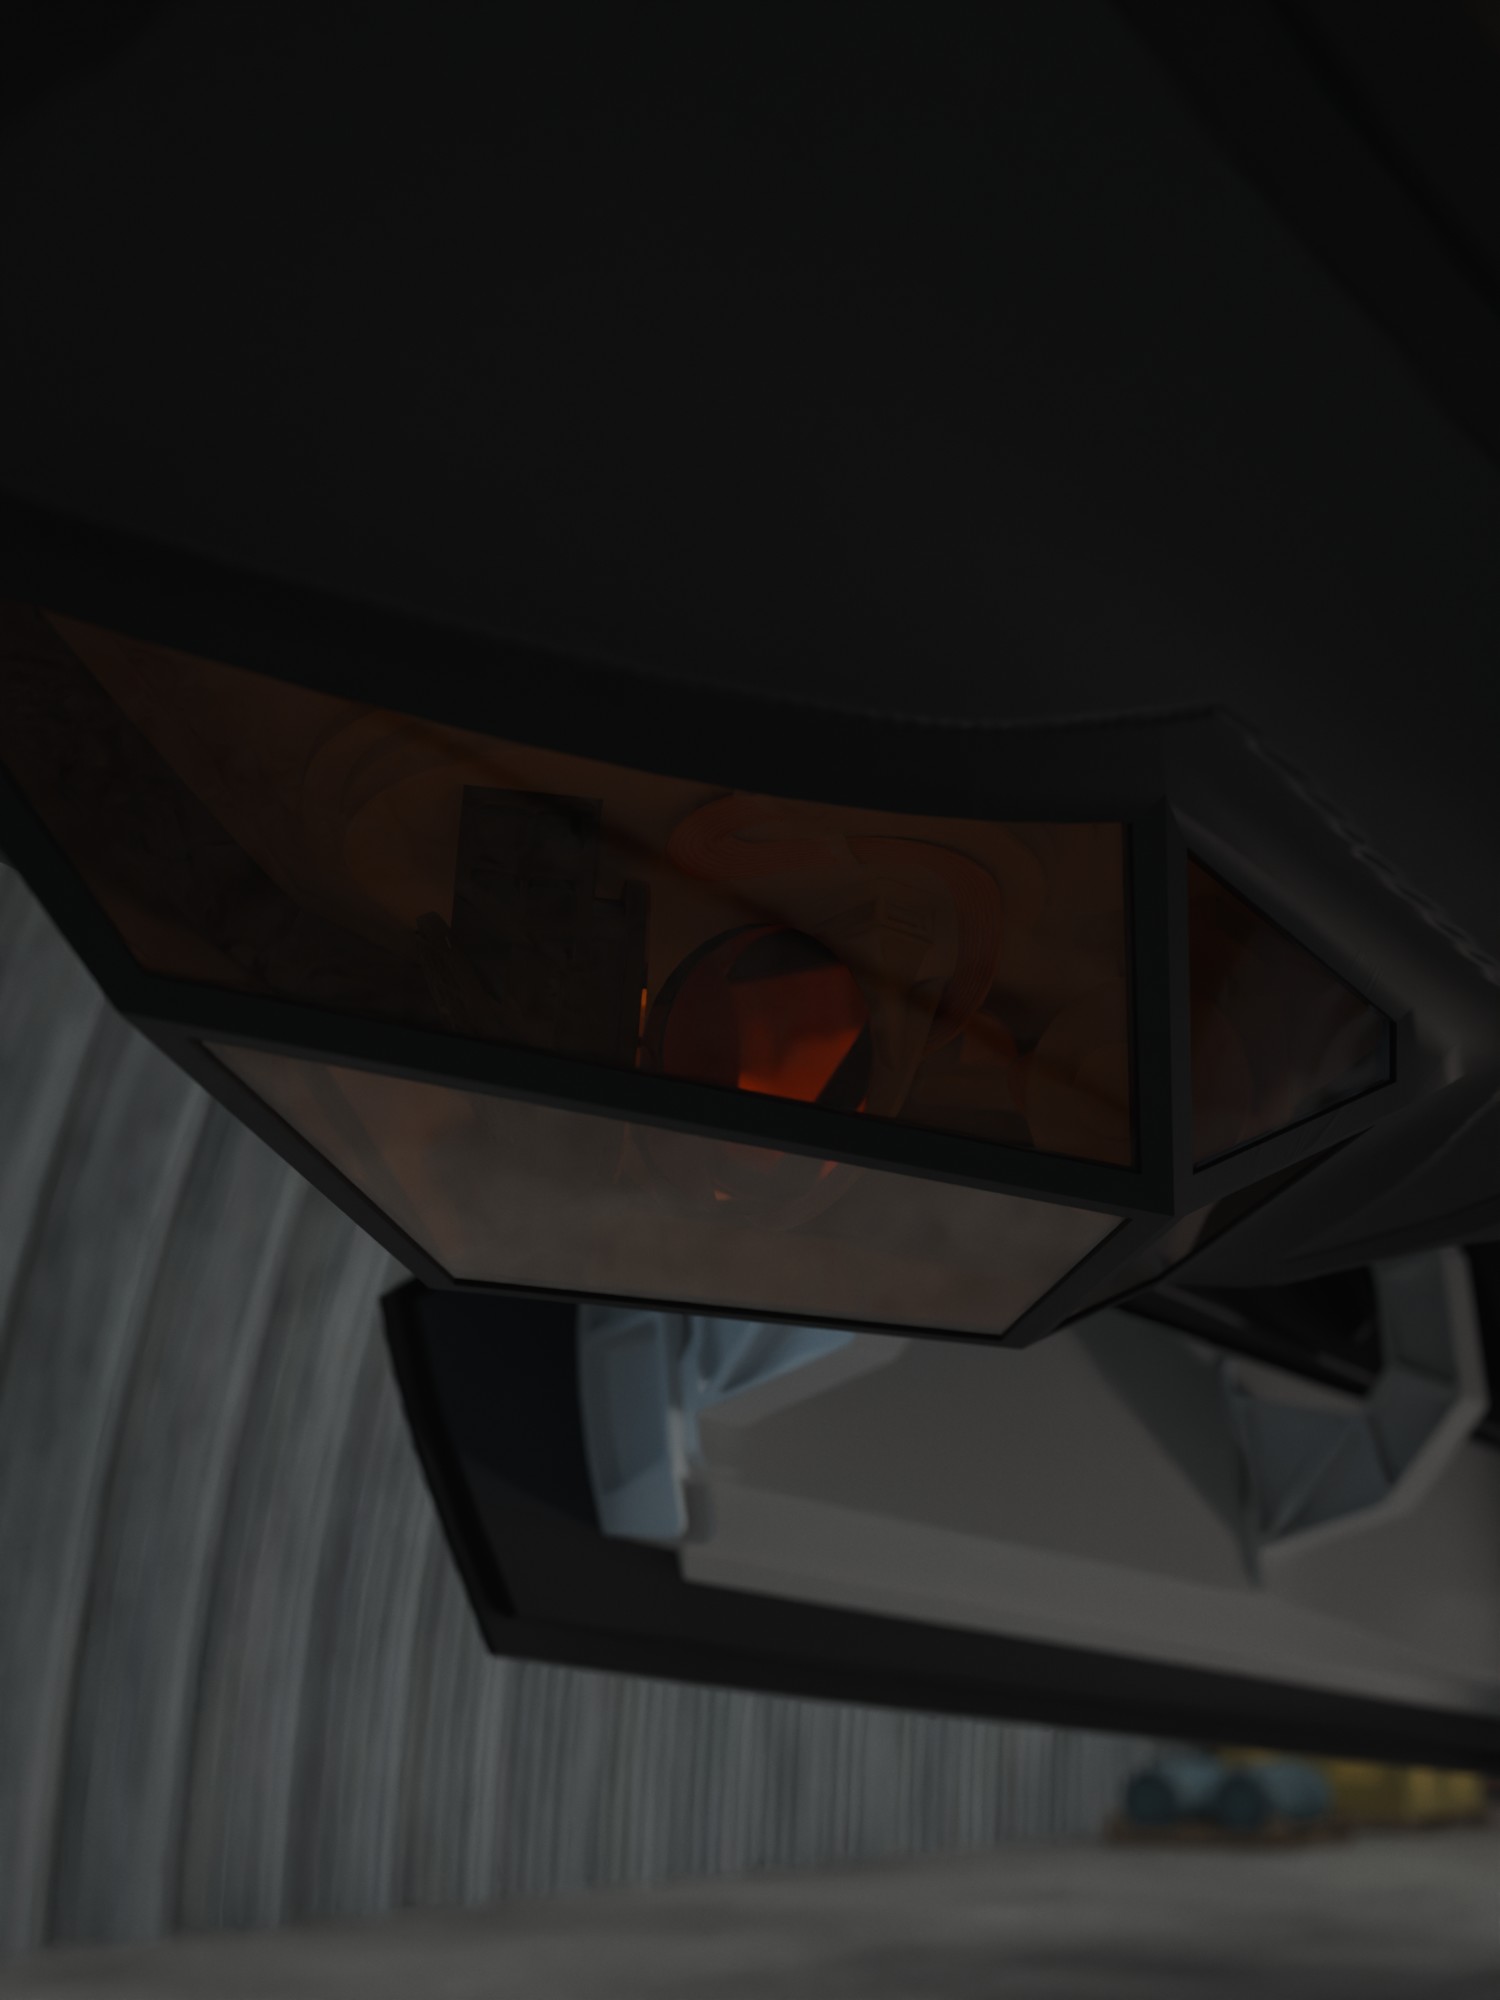
The WSO (or Weapons Systems Officer) has access to their own PCD, as well as a number of extra controls. An extra screen on the right side provides mission info and communications. An optional top mounted display can serve as additional screen space for maps or other info. This workplace also comes with a positionable light for reading in the dark.
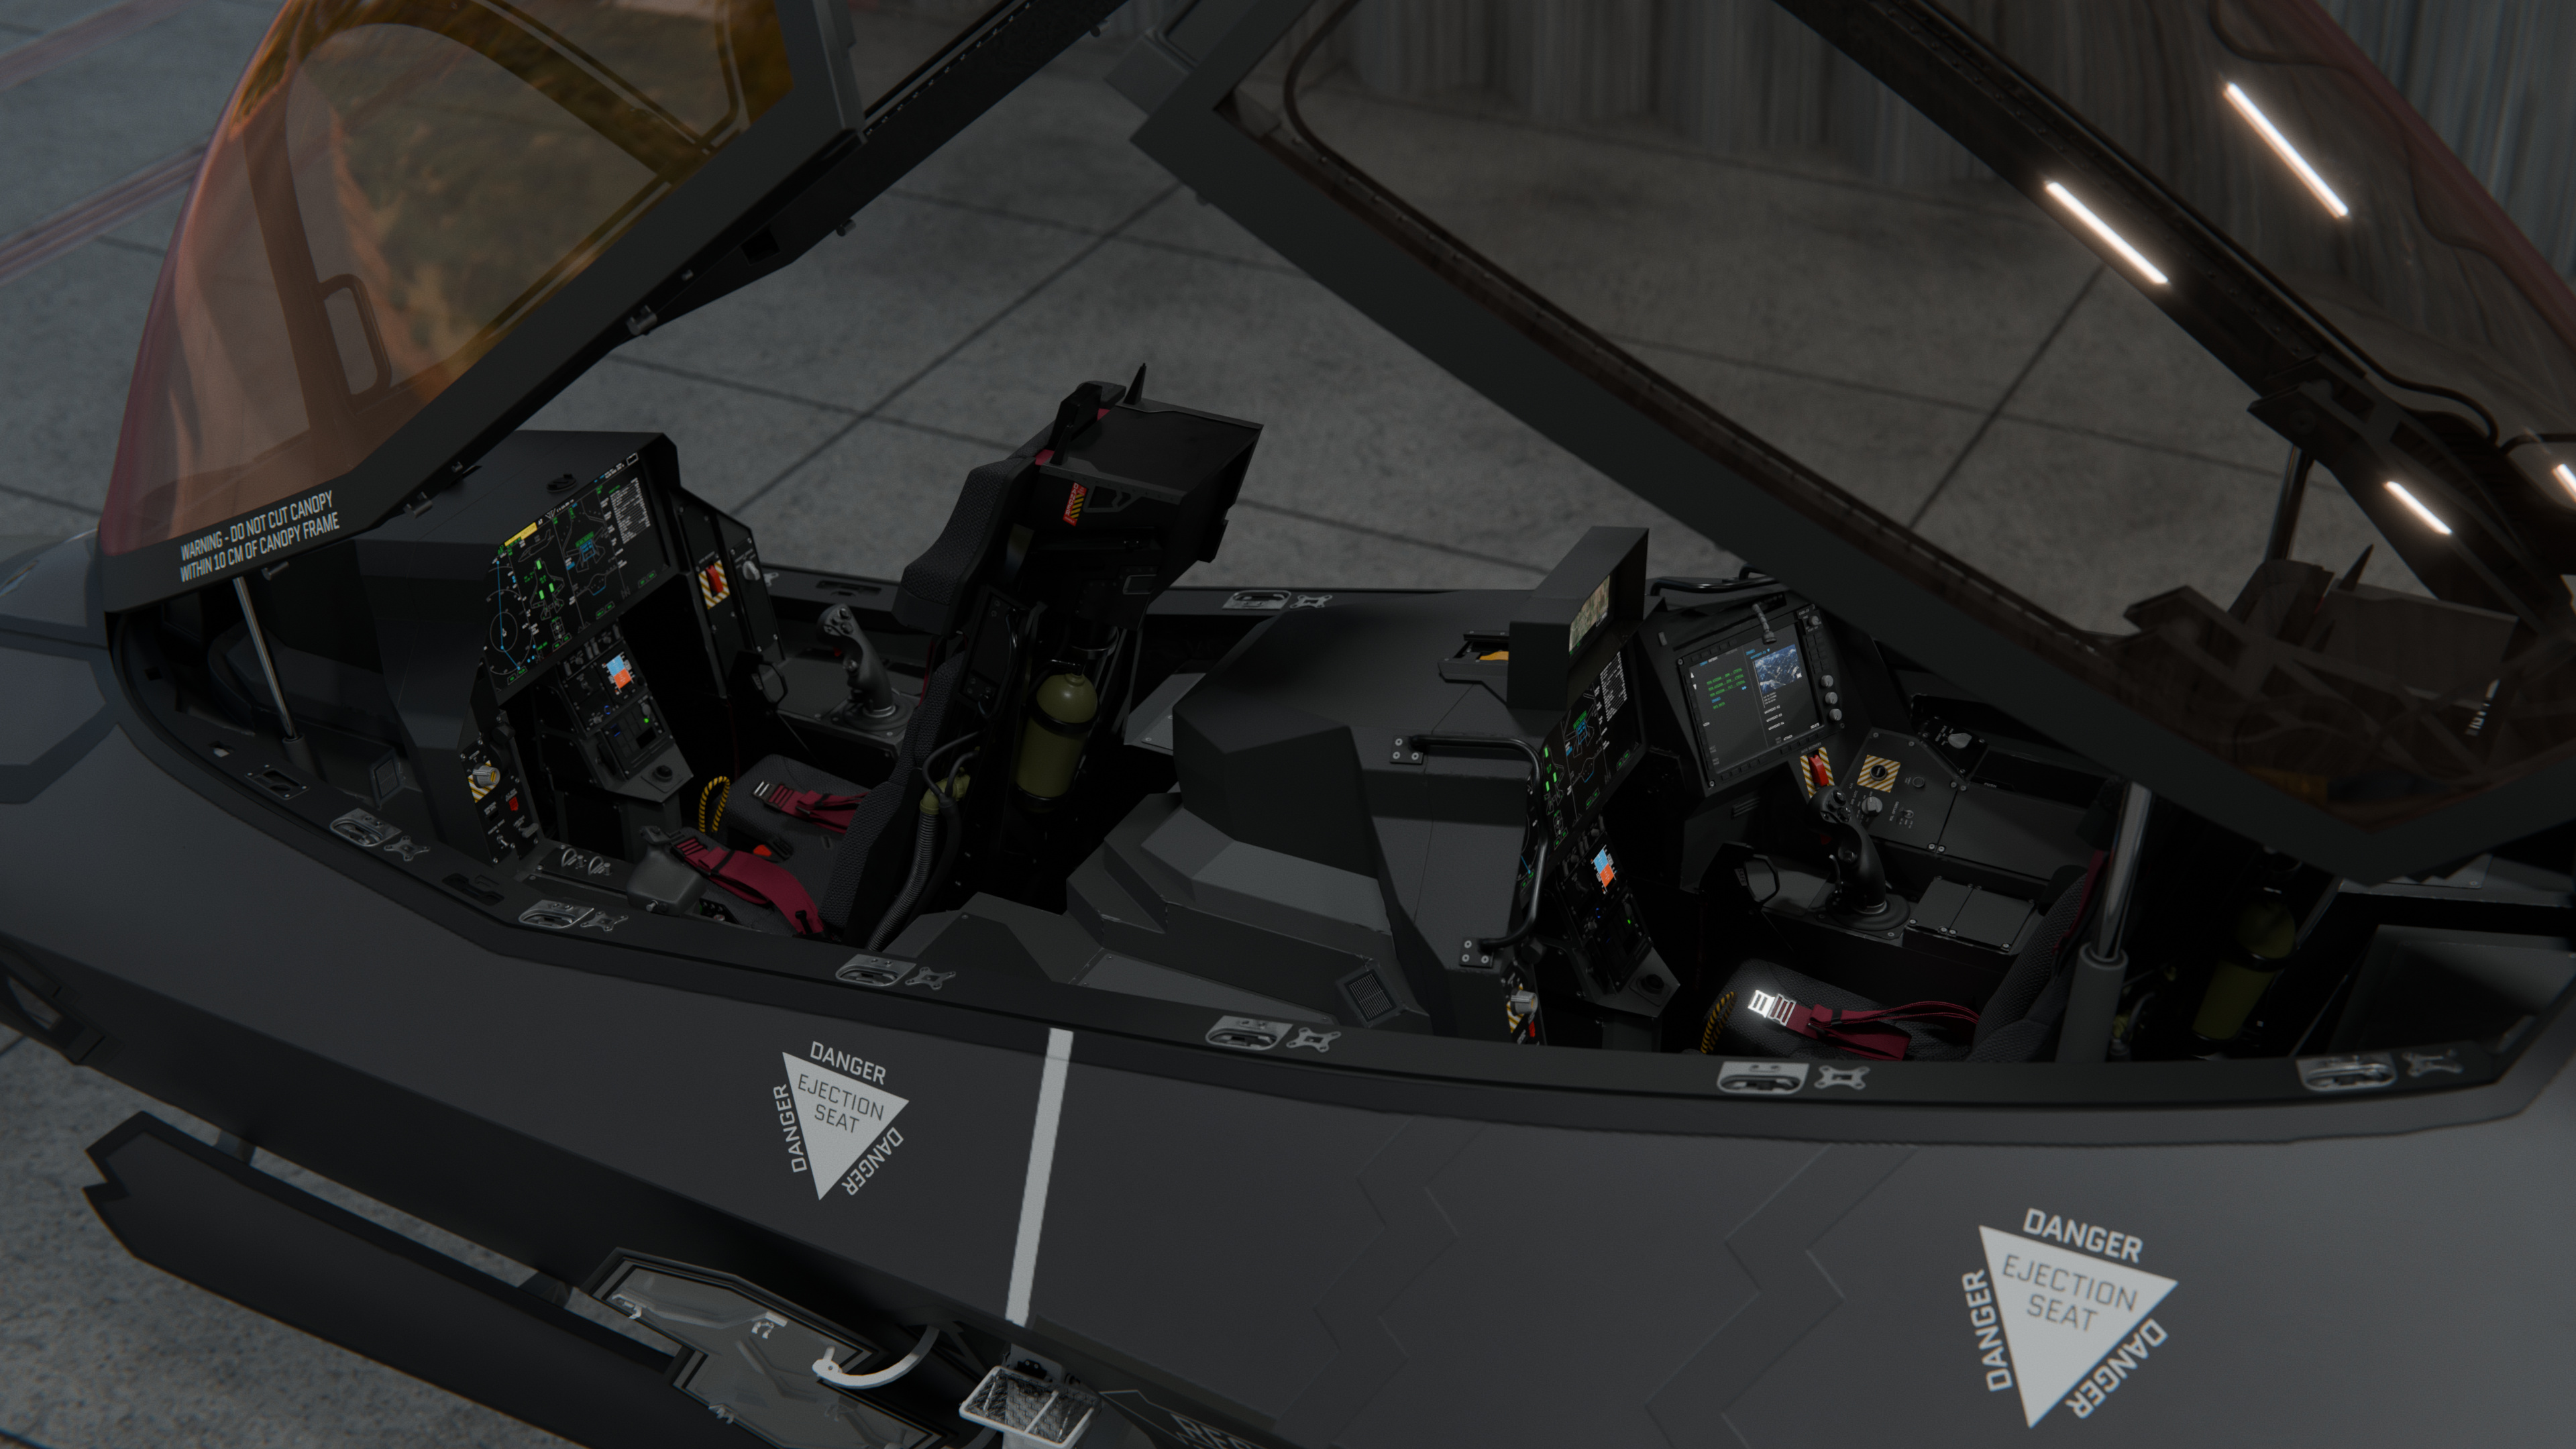
The canopy is split into two halves that interlock in the middle. The cockpit is accessed by a foldable ladder on the left side. A white line serves as a guide when exiting, as it can be difficult to find the first step under the slight overhang.
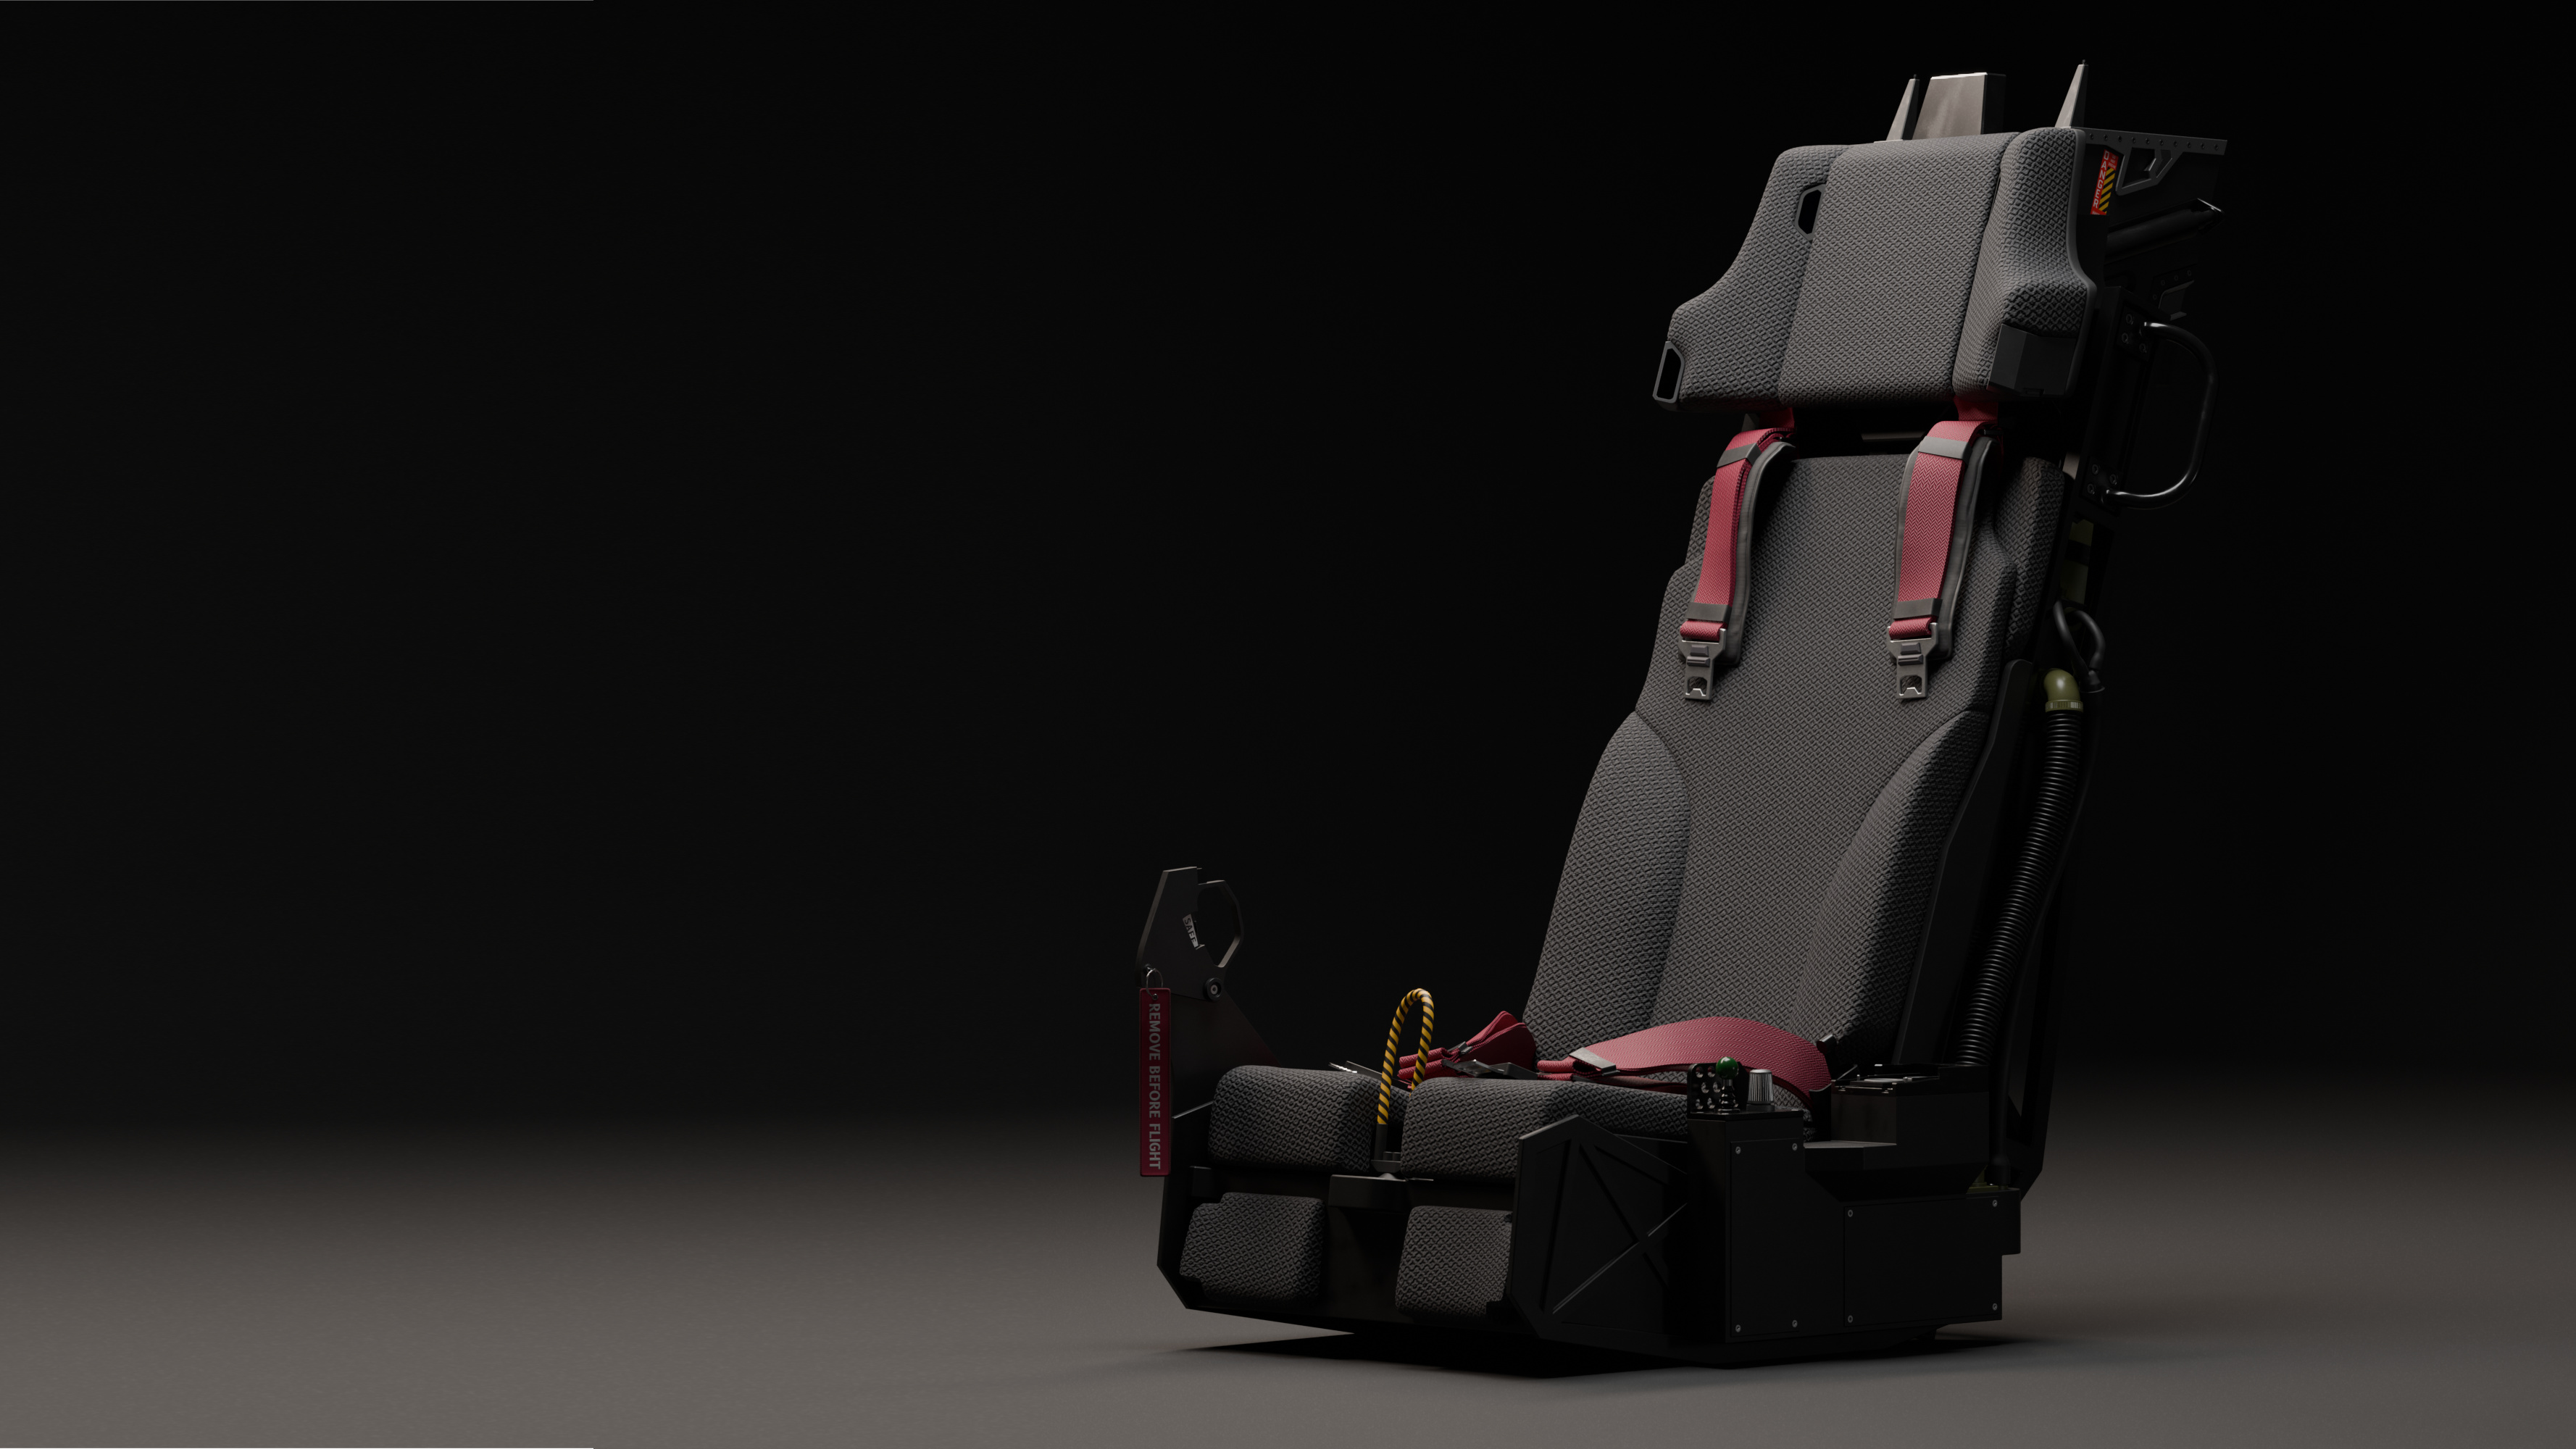
The safety net
The connection between the crew and the plane is their ejection seat. This piece of cutting-edge equipment not only holds them in place during flight, but also comes with outside-in tracking cameras that measure the position and rotation of the head of the crew, so that the helmet-mounted HUD can be reliably fixed to positions in the world around them. It can also explosively catapult itself and the crew strapped to it out of harms way in an emergency.
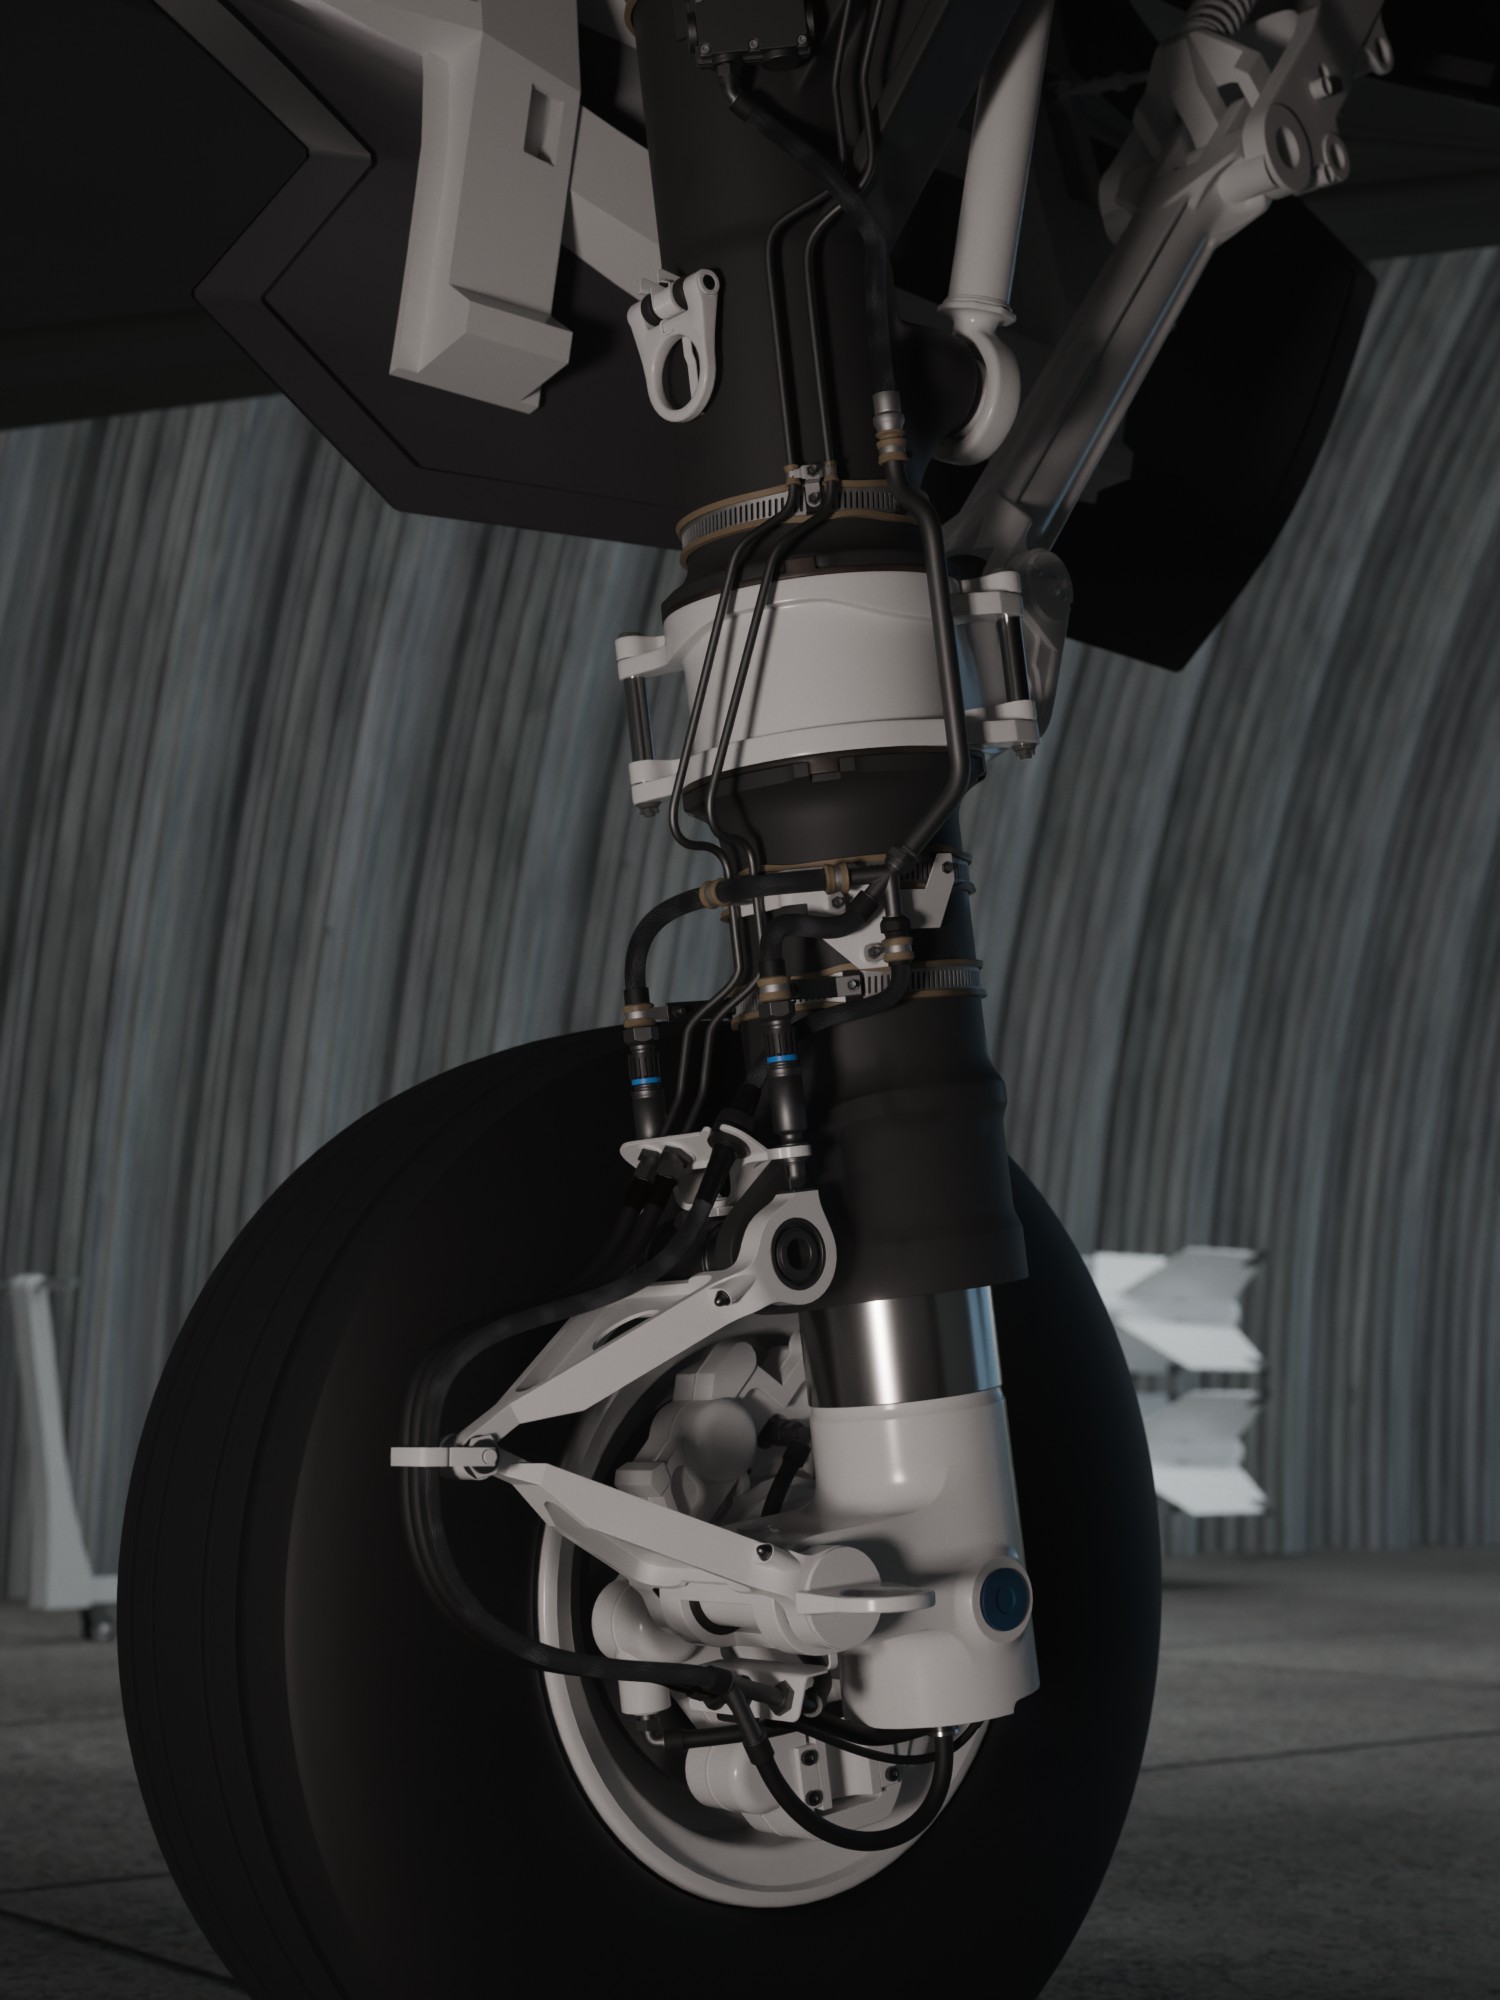
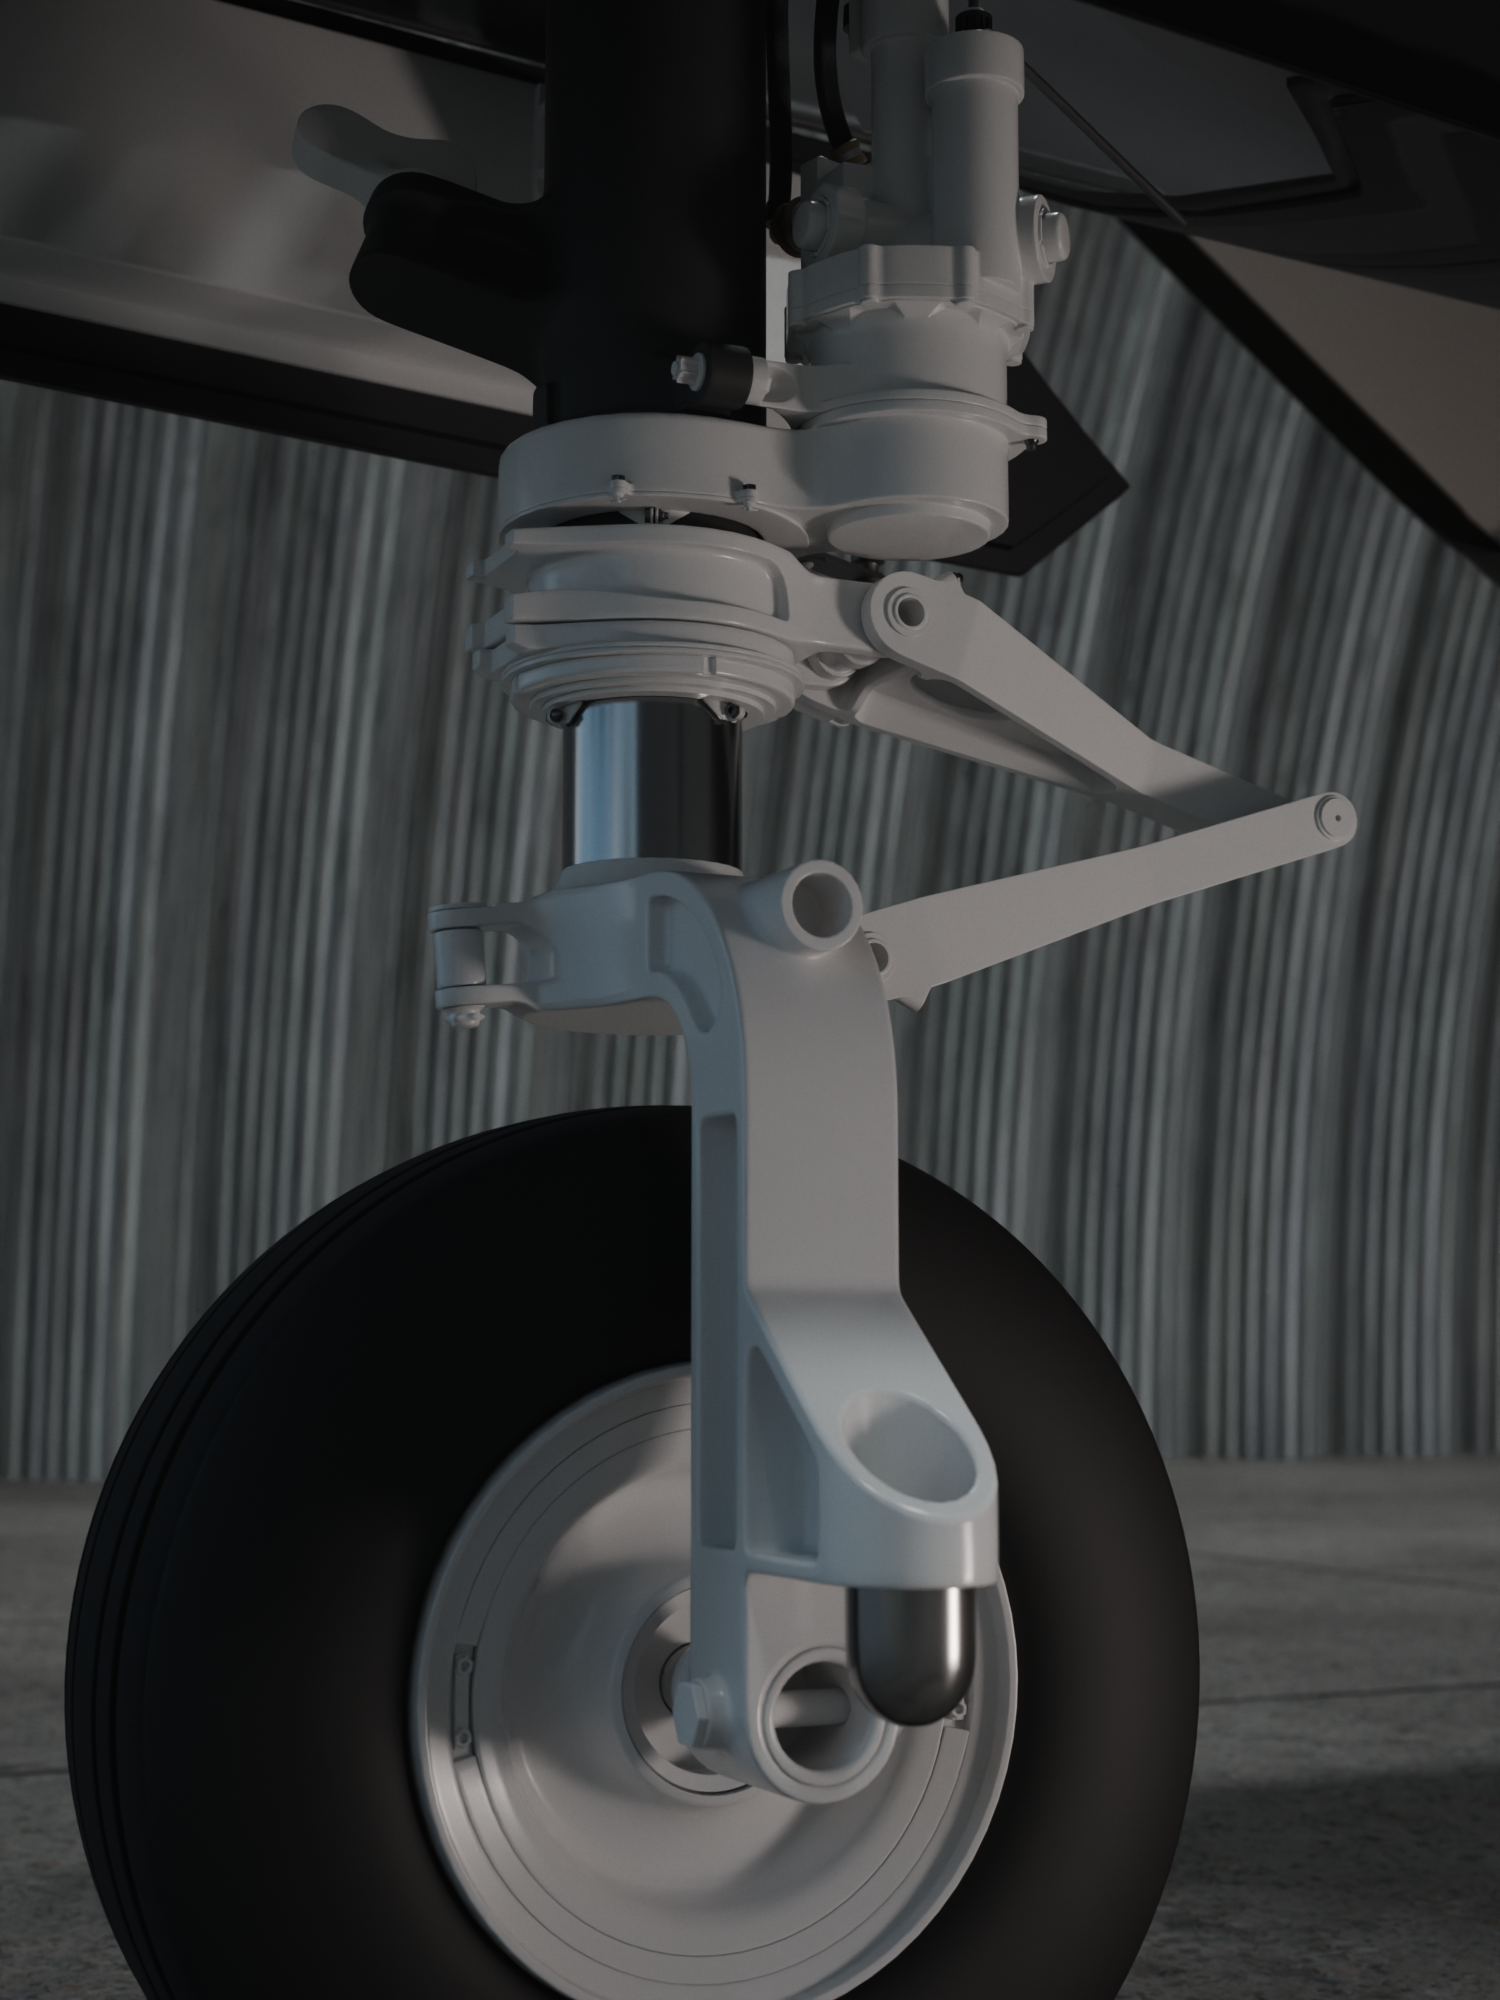
Other work in progress
Some of the areas like the landing gear, weapon bays and other smaller spots around the plane are still work in progress. Still, I wanted to show some of the work that has already happened in these areas, like the intricate mechanics and hydraulics of the landing gear and the Electro-Optical Targeting System (EOTS) under the nose of the plane. A lot is still to do here, like proper texturing and rigging.
Where it all started
After some early experimentation with building space ships around 2019, I came across a Real Engineering video on the F-35. I was looking for something new and challenging to build at the time, and I love the shapes and silhouette of this plane. I modelled the first version of the jet within a few months, but only a few months after I was done I picked it back up to remodel substantially. The first version was mostly basic, only to be looked at with a little distance and from certain angles. I wanted to change that.

The very first version of the plane around january 2020.
A pilot project
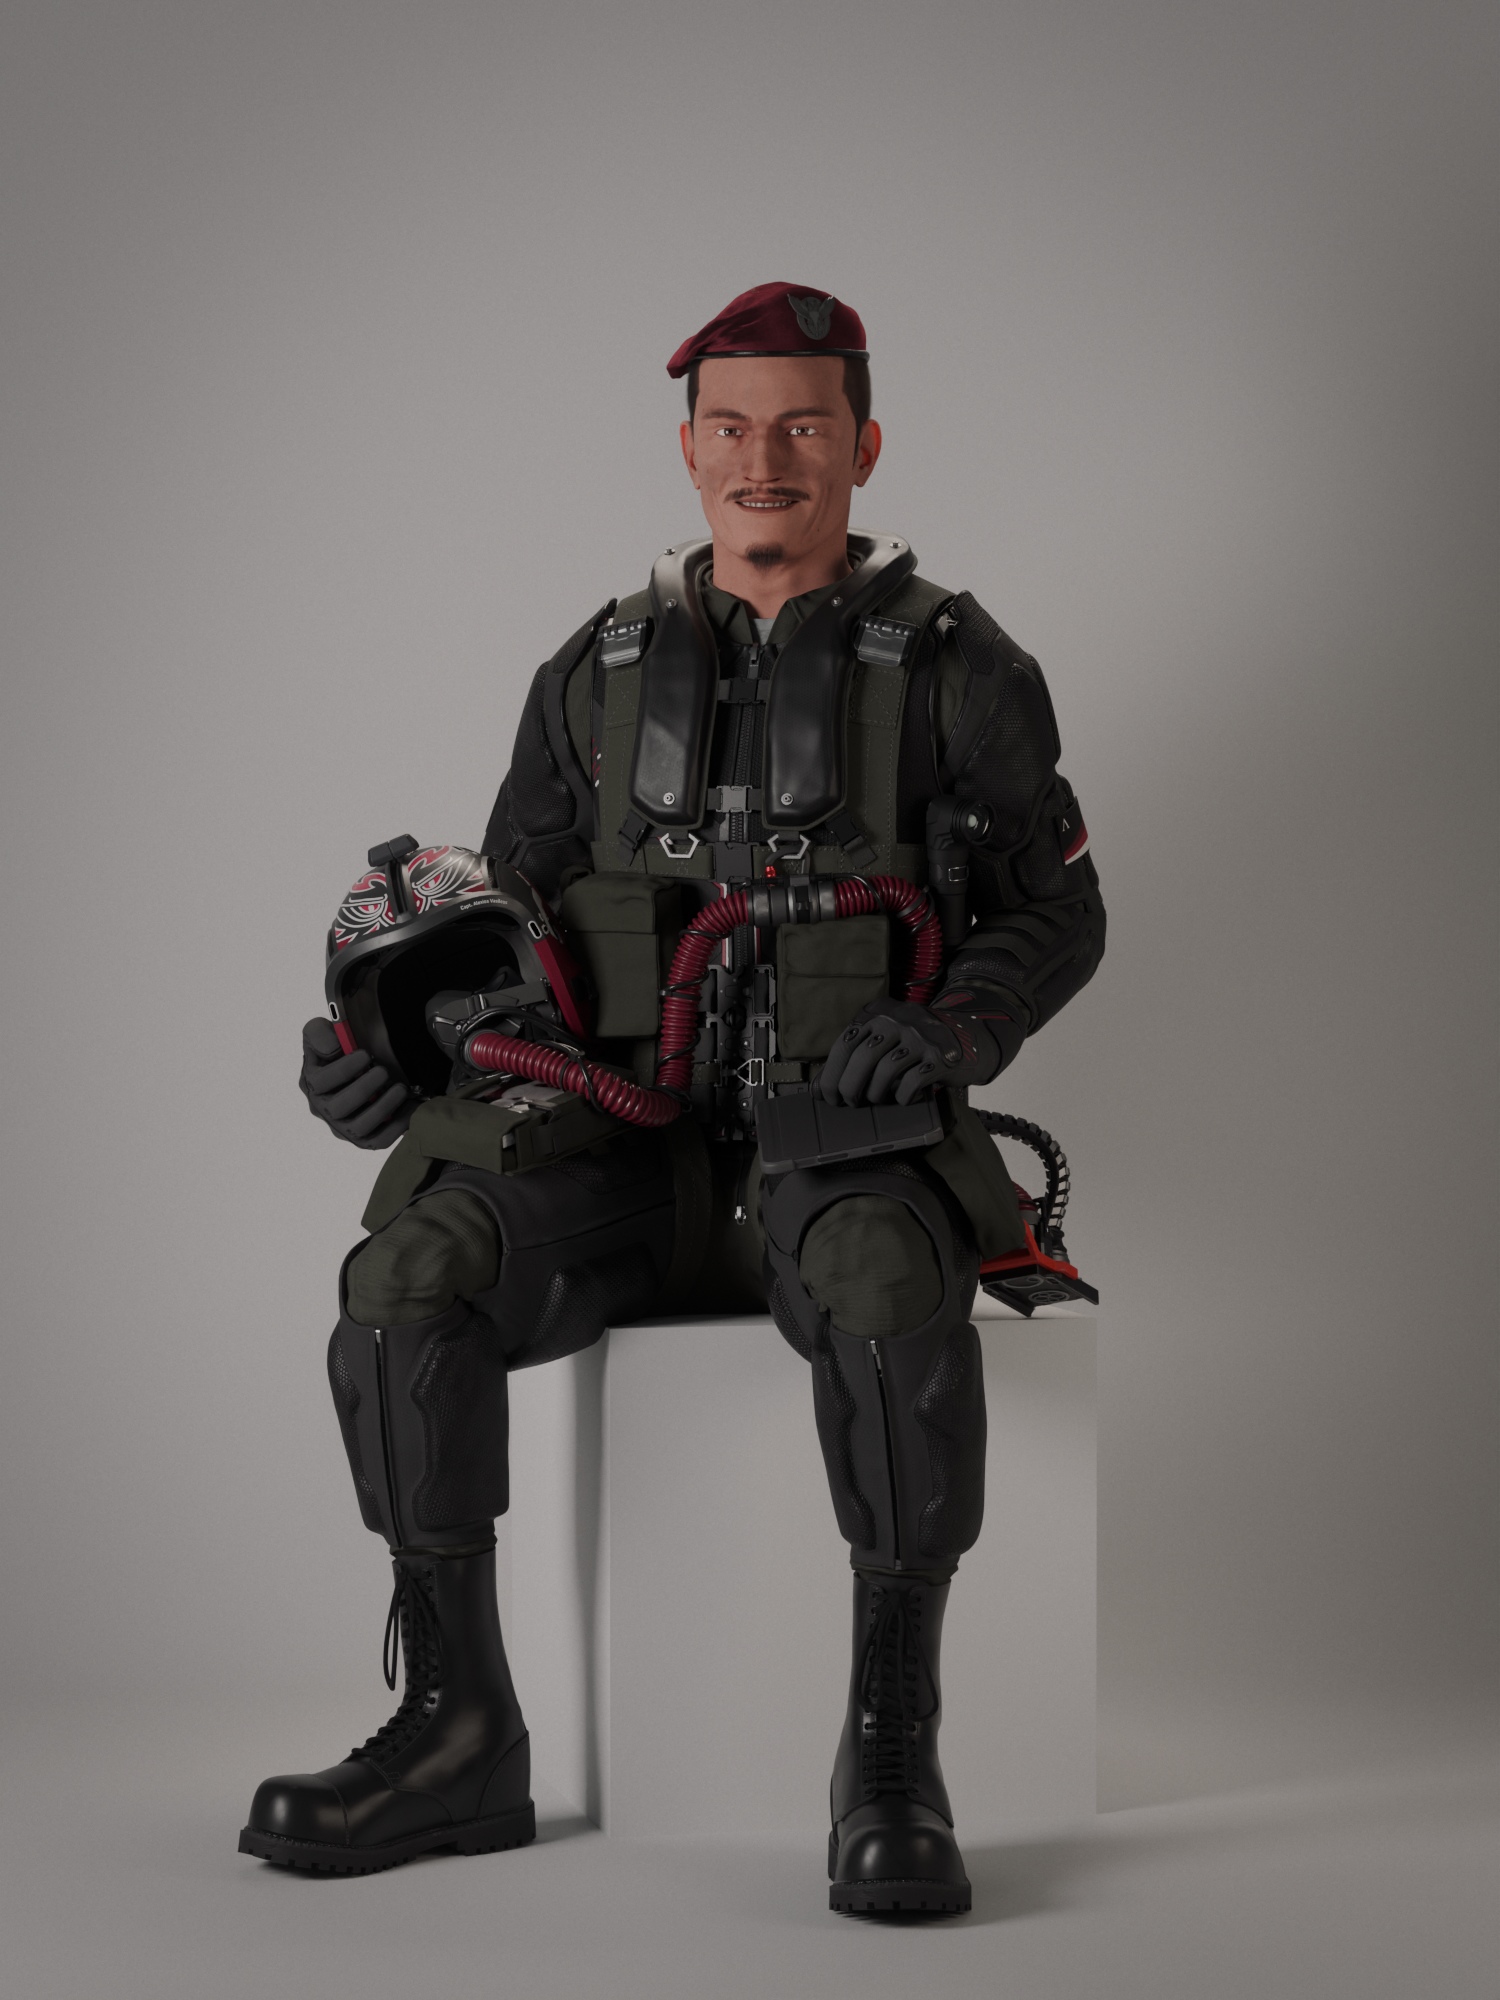
As a side project and distraction to the jet, I was looking into making a pilot for it. My aim was to get hands on with character design and how to build them. I quickly went from messing around with premade models to making my own, since I wanted more resolution and control over them. I specifically wanted to create my own design in this case and not build it fully after real world reference. As I continously learned and improved with tools like Substance Painter and Blender, I applied these directly on projects like these.
More than meets the eye
When working with characters that have helmets, the helmet has to become part of them. It takes part in their expression and identity. Popular references include the Power Rangers, Mandalorian or Top Gun. I knew that when I started to work on a fighter pilot, their helmet would be critical to the overall design. It's the part that went through the most iterations and tweaks over the years.
What is important to me in the design process of fictional things is that functionality is maintained. I try to think of logical solutions and combine them with aesthetic desires. So let's take a closer look at the design of this helmet and its role for the pilot.
Helmet-mounted HUDs have been done before the F-35 in the real world, but it is the first instance where the plane has been designed around the feature. I wanted to incorporate that tech, but with a completely new helmet design.

V1 – May 2020
V2 – August 2020
V3 – November 2020
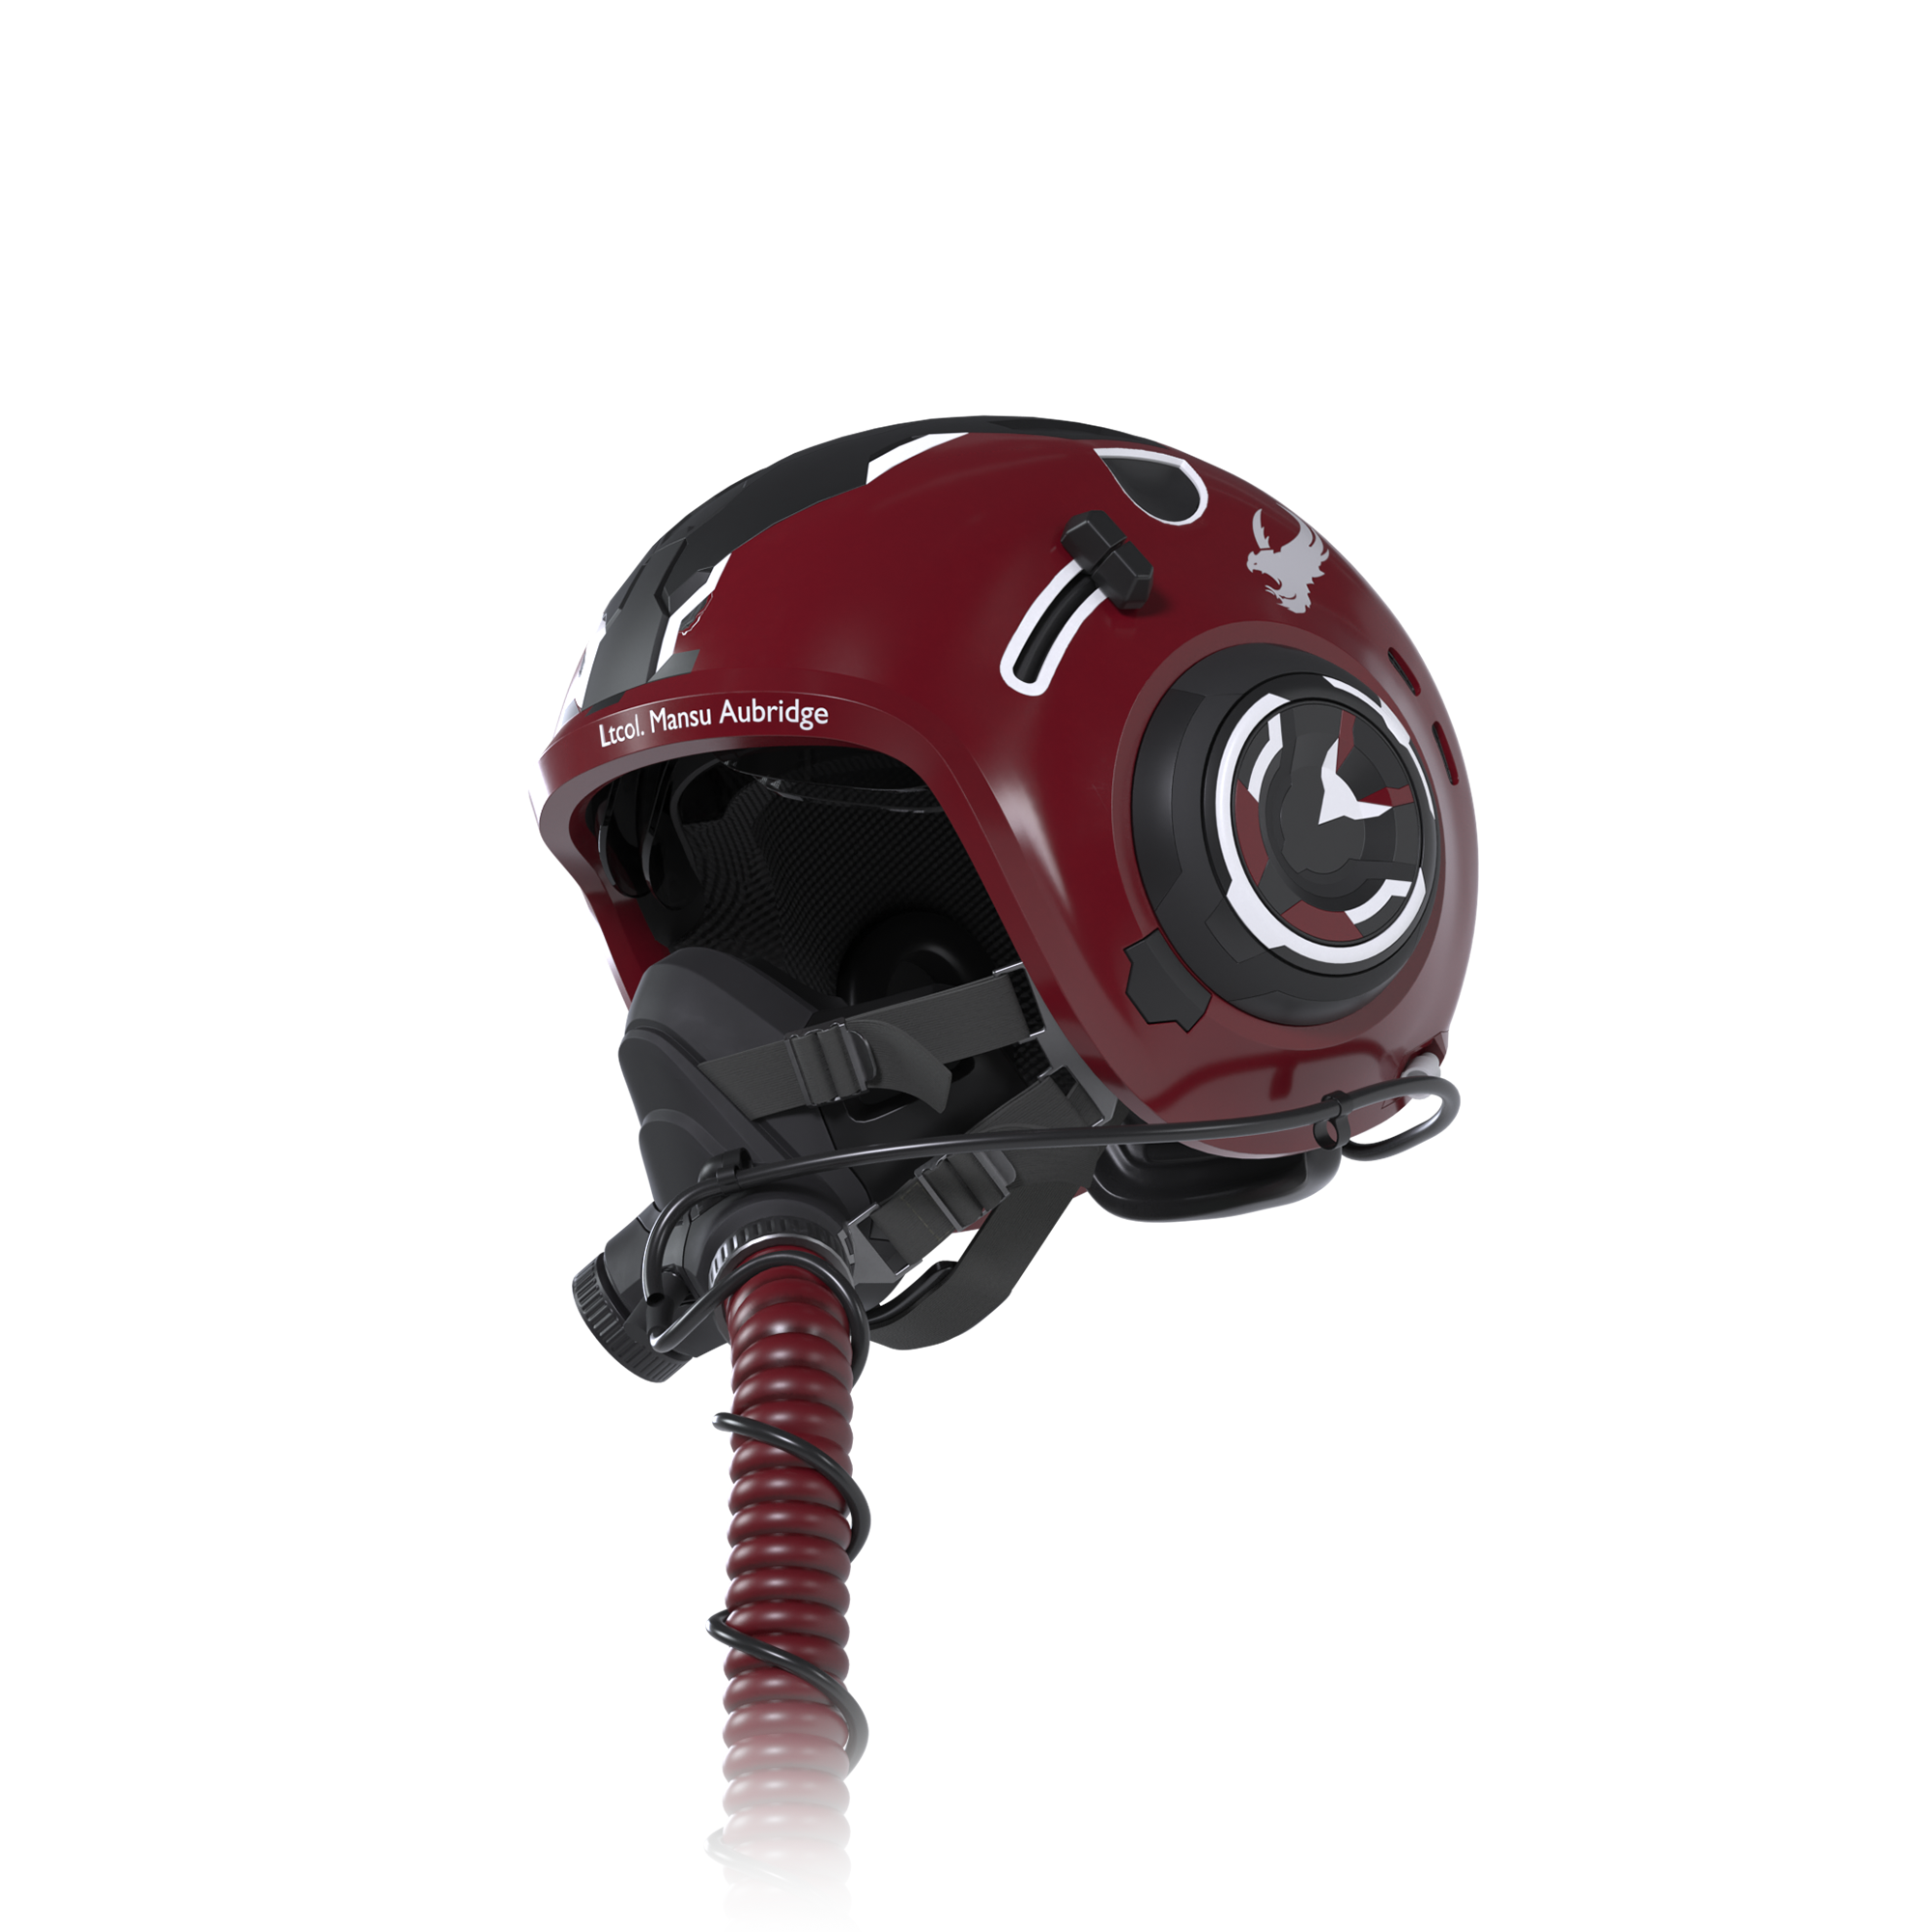
V4 – May 2023
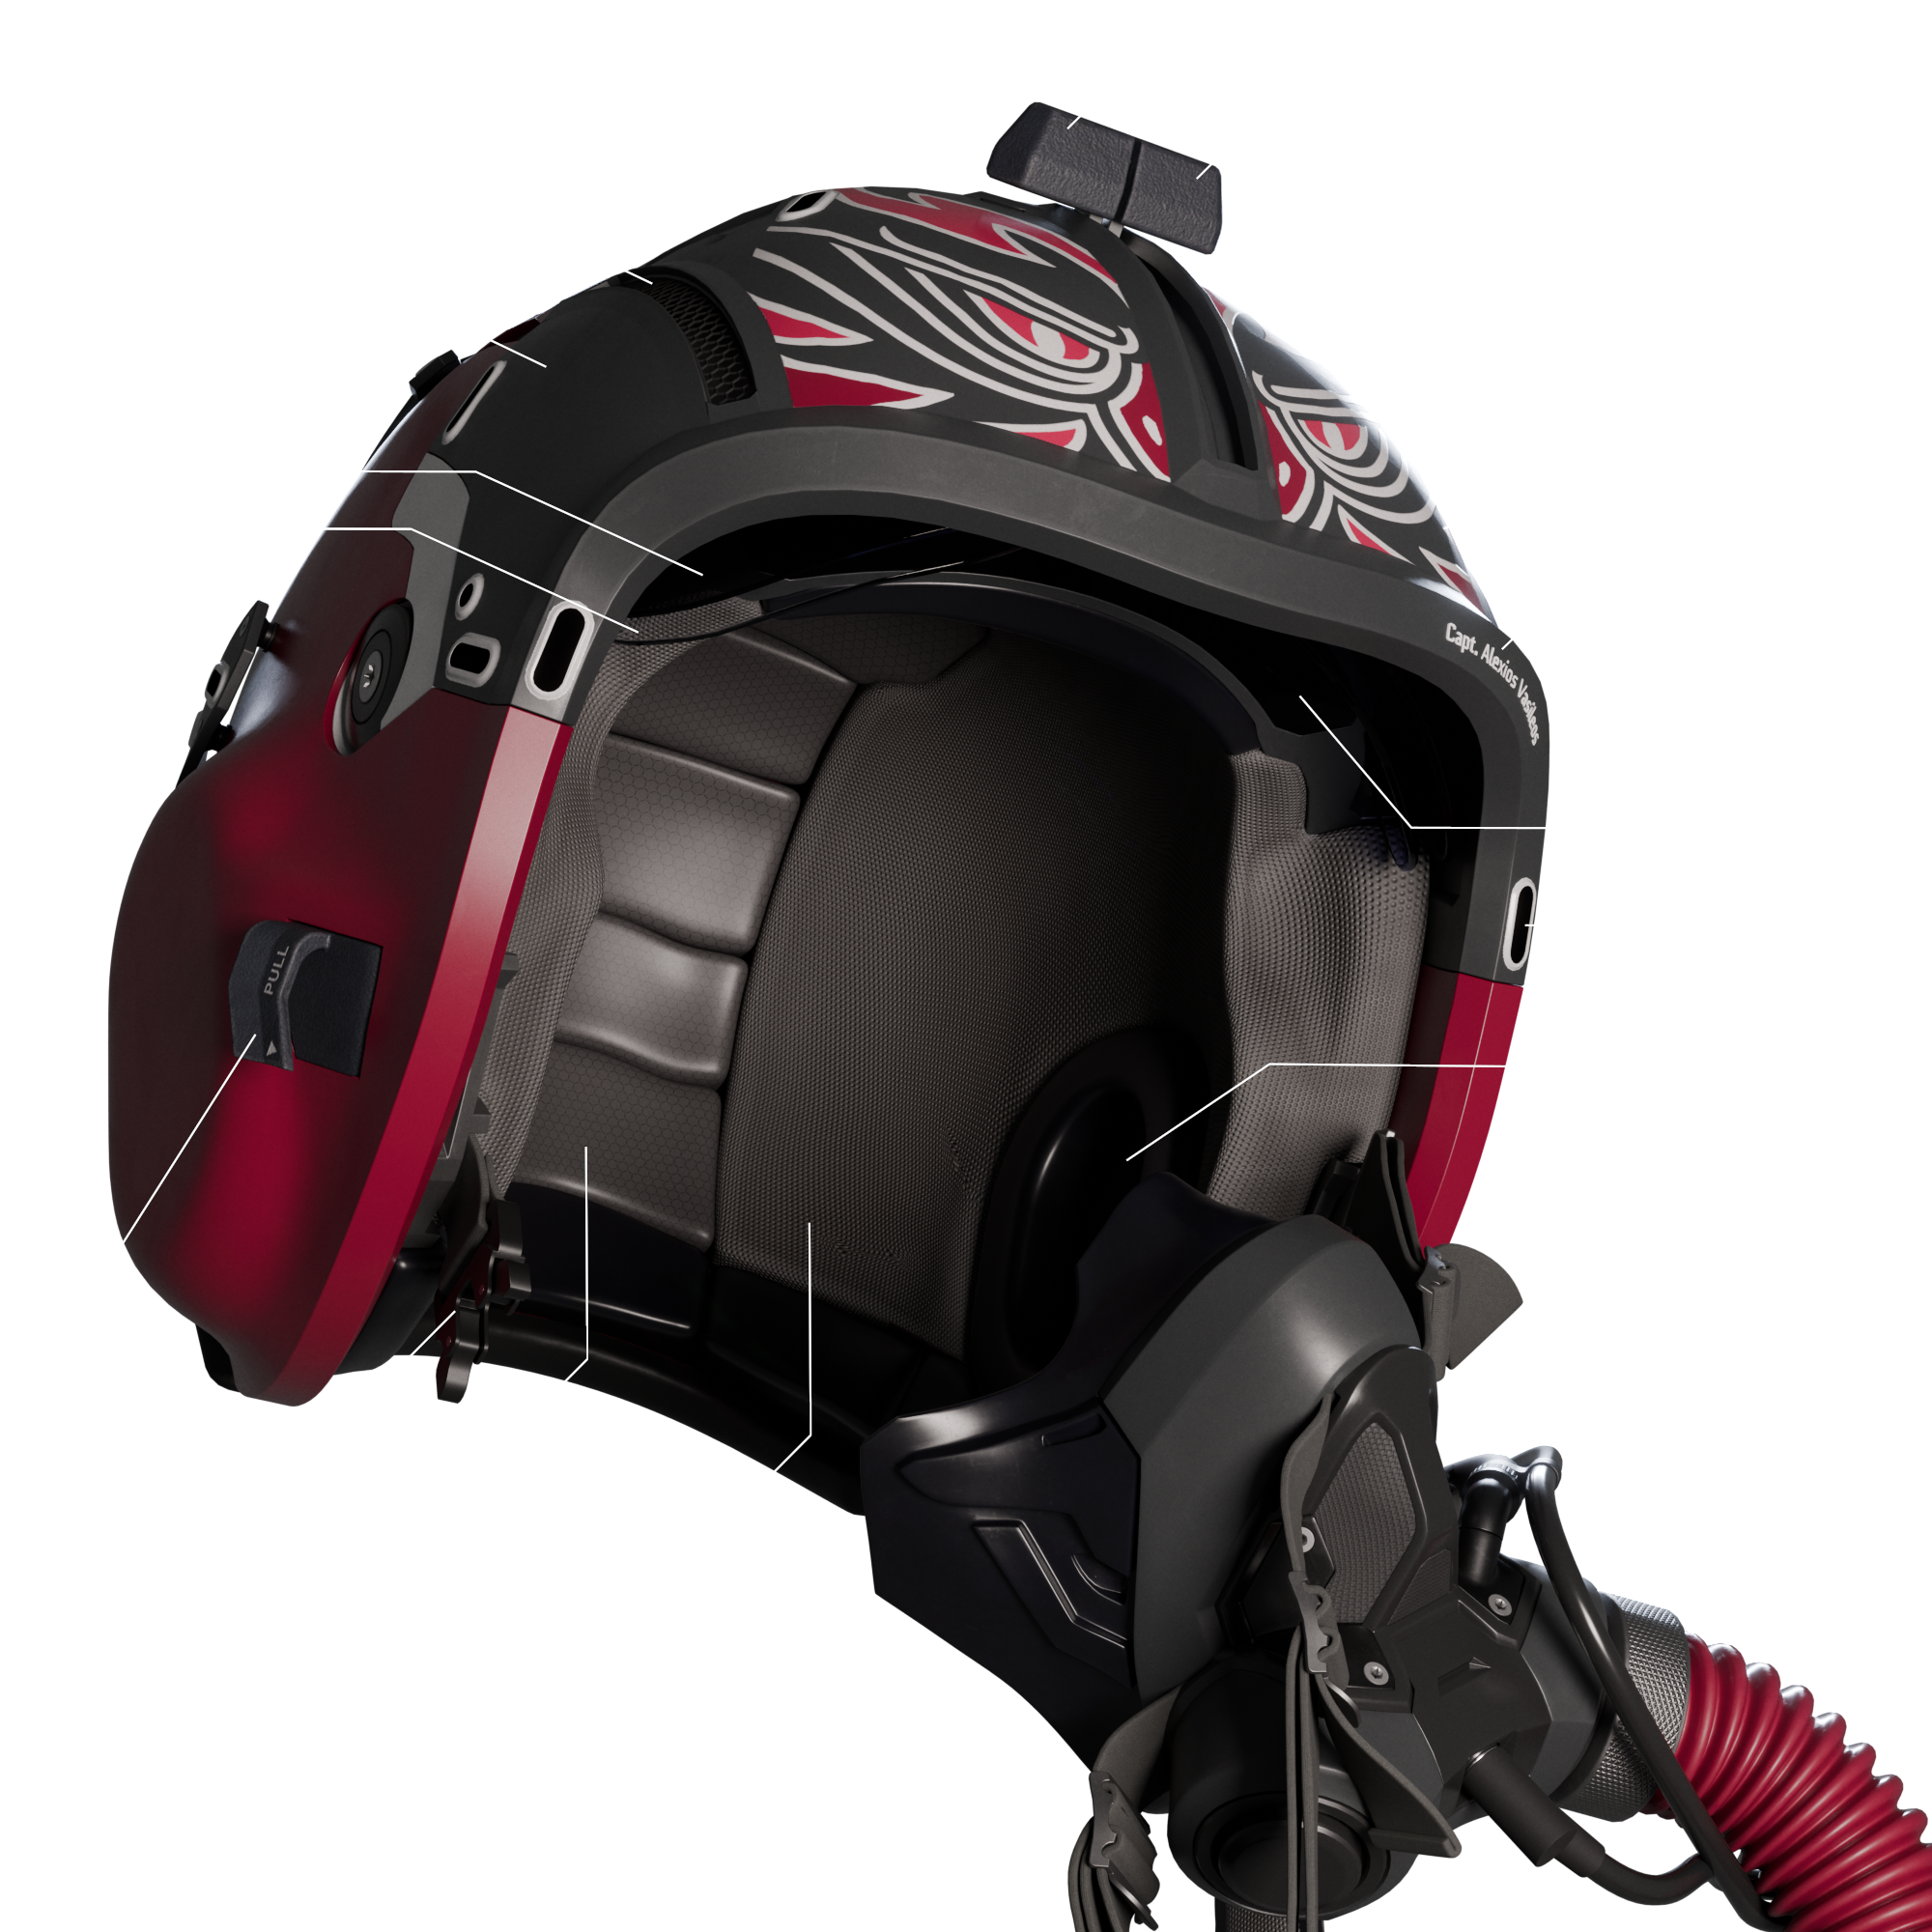
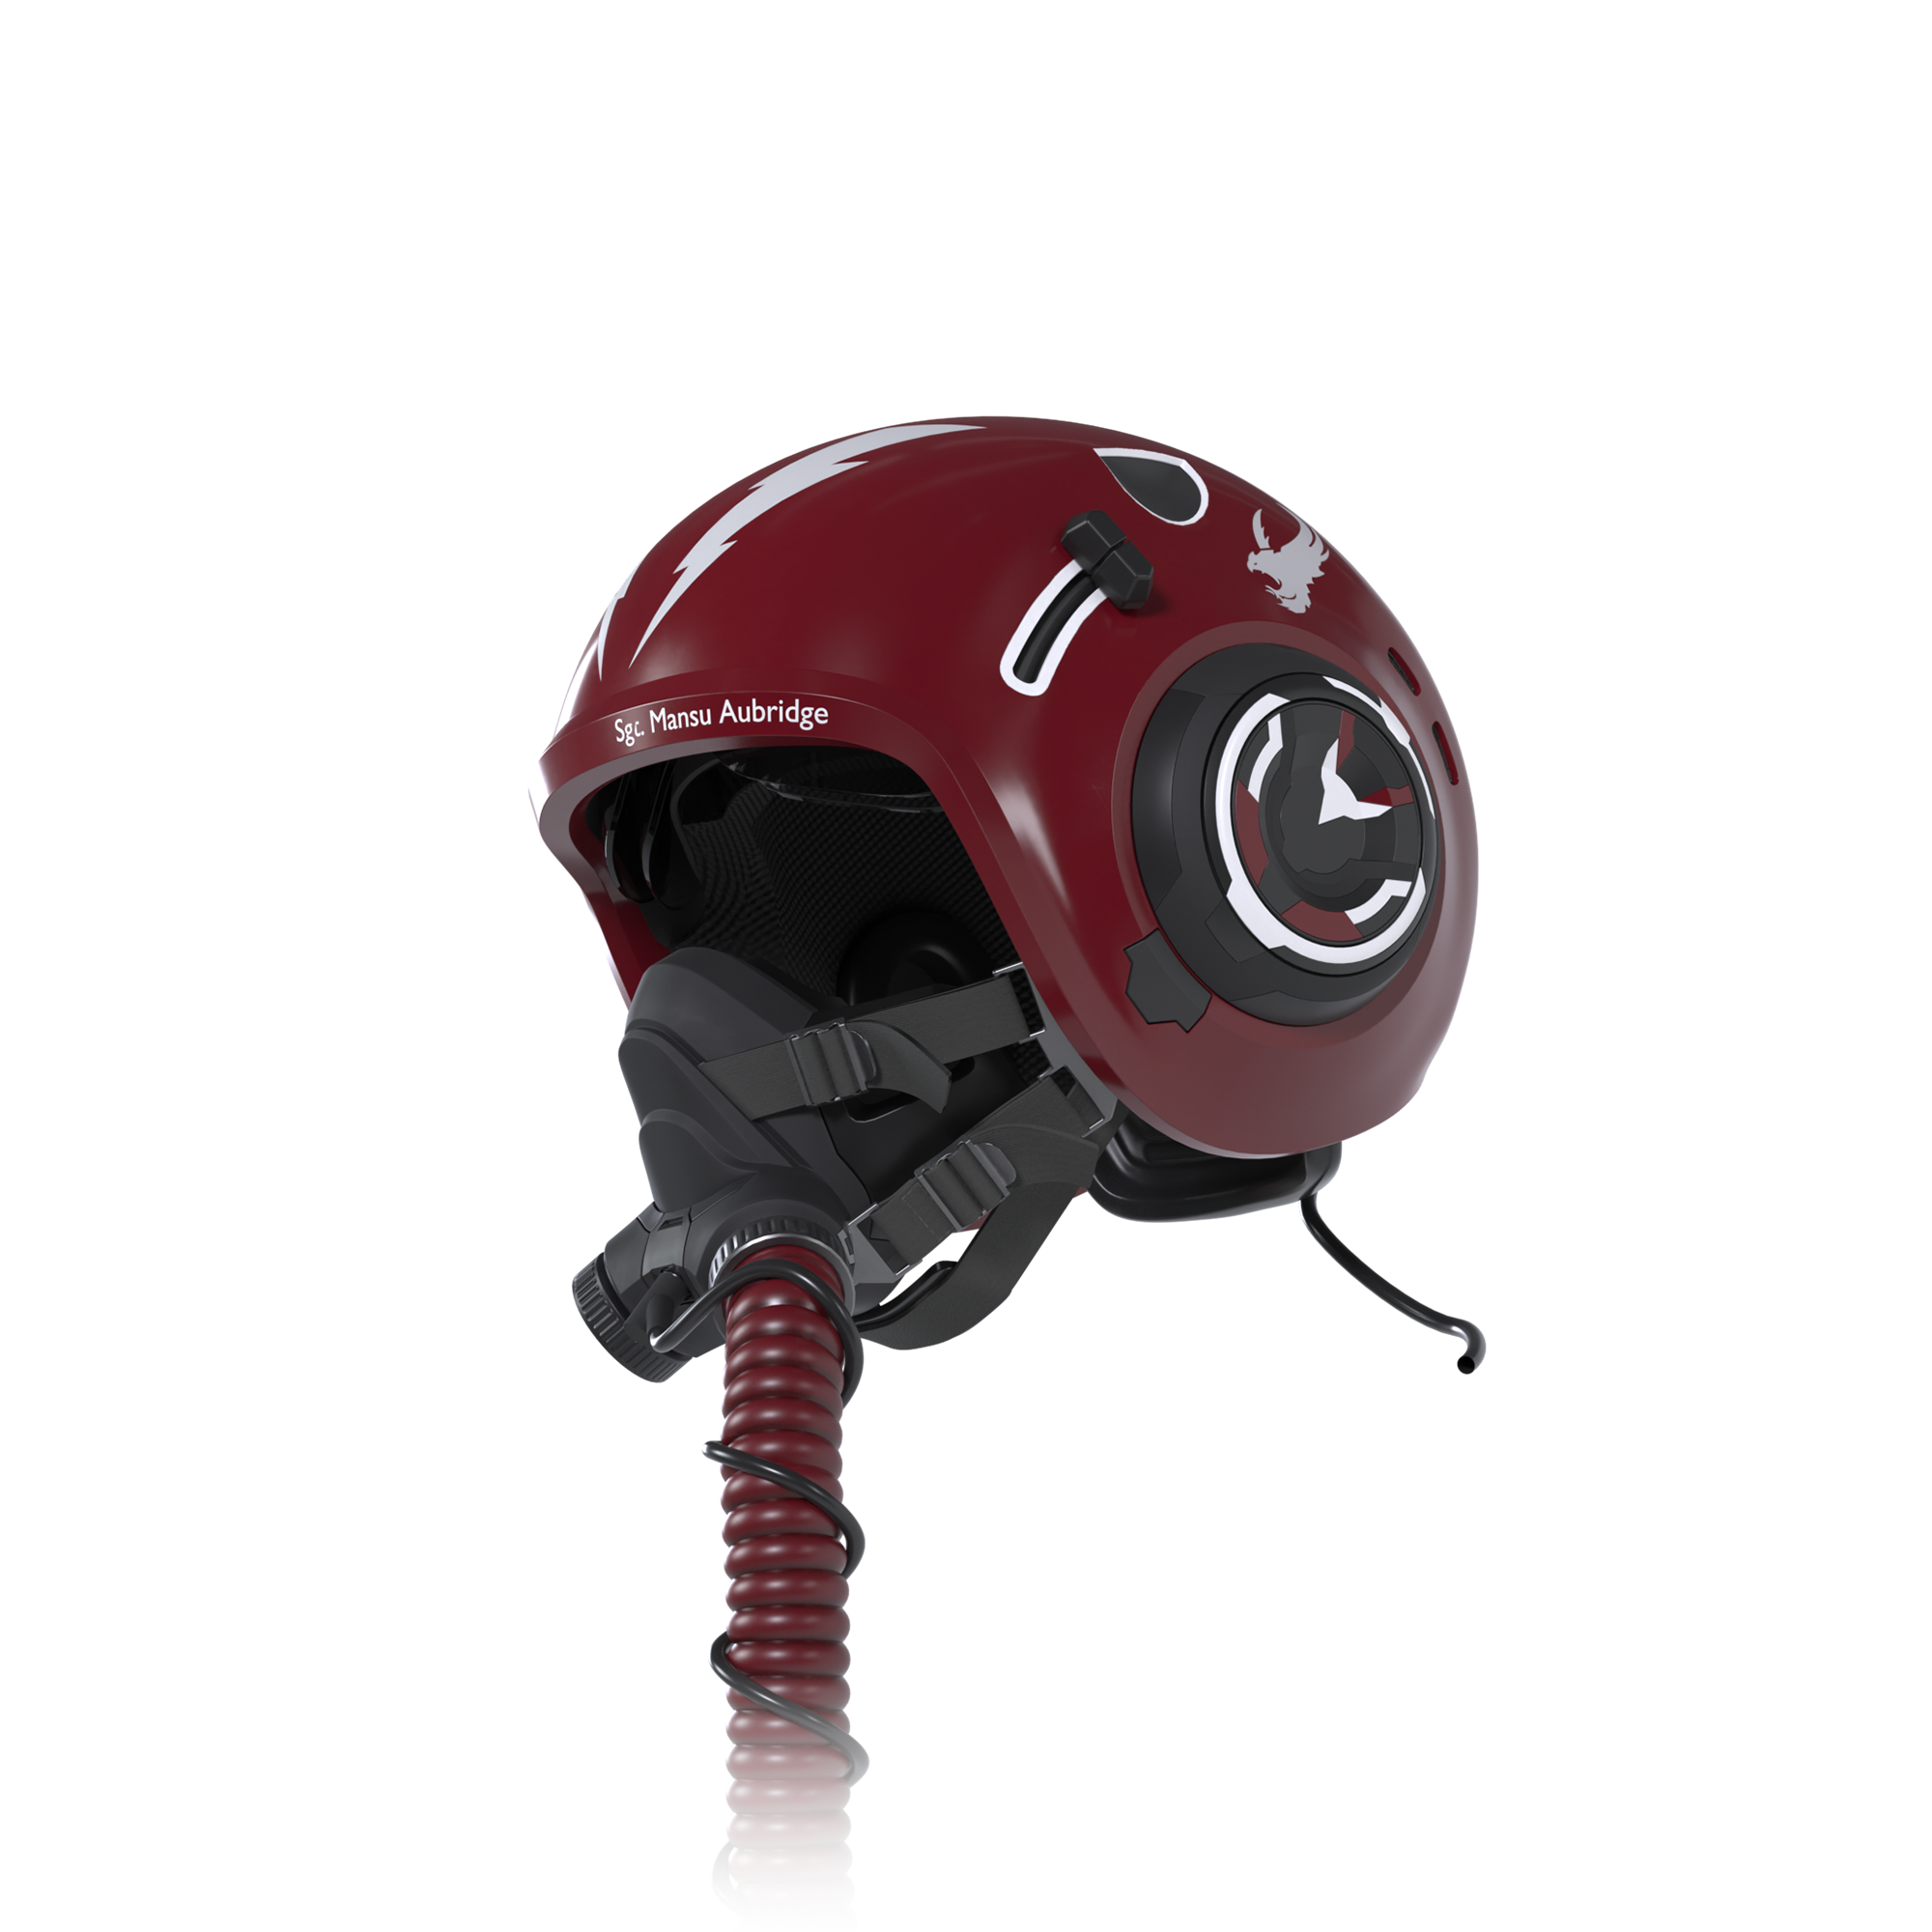
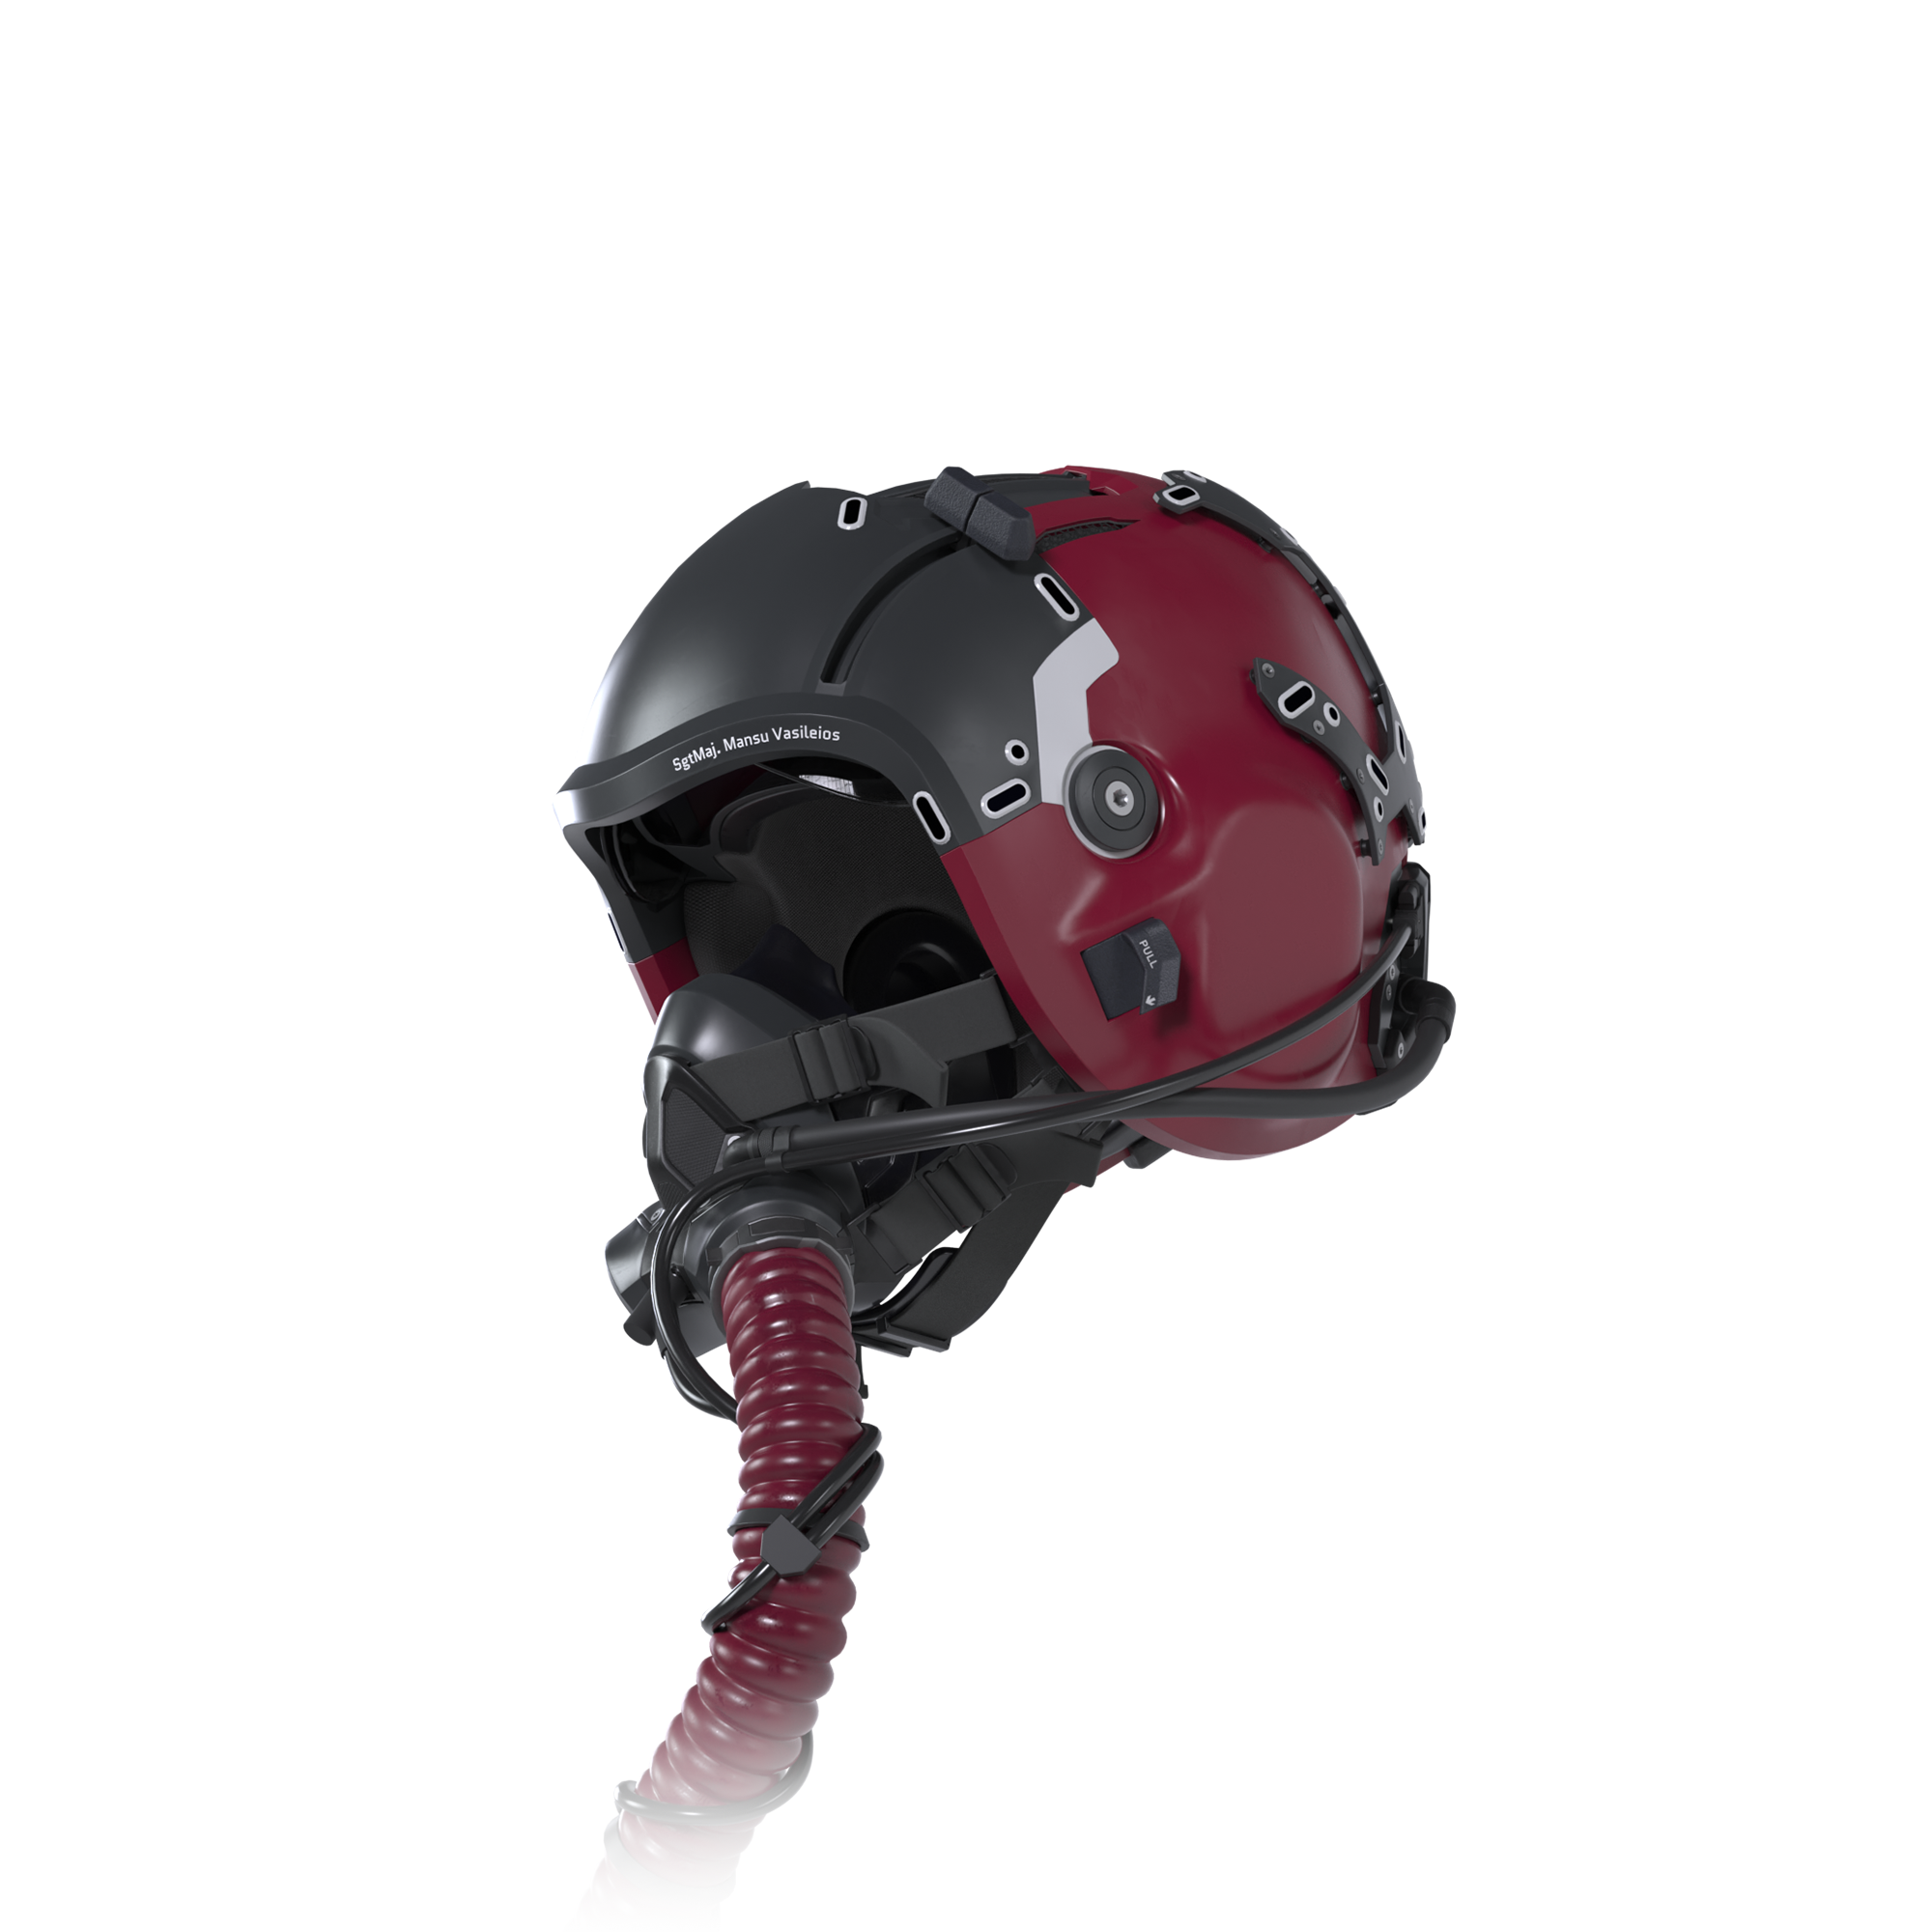
The helmet features a modular design, and this model is equipped with the projection tech. For other aircraft without the technology to make helmet-mounted HUDs work, it can be configured without these elements to cut down on cost, weight and increase part-sharing. The projection package consists of multiple elements all around the helmet. On the forehead sits a casing that houses the two visors. The inner clear visor serves as the canvas for the projection. A sun visor can be slid in front for comfort. The top of the visor module is used a lot by the crew as a canvas for personalization, and this one features the face of an owl. On the inside sits a covered foam liner, along with a pressure liner. Active noise-cancelling headphones reduce the loud engine noise and help with communications.
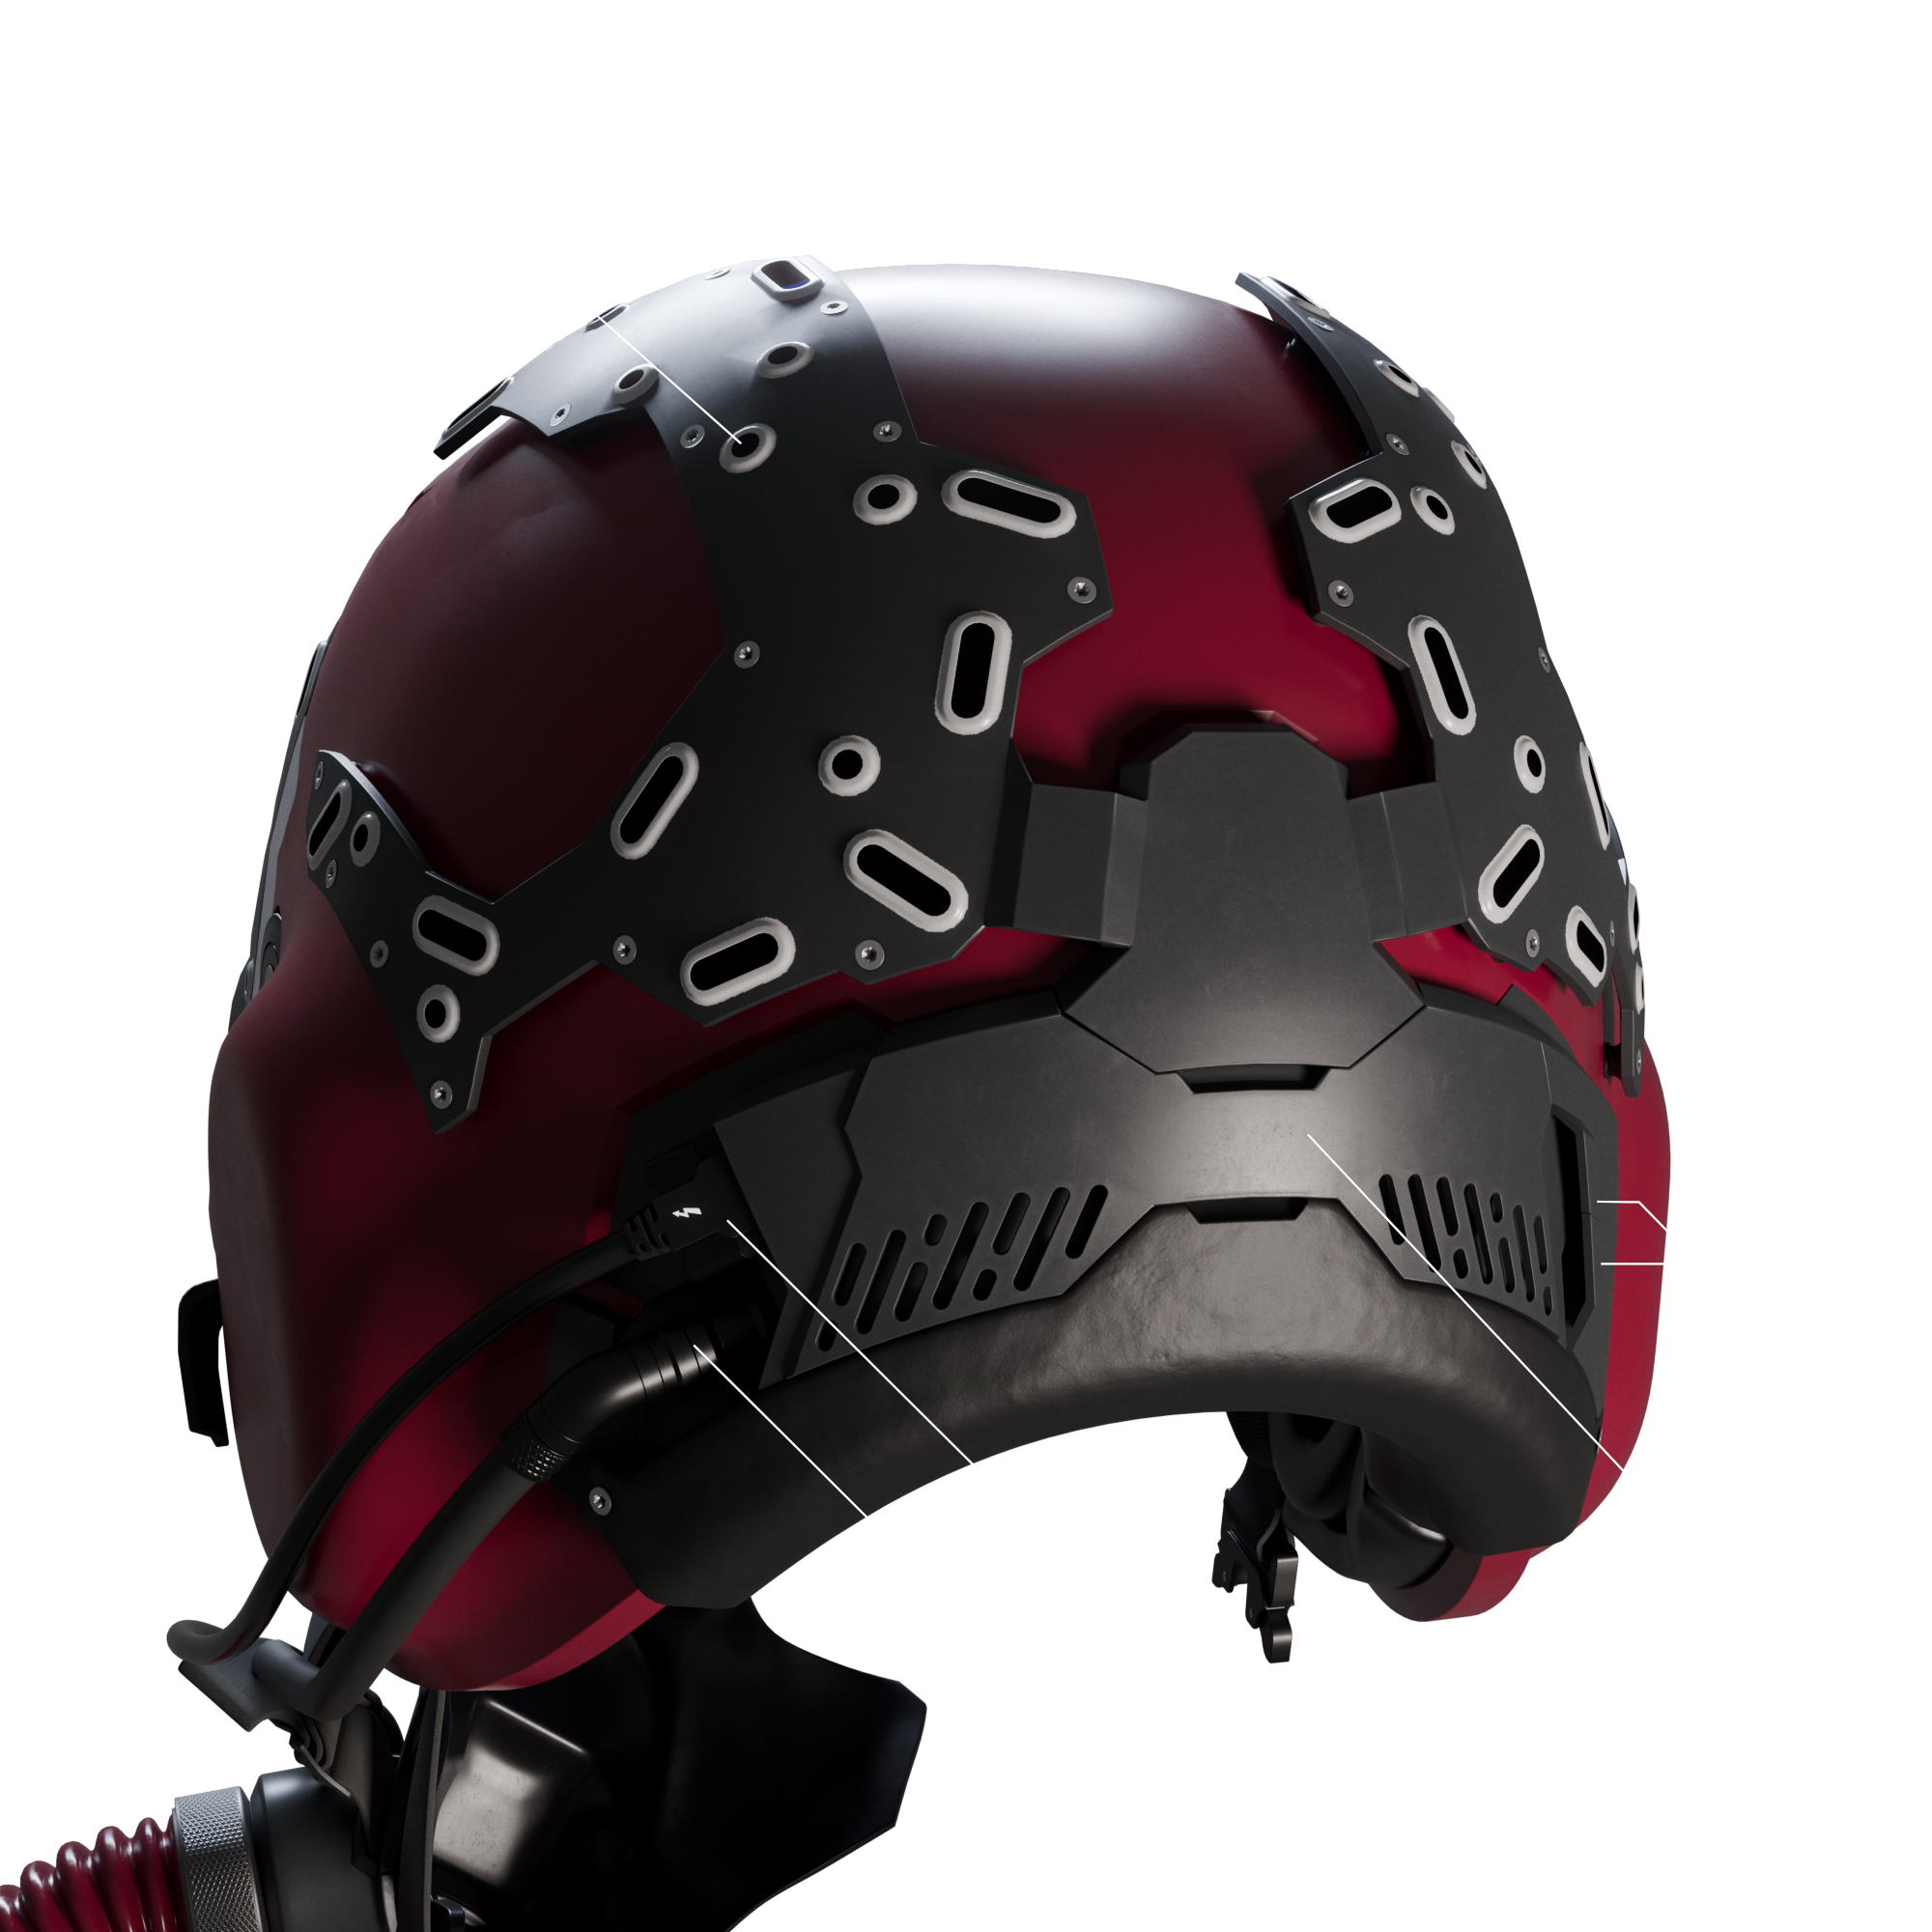
The back houses some of the local computing elements. Most of the HUD computation is handled by the aircraft, but the display adapter sits in this module. The device is fully powered by a high-bandwidth USB-C connection that plugs into the back, which also sends the image and audio data. Below that a connection to the G-suit can be made. In high-G-turns, the helmet can press itself harder onto the head to stay in place. The entire helmet and mask is set up in a way that these connections can also be plugged in from the right side, if the aircraft is a different model or the crew member prefers. The unused connectors get covered up with small plates that snap to the module magnetically. Above the compute module sits the IR reflector module, which wraps itself around the back shell. It works together with the IR sensors embedded in the seat to accurately meassure the precise location and rotation of the head. The rear assembly also serves as a counterweight to the front, balancing the helmet on the head for comfort.
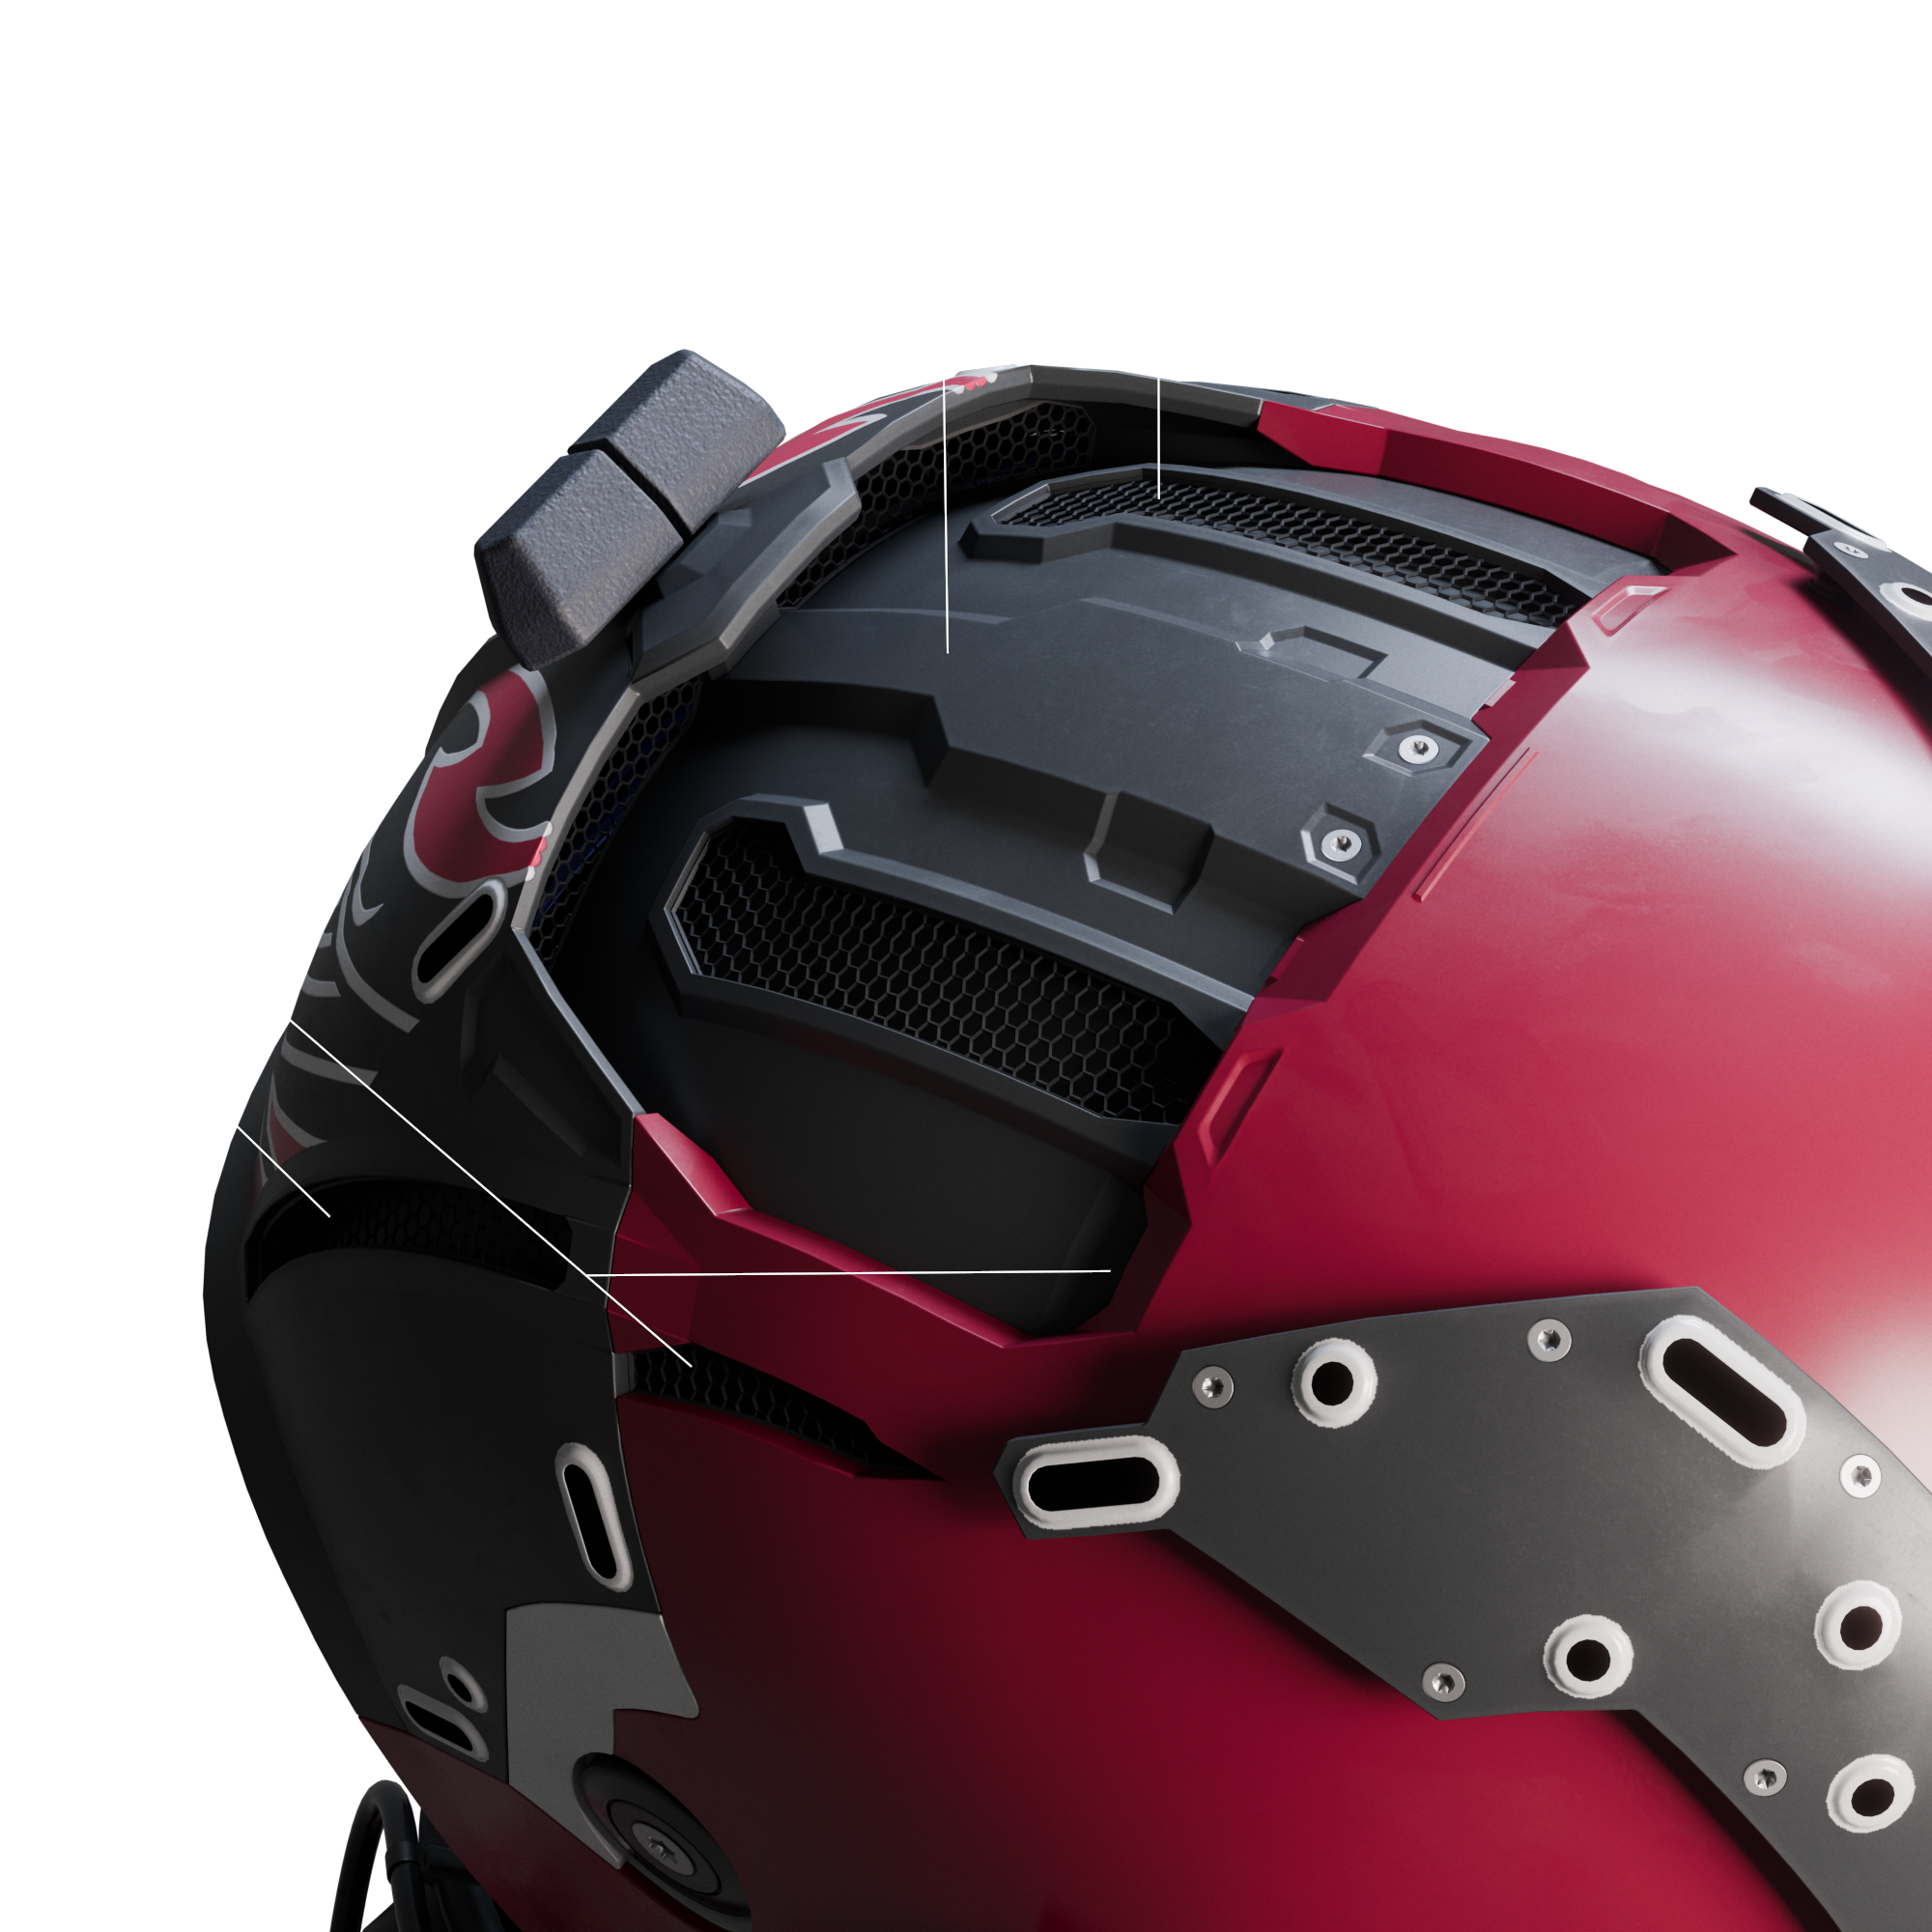
The projectors for the holo displays sit on the upper end of the forehead, with one projector per eye. Extra ventilation for these projectorstransports the heat away to the top of the head, where it can excape through two shafts. This assures that the helmet is comfortable to wear even for extended periods of time and tha the projectors stay at optimal temperature. There are also additional vents for passive ventilation directly to the head on the sides.
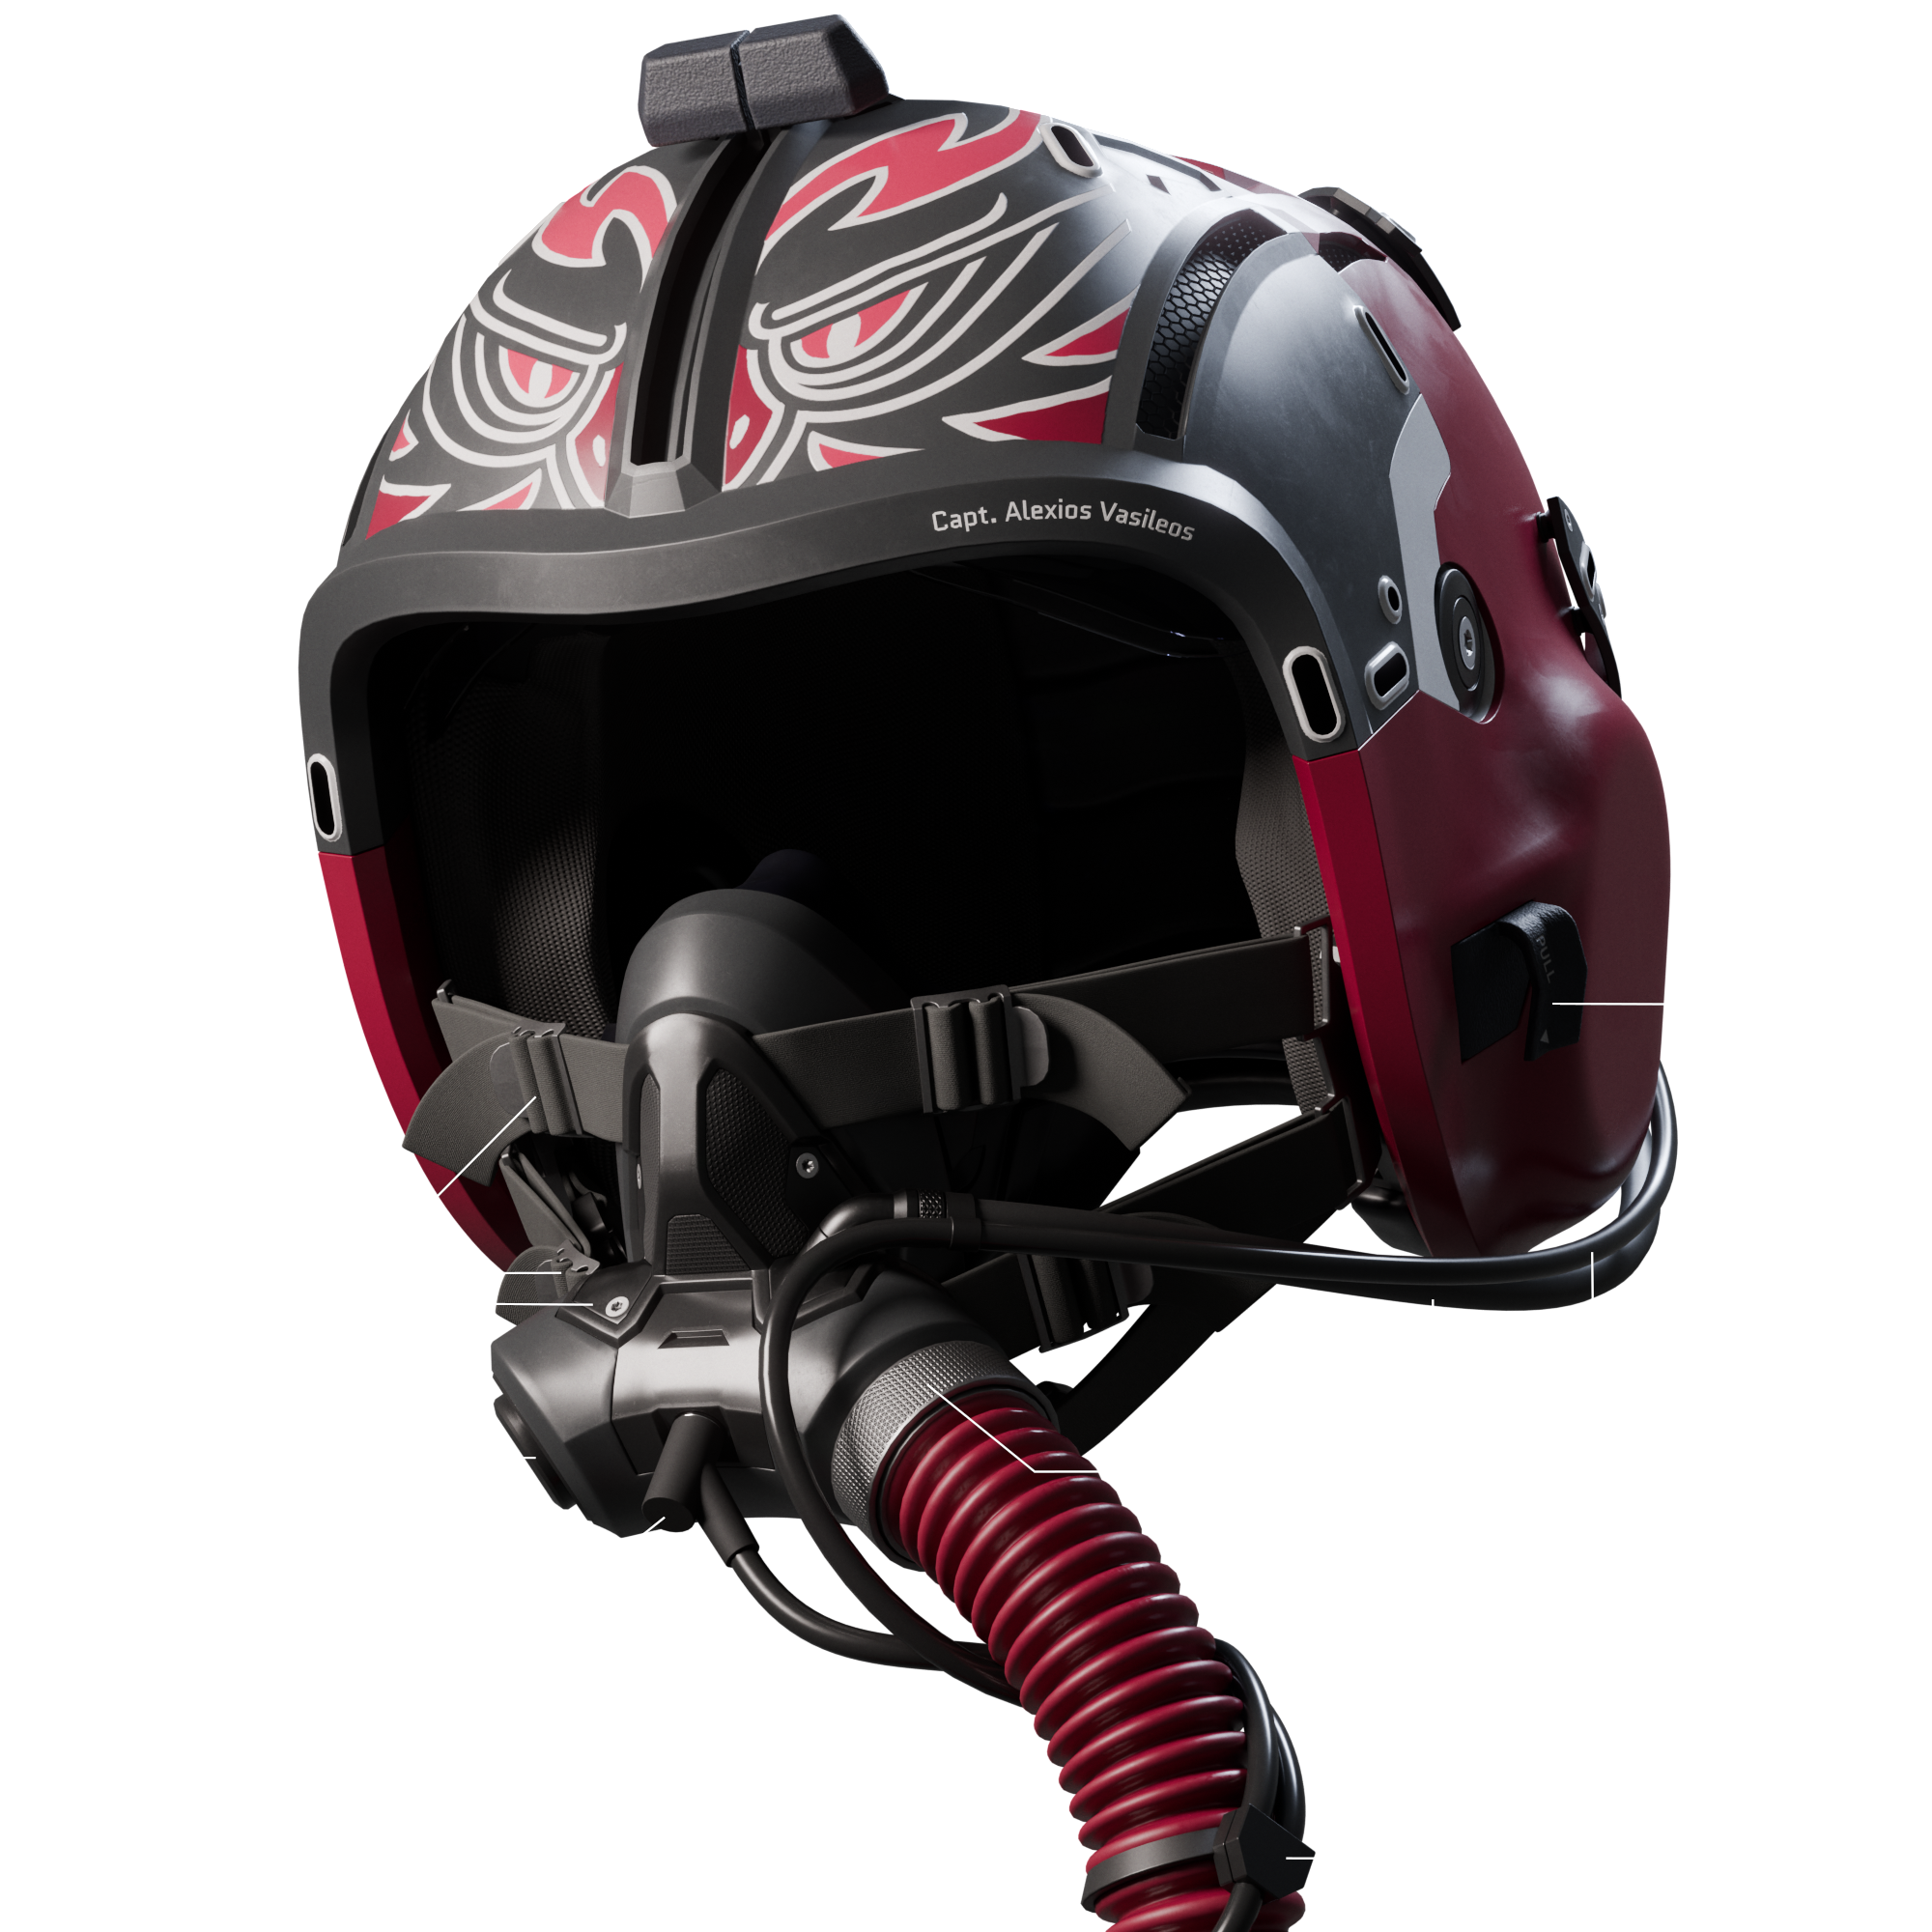
The mask is lightweight and features a symmetrical design, so that the in- and outputs can be configured as desired. The mask is attached via two buckles and can be disconnected by pulling the small handles on either side of the helmet. Four pull straps allow for proper fitting of the mask. The microphone module sits in the front and is connected to the main data line through a splitter and AUX port. The oxygen hose, which also carries an aditional pressure line from the G-suit system, can be screwed in on the left or right side.
Under the hood the helmet and mask feature an extensive rig, which allows for a high degree of flexibility. The rigs can be connected together or separated through some checkboxes. The straps are rigged with a spline-IK setup, which I first tested on this project. The cable and pressure line on the side are movable through rigged Bezier curves and highly adjustable. The hoses use a BendyBone setup that can be either parented to follow the body movement of the pilot or used as a simple FK-chain. There are some tweaks I want to do, but I am already very pleased with the functionality.
To make all of these parts play together, the entire character is build around modularity. The entire project makes extensive use of Blenders Library Override and linking system to cut down on excessive storage use while keeping changes in sync across scene files. The head of the characters is its own blend file with its own rig. The helmet and mask share their blend file with the flight suit body, to which the head and its rig connect with just a few clicks. This way, the head can be changed onto a different body very easily in the future. The Helmet and mask each have their own rigs, so they can be easily disconnected from each other. The ejection seat belts also hook into place through constraints. The character comes with a modular hair system, so parts can be swapped or hidden for performance, depending on the situation.